

A resource for those seeking information on organizing and transforming spaces.

Ways of Boosting Curb Appeal With Your Garage Door
One of the things that homeowners talk about when they’re thinking about putting their house on the market is making improvements that will help them fetch a good price.
More often than not, homeowners go with major remodeling work, but some choose to boost their curb appeal instead. After all, the first thing that someone shopping for a new home readily sees is how a prospective house looks from the curb.
Then again, you don’t necessarily have to be selling to boost your home’s curb appeal. You can do it for aesthetic reasons, and still improve your home’s value over time.
There are many ways of improving a home’s curb appeal. One of them is making use of your garage door as a focal point. Considering how your garage door occupies much of the curb-facing part of your home, it makes sense to utilize it to boost curb appeal. Here are some ways that you can do just that.

One of the things that homeowners talk about when they’re thinking about putting their house on the market is making improvements that will help them fetch a good price.
More often than not, homeowners go with major remodeling work, but some choose to boost their curb appeal instead. After all, the first thing that someone shopping for a new home readily sees is how a prospective house looks from the curb.
Then again, you don’t necessarily have to be selling to boost your home’s curb appeal. You can do it for aesthetic reasons, and still improve your home’s value over time.
There are many ways of improving a home’s curb appeal. One of them is making use of your garage door as a focal point. Considering how your garage door occupies much of the curb-facing part of your home, it makes sense to utilize it to boost curb appeal. Here are some ways that you can do just that.
Get a new garage door.
Of course, this tip assumes that you’ve had your current garage door for a long time, and its age is showing. You’ve already called for garage door repair services several times, and it doesn’t look that good from the curb anymore. Replacing your aging garage door with a newer model that goes perfectly with the design of your home is going to do wonders for your curb appeal, and how!
Repaint it.
If your garage door is relatively new and you’re unwilling to replace it, then you can opt to change things up by repainting it. Many homeowners go for a color that would blend well with the exterior paint of their house, while some prefer a color that would create a lovely contrast. If you’re going for a darker hue, make sure that it wouldn’t contrast starkly with your home’s exterior paint.
Accessorize
Many homeowners have rather plain-looking garage doors, and that’s okay. Many prefer things that way, but if you have boosting curb appeal in mind, you might want to consider accessorizing. You can install decorative door handles or even magnetic decorations.
You can also beautify the area around your garage door. Potted plants or shrubs on either side of your garage door would do the trick. The same goes for putting up decorative stonework on your driveway.
Lights!
If you want your home to look amazing from the curb even at night, then you might want to consider installing exterior light fixtures. With your garage door as a focal point, put up overhead and side lights that will frame your garage door and your home perfectly in the evenings. You can also install ground lights that you can point toward the trees and tall plants you have planted in the area around your garage door for an even grander look.
Achieve balance with the front door.
If you aim to boost curb appeal with your garage door, then you must also do the same with your front door. Do whatever you can to improve the look of your front door, all to achieve balance and consistency between the two most prominent features of your home’s façade.
Make the garage look great, too.
People admire your home’s curb appeal, boosted by the gorgeous treatment you’ve done for the garage door. Then that same garage door opens, and people will see that the actual garage doesn’t match the appeal of its door, to say the least.
Do what you can with your garage door, but don’t forget about the garage itself. Keep it as clean and orderly as possible. If you have the budget for it, you can also do things that will improve your garage’s overall look, like applying a garage floor coating that comes in a wide range of colors and designs. That way, people standing on the curb will still admire your home even when the garage doors are wide open.
For a homeowner, few things are as satisfying and flattering than watching people walking or driving by and admiring your house. The sight of them stopping for a bit and appreciating how your home looks from the curb is quite a way to tell you that you’ve done something right. With your garage door featured like a crown jewel, you can expect more and more people doing the same thing for the foreseeable future.

How to Choose Blanket to Match Bedroom Style
You can add texture to any interior with a stylish throw blanket—whether tossed on the arm of a sofa, laid along the end of a bed, or hung from the back of a lounge chair. A chic throw is terrific for heating a space. Your home is your refuge and solace – but there's no place like the bedroom. Adding a throw blanket to your home is an easy, low-cost way to add big style! Throw blankets let you play with a little more risk than more significant investments like furniture, rugs, and paint. If you're thinking about picking and styling a throw blanket to match your modern nightstand, there are several things to consider. There's location, texture, style, size, color, and your style.

You can add texture to any interior with a stylish throw blanket—whether tossed on the arm of a sofa, laid along the end of a bed, or hung from the back of a lounge chair. A chic throw is terrific for heating a space. Your home is your refuge and solace – but there's no place like the bedroom. Adding a throw blanket to your home is an easy, low-cost way to add big style! Throw blankets let you play with a little more risk than more significant investments like furniture, rugs, and paint. If you're thinking about picking and styling a throw blanket to match your modern nightstand, there are several things to consider. There's location, texture, style, size, color, and your style.
CHOOSING THE RIGHT THROW BLANKET FOR YOUR HOUSE DESIGN
Have you got a "style" you find most desirable? So, based on general style rules, you'll get hints on what to do and what not to do. Here's an essential guide to some popular blanket styles and tips for choosing the right one.
1. Eclectic
Eclectic style doesn't mean a random assortment of things; it comes from a blend of periods and styles, blended with thoughtful scale, space, color, shape, and texture for a beautiful, harmonious look that's not bound by time or a particular look. It's a style that combines elements of several styles into one. It's an informal mix of furniture and decor, with plenty of different styles to choose from. Eclectic decor is often bright and colorful with unexpected elements, like boho bedroom decor.
2. Picking a throw blanket
Your throw should be balanced, so mimic something else in the room. Does one side of the room have a bunch of colorful globes? Put a bright throw on the opposite couch to match the splash of color. Don't expect everything to match. Balance and scale are essential. You shouldn't be scared to mix textures, add global/ethnic elements, or be super bold with your throw.
3. Traditional
Classic and comfortable. We've all grown up in a traditional home. Place furnishings in pairs, and keep them centered in the room, understated, relaxing, gentle curves. The traditional style is all about beige, browns, upholstered furniture, and classic lamps & window coverings. Traditionalism is inspired by, well, tradition. Taking hints from the 18th and 19th centuries, it combines classic art, antiques, and pieces from history. While the traditional design is usually influenced by European decor, it can incorporate elements from England, France, or even East Asia.
4. Picking a throw blanket
It's not chaotic, but proponents don't mind color. Pick fall colors in bold shades or a contrasting teal to liven up browns. Don't try to make your throw unique or significant. Try adding personalised blankets. Keep the proportions consistent. Feel free to pick any pattern you like. Pattens are a low-risk way to add a little fun and personality to the room.
5. Minimalist
A minimalist style emphasizes clean lines, minimal clutter, and open spaces. The most standard colors are black and white. The Scandinavian style similarly combines warm wood and plants. The minimalist interior design uses only the bare essentials to create a simple and uncluttered space. A monochromatic palette and clean lines are the hallmarks of this style.
6. Picking a throw blanket
You don't have to be afraid of an accent. Layers are an excellent way to add warmness and depth to a minimalist look. Don't go for anything too flashy. Rather than a wild floral or organic pattern, choose a geometric or line design with a modern dresser. If you want the blanket to match your couch or walls, try a different fabric or texture, like sheepskin or chunky-knit.
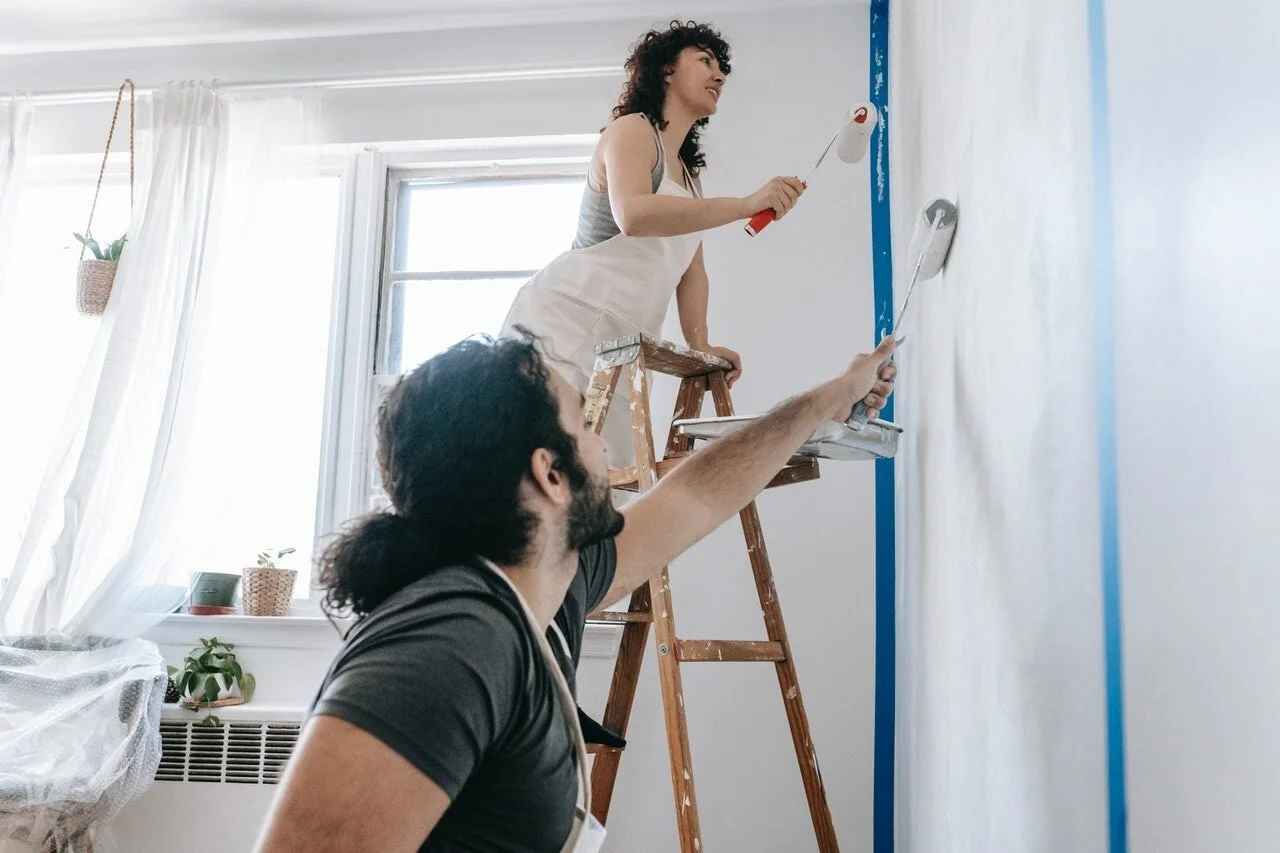
Guest Post - How to paint a room on a budget within a day
Your walls feel a bit drab and ready for a new spice of life. This is something you should be able to take on. But while painting can be a relatively accessible and affordable project for a newbie, it takes time.
You need to come prepared and understand some tricks of the trade. This article will show you how to paint a room on a budget in a short time.

Your walls feel a bit drab and ready for a new spice of life. This is something you should be able to take on. But while painting can be a relatively accessible and affordable project for a newbie, it takes time.
You need to come prepared and understand some tricks of the trade. This article will show you how to paint a room on a budget in a short time.
Plan
To paint a room within budget and within time constraints, some planning is necessary. The first step in this process is to decide what color you would like the walls in your space to be.
Keep in mind that paint colors can drastically change the mood of a room. For example, blue creates a sense of calm and softness. Importantly, make sure that whatever colors are chosen for furniture will balance the wall colors.
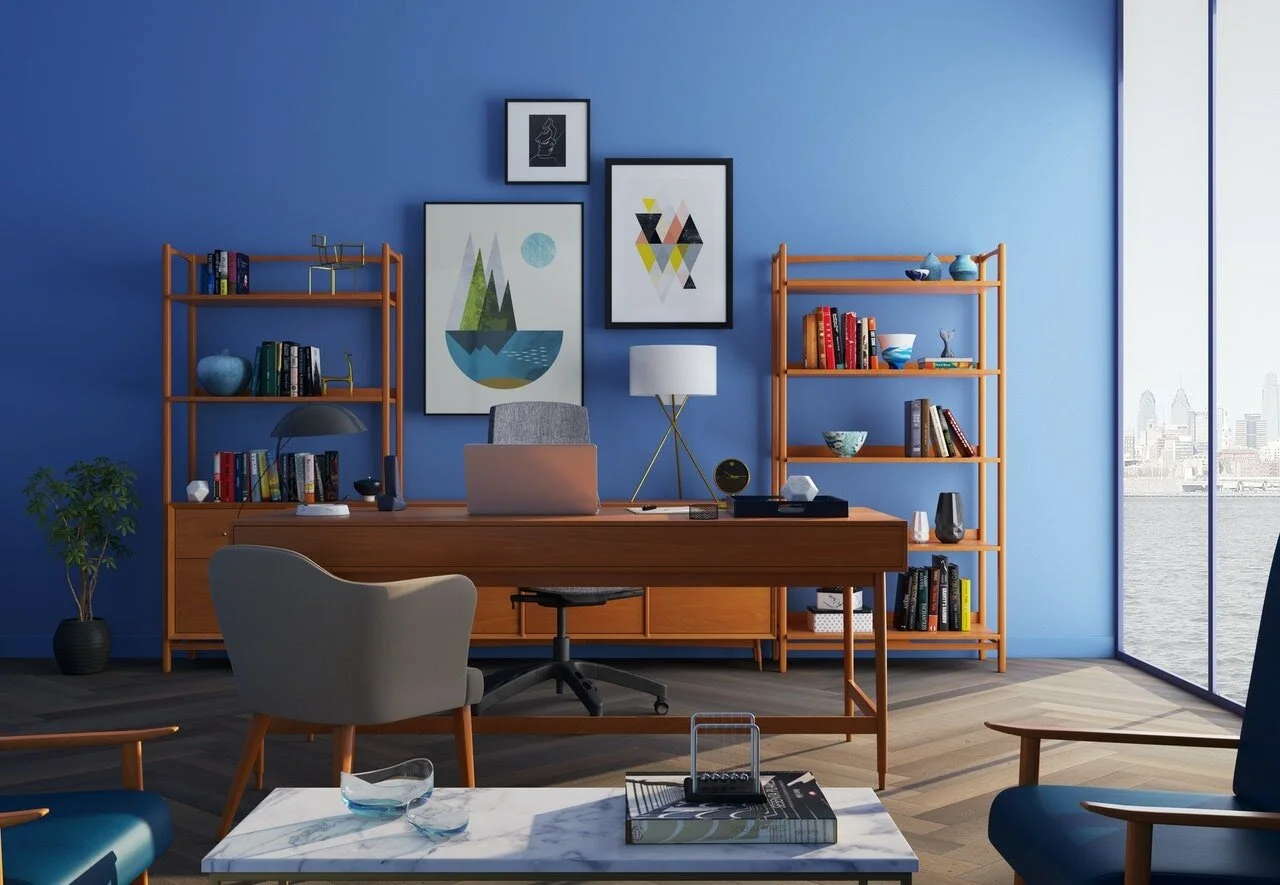
Use the 60-30-10 interior design equation when deciding on colors. You don't need to create overwhelm in your room by choosing a variety of colors. The 60% in the equation represents the dominant colors (ideally, the color of your wall).
30% represents the secondary color, used for accent walls, painted bookcases, wainscoting, or furniture such as the sofa. Art and accessories should make up the remaining 10% of the color scheme.
You should also plan for room prepping. As you paint, where do you plan to move furniture? Do you think they can be moved to the center and covered with drop cloths? Keep track of your tasks with a checklist.
Select the right color
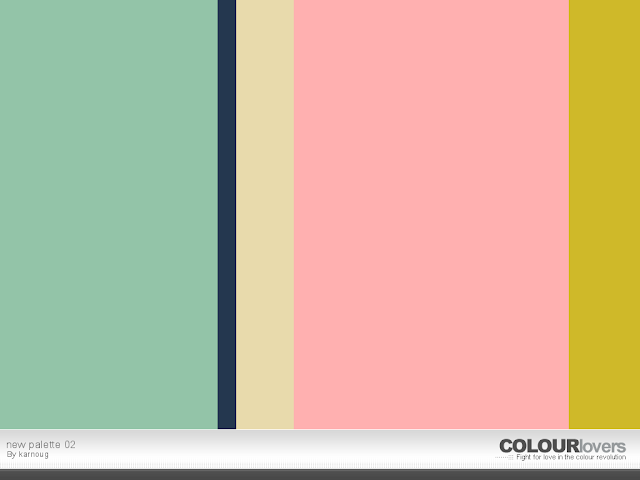
When trying to evoke a specific mood, color can make all the difference: red might evoke feelings of warmth and love, whereas blue might promote relaxation. For example, if you are painting a bedroom and want it to be both relaxing and inspiring, the color palette below might work well.
Instead of going all out and painting a room and then having to redo the whole job, it always pays to play around with different shades before deciding. You can purchase color swatches or paint samples for your interior design project.
Once the paint dries, check how it looks during the day and at night. You may be able to get some new ideas and eliminate some colors that don't fit together.
Aside from the effect of the right color on the mood of your space, choosing the right color can significantly increase your home's value. Based on Zillow's research, powder blue and periwinkle blue bathrooms can boost the value of your home by $5,000 over average, whereas white or off-white bathrooms tend to sell for $4,000 less than average.
There is an increase of about $2,600 in the price of houses with blue kitchens compared to houses with yellow kitchens. The price of a home can increase by $1,800 when a brown living room is chosen. Finally, many buyers prefer the "greige" exterior (a mix of light grey and beige shades) over brown or taupe.
Gather painting materials
Here are the tools you'll need.
1. Paint. You can choose from high-gloss, eggshell and matte paint finishes. While high-gloss is easier to clean (suitable for bathrooms and high-traffic locations), they easily highlight imperfections. On the other hand, matte paint hides imperfections but is easily damaged. In most cases, eggshell finish is the best choice, as it balances the qualities of gloss and flat finishes.
Yulanda Harris, owner of Harris Interior design studio recommends choosing paint type based on the amount of natural light the room will receive. “The more light a wall gets, the faster the paint color will fade. You should use oil-based paint if you can't find one that's UV-resistant”. To see how much paint you'll need, use a paint calculator like this one provided by Benjamin Moore.
2. Paint roller. You want to use a 9-inch roller for general painting, a 14- or 18-inch roller for quickly coating large walls and ceilings, and a small foam roller on door panels and wainscoting
3. Paint roller extension pole. For walls up to 8 ft and low ceilings, a pole with a diameter of 2 — 4 ft is suitable. For ceilings, a pole 4-8ft long is a better choice, which allows for a greater reach over furniture. For tall walls, ceilings, and exterior painting, 6 ft to 12 ft is the ideal size
4. Paintbrushes. Although they cost a little more, you want to go for high quality paint brushes.
5. Sandpaper
6. Drop cloths
7. Paint tray
8. Rags
9. Putty knife
10. Painter's tape.
11. Primer
12. Paint can opener
13. Gloves
14. Nose mask
Prep the space
Of course you're ready to roll. But wait, painting is a delicate job. It’s essential to know the importance of prepping a space when learning how to paint a room. Neglecting a simple task such as wiping down walls before painting could make your efforts fruitless as dirt wouldn't allow paint to stick to the walls. Here are some steps to take to prepare your room for painting.
How to prep a room for painting
1. Choose the right time for painting. According to a Realtor.com article, "paint dries quickest at 70 degrees Fahrenheit, so if you have to paint when temperatures are less than ideal, it’s a good idea to set your thermostat… While higher temps can help paint dry, humidity can undo all that work and actually slow down the process".
2. Remove furniture from the room altogether, if you can. If you don't have enough space to keep large furniture in, shift these to the center.
3. Ensure to use a nose mask when painting. Also, you want to opt for low VOC (volatile organic compound) paints or even zero VOC paints as the scent of regular VOC paint is very toxic. If not, you should consider vacating your house for a week after painting.
Cleaning walls with ammonia-based cleaners is not recommended if you use non-VOC paint. In addition, you shouldn't clean the walls for 30 days after application.
4. Put on safety goggles and old clothes in case of paint splatter. Use drop cloths to protect floors.
5. Using a towel or a vacuum cleaner, dust and clean the walls. Before painting a bathroom or kitchen, wash the walls with a solution containing 3 tablespoons of laundry detergent in a gallon of water.
6. Smooth imperfect areas on walls with sandpaper, using an electric sander or a piece of sandpaper stapled to a sanding block. Fill nail holes in walls with spackling or caulk and let them dry before you proceed.
7. Use painter's tape to protect outlets, wall trims and light switches from paint drips.
Prime the wall
When you prime a wall, the paint adheres to the primer and this creates a smoother finish than applying paint directly. In addition, you only have to repaint twice once you have applied a primer. A water-based latex primer should be applied to new drywall. If the wall has water or smoke damage, or if it has paneling, use an oil-based primer.
Mix the paint
Each can of paint includes a stirrer because paint ingredients separate. Stir the paint before you start painting. And stir continuously as you work. This ensures that the finish has a uniform appearance.
Start rolling
While using rollers helps you cover more area with paint, you will still need to use a brush. Paint about an inch from corners, ceilings and baseboards with a high-quality brush. A roller can't reach these areas.
How to paint a wall with a roller

1. The first step in painting a wall with a roller is to use the long, thin end of it on all four corners and at least an inch into each side from your desired paint line. This will help prevent that dreaded "bald spot" between two coats.
2. Next roll out horizontally across the entire surface- make sure you overlap as much as possible when doing this so there are no gaps or bare spots left behind by not getting enough coverage during one pass (which would only get worse if you don't do another coat).
After covering everything once, go over any areas where there might be significant problems like bumps or crevices for example using smaller motions to fill them in even more thoroughly than before.
DIYnetwork recommends using a "W" pattern; "start in the corner of a wall and roll on a 3' by 3' "W"; then fill it in without lifting the roller. Repeat until the section is finished. This helps hide seams and any places where the roller has been lifted and put back on the wall again".
3. Usually after four to six hours of your first coat of paint drying, you can recoat. It's a good idea to wait at least three hours before recoating water-based paint or primer. In the case of oil-based paints and primers, waiting 24 hours is best.
However, oil paints do not dry. Instead they harden due to oxidation. Ideally, this happens in two weeks and sometimes it takes months. So you don't need to wait too long to apply a fresh coat of paint.
You now know how to paint a room like a pro. Big ups to you. Next, ensure to clean up - don't leave paint cans open or brushes in water; clean your tools with soap and hot water immediately after use; dispose of old paint properly (i.e., do not pour it down the drain).
Make sure your paint is stored at the optimum temperature range of 55 to 90 degrees. If you're storing leftover paint, close the lid firmly (use a hammer to be sure it's sealed), and then flip the can upside down.
How much does it cost to paint a 12 by 12 room?
The US uses about 1.57 billion gallons of paint per year, based on data from the EPA. This means a lot of painting projects go on each year. Based on data from Homeadvisor, Painting a room measuring 10 by 12 feet can cost between $200 and $800. But as with any home improvement cost, you should be prepared to spend a bit more than you budgeted for.
AUTHOR BIO
Agnes A Gaddis is a writer for Inman News, Influencive and the TSAHC (Texas State Affordable Housing Corporation). She has over 7 years experience writing for the real estate industry. Connect with her on Twitter @Alanagaddis

Guest Post - Getting the Most Out of Your Small Space
The average house size in the U.S. is growing. In the early 1970s, the average size was 1,660 square feet. As of 2015, that had jumped to 2,687 square feet for newly-constructed homes. But, many people are still moving into smaller, pre-existing homes. Some are even downsizing and jumping on the tiny house trend.

The average house size in the U.S. is growing. In the early 1970s, the average size was 1,660 square feet. As of 2015, that had jumped to 2,687 square feet for newly-constructed homes. But, many people are still moving into smaller, pre-existing homes. Some are even downsizing and jumping on the tiny house trend.
If you’re one of those people, getting the most out of your small space is important. Living a minimalistic-yet-functional lifestyle is completely possible, even if you’re short on space.
To make the most of your space, there are a few tips and tricks to keep in mind. Thankfully, you don’t have to be a design expert to bring these tricks to life. With a bit of time, effort, and creativity, you can get more out of your small space – and may even make it feel bigger.
So, what can you do to maximize your minimal space?
Making Your Space Functional
To get the most out of your space, it needs to be both a functional and stylish reflection of your personality. This means choosing the right way to arrange your furniture and decorate. One of the best ways to do that is to consider the natural flow of each room.
Consider practicing Feng Shui for your small rooms. The principle of this practice focuses on the connections between people and their spaces. The idea is that the way you arrange a room can affect things like:
Your relationships
Creativity
Prosperity
Wealth
Some people don’t necessarily believe in those principles, but the practice of Feng Shui can make a room more functional. For example, putting your dining table in the center of the room can add a more open, flowing feel. Turning the backs of the chairs in your living room away from doors can allow people to see a bigger space with more open opportunities when they walk in.
In addition to organizing your furniture and decor the right way, the colors and designs you choose for each room can make a difference. Using different shades of the same color in a room can make it seem bigger. Painting your ceiling a darker color will draw people’s attention upward and make the room feel higher.
When you allow your design preferences to mesh with functionality, you can create more inviting, open spaces throughout your home – even if some of those “tricks” only provide the illusion of more space.
Setting Up a Successful Storage Space
The last thing you want is a small space that is cluttered and disorganized. Having things on the floor or out of place can make any room seem smaller and doesn’t allow you to utilize it to its full potential. Even your basement can quickly become a more functional area of your home if you choose to rethink the way you store things.
When you know how to store things the right way, you can continue to make smart purchases that bring you joy. You don’t have to give up everything just because you’re dealing with a small space. Instead, consider where you’ll put new items and how they’ll contribute to your existing space. Practice mindfulness with your purchases, especially if you are a collector, and ask yourself a few questions, including:
Am I getting a good deal?
Will this item increase in value?
Will it bring me joy?
Where will I put it?
What will I have to get rid of to make room for it?
By purchasing things that are valuable to you in some way, you’re more likely to store them practically. That might include building shelves or cupboards. You might even have an organization system somewhere with bins and boxes that are neatly hidden away to free up more space. It’s also a good idea to think outside the box – literally. When you don’t have much space, getting creative with your storage solutions can be a lifesaver. Try things like:
Hanging items on walls
Making vertical cabinets
Using “hidden storage” furniture
Sliding things under furniture
You don’t have to give up a certain lifestyle or things that you want just because you have a small space. When you’re willing to make a few changes and be creative about your storage, decor, and design, you can get the most out of your small space and be perfectly content with what you have.
Author Bio: Noah Rue is a freelance writer.