

A resource for those seeking information on organizing and transforming spaces.
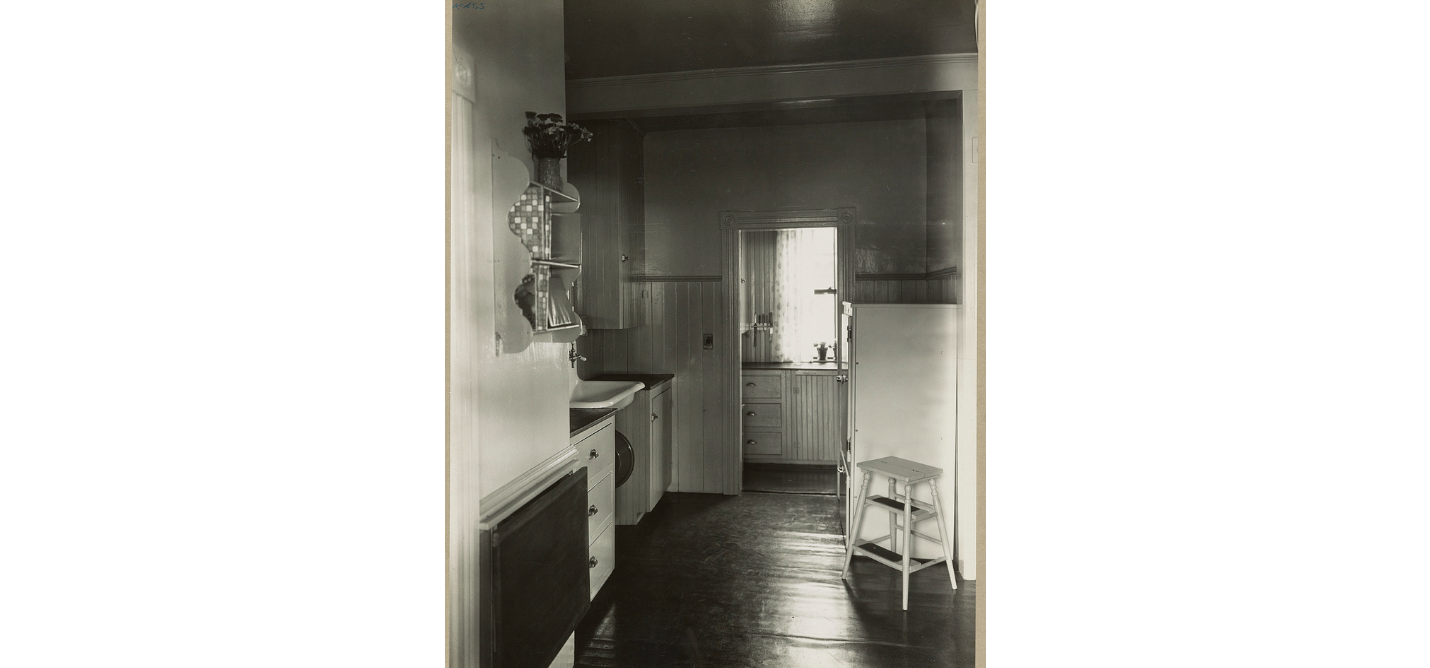
5 Old Kitchen Styles you can bring back to life
Many people want the best of the best for their kitchens because it is the most significant area in the house. Whatever the occasion, your kitchen is the setting for meals and entertaining visitors, so keeping it looking new and fresh is crucial. On top of it, you will need a long-lasting style when you get your kitchen renovated because of various reasons and the trends that come up these days come and die as the wind changes but some old vintage styles stay alive forever. And bringing back some old ideas might help you in making your kitchen look more aesthetic and stylish. So here are 5 old kitchen styles you can bring back to life.
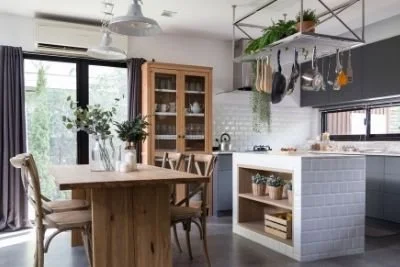
Many people want the best of the best for their kitchens because it is the most significant area in the house. Whatever the occasion, your kitchen is the setting for meals and entertaining visitors, so keeping it looking new and fresh is crucial. On top of it, you will need a long-lasting style when you get your kitchen renovated because of various reasons and the trends that come up these days come and die as the wind changes but some old vintage styles stay alive forever. And bringing back some old ideas might help you in making your kitchen look more aesthetic and stylish. So here are 5 old kitchen styles you can bring back to life.
1. Vintage Color pallet
Whether you name it mushroom or beige, this new neutral has the potential to overtake grey as the most popular kitchen neutral. It's difficult to go wrong with this color combination. For a traditional style, pair with fresh white, or add black accents for a modern and trendy effect.
This is a color that never goes out of style. You can also go for the green, which is having a trend in our homes right now. While some hues will pass the test of time, darker greens will endure. Forest green is a lush, deep shade that evokes vintage British racing cars, and it looks especially good in kitchens with a vintage feel. A blue and yellow palette is also a fantastic choice. For a retro-inspired look, layer blue-and-white patterned tiles with a brilliant yellow island and glass globe pendants.
2. Add Retro style Lights and essentials
Remember how popular lava lamps were back in the day? Install similar-looking hanging lights above your kitchen island to create a focal point. To go with the wood furniture in the room, choose a design with a dark purple tint. Replace your modern seating with a vintage-looking bar and counter stools to give your kitchen the same cozy feel as the bars and restaurants in your family's photo album. Mint is a popular color among retro design enthusiasts, especially for appliances and furniture. As a result, you can use mint-colored appliances if they complement your overall kitchen design.
3. Flooring
Checkerboard floors in black and white are the essence of retro style. While smaller-scale checkered carpeting is lovely, larger squares can make your room pop. And If you want to keep your kitchen looking trendy, choose bright patterned flooring. Using a detailed pattern will give you a nostalgic vibe while remaining faithful to your original style. You can also go for a yellow and white color scheme for a fresh yet energetic look on checkboard floors
4. Wall designs
Brick walls never go out of style. Weathered brick that has been preserved can be used as a backsplash or focal point in your kitchen. Use vibrant colour combinations to create a checkerboard-like mosaic accent wall in your kitchen. A design palette of yellow and light blue is unusual but enjoyable.
You may also try a Hexagon Tile Backsplash design on one of your walls; for a dated backsplash, use a warm or cool shade of hexagon tile. The design is captivating, and if used in one area of the kitchen, it may serve as a stunning focal point. Adding art to your kitchen's walls is another fantastic way to personalize and renew it. As a retro decor, use antique pastoral paintings and sketches.
5. Themes
For classic fashions, a Coca-Cola look is a terrific concept. Coca-Cola has been around since the 1880s, so take a cue from the renowned name and go for a lively appearance with red cabinets and chairs. Alternatively, the True 70s Vibes theme, which features a blend of warm and dark tones throughout, can inspire your area. A dark accent tile wall and an antique-inspired island can be used to recreate the appearance.
A Boho Look motif, bohemian touches, and retroelements can all work together to create a one-of-a-kind look. For a vintage atmosphere, update your kitchen with a white palette, gold accents, and graphic wallpaper. You can go with a Present-Day Nostalgia theme, as shown in this cozy kitchen. Pastel tones go well with white. The space is kept clean and open with blue wall tiles and bright green bar stools. To get your themes perfectly laid in your kitchen renovation process, You should hire a professional company that will do a kitchen renovation and perfectly brings your old kitchen to life again.
Conclusion
It's difficult to strike a balance between trends and long-lasting style. Should you go for current design trends that may become outdated by the time you're done decorating, or should you play it safe and wind up with a room that doesn't inspire you? NO, don’t corporate with both of these ideas, instead, try going for an old vintage style that inspires you when you get your kitchen renovated. Because Vintage is fashion and will always remain one.

How Decorating With Art Sets Your Home Apart
Like most people, you want your home to look as beautiful as possible. However, this also means you don't want your home to look the same as all the others. To accomplish this, you should consider decorating it with various pieces of artwork. When you do, you will find your home will have an added sense of uniqueness to it. If this sounds like an excellent idea, here are some reasons why artwork will do wonders for your home.
Like most people, you want your home to look as beautiful as possible. However, this also means you don't want your home to look the same as all the others. To accomplish this, you should consider decorating it with various pieces of artwork. When you do, you will find your home will have an added sense of uniqueness to it. If this sounds like an excellent idea, here are some reasons why artwork will do wonders for your home.
Your Home Becomes Unique
Upon decorating your home with exquisite works of art, your home instantly becomes unique. Whether you are entertaining friends for an evening, hosting an important business client for dinner, or just spending a quiet evening at home by yourself, having wonderful artwork to gaze upon will help you and others see the beauty of your home.
Adds a Splash of Color
When artwork becomes part of your home's decor, it adds a splash of color to rooms that may have previously been dull or simple. If you decide to buy fine paintings online, you can find pieces of art that will complement the rest of a particular room. As you shop, try to determine which artists you resonate with. You can add a sense of unity by purchasing multiple pieces made by a single artist, or you can add variety by decorating your home with the work of different artists.
Showcases Your Personality
Showcasing your personality and highlighting your interests are just a few things that artwork can do for your home. For example, if you are a nature lover, you can have pictures that depict the great outdoors, various types of wildlife, or perhaps beautiful flowers, rivers, or other scenic aspects. Since your home and its decor should always display your personality, having works of art here and there will do just that and much more.
Excellent Conversation Starters
Finally, no person can walk by a wonderful work of art without having something to say about it. From pictures to sculptures and other types of art, you are always guaranteed to have others wanting to know more about your home's artwork. Don't be surprised if you and your friends wind up spending hours talking about what an artist was really trying to convey when they created their masterpiece.
Whether you are new to the world of art or have an in-depth knowledge of various artists throughout the ages, finding the perfect pieces for your home will be a challenge. However, when you do find just what you want, decorating your home with your new works of art will unleash an underlying beauty you never realized existed until now.

How To Do a Skylight Installation on Your Roof
The sky is the limit when installing skylights that bring natural light into your home, but getting started can be challenging. This article will learn everything you need to know about skylight installation.
The sky is the limit when installing skylights that bring natural light into your home, but getting started can be challenging. This article will learn everything you need to know about skylight installation.
You Will Need
• A skylight
• For the frame,
• Drywall and ceiling finishing supplies,
• Roofing paper,
• Galvanized nails
• Continuous flashing
Step One: Plan the Skylight's Location on Your Roof
Check for the wind resistance and other relevant factors before installing any skylights. Most jurisdictions require building permits for installation.
An arctic roof window that captures a view necessitates meticulous planning in size and placement. Placement will be affected by the roof's slope, and it will take a taller window to get the same view from a low-sloped roof as it does from a steeper roof.
Step Two: Make a Cut and a Frame for the Opening
If the skylight is installed above an attic, you'll also need to cut and frame a well-measured hole in the ceiling of the room below the skylight. Construct an attic-to-room lighting duct in your home.
Step Three: Remove the Shingles From the Roof and Install the Skylight
Using a utility knife and a spirit level, remove the roof shingles from all four sides of the aperture. Set the skylight centered on the gap, and nail or screw it to the roof.
Step Four: Place the Underlayment on the Top
Cut 8-inch-wide strips of roofing paper and tuck them under the shingles. Install the bottom piece first, followed by the sides, and finally the top. The goal is to overlap the down-roof components with the pieces that are up-roof to ensure proper water drainage.
Step Five: Install the Bottom and Step Flashings
Set the skylight's bottom flashing in place, which is a single piece covering the skylight and rests on top of the roof shingles. Skylight nails should not be driven vertically into the roof, but horizontally. Step flashing is the next thing to go under the shingles. Start from the base and work your way up on each side. The step flashing pieces should overlap by 4 inches or so. Attach the flashing to the skylight rather than the roof.
Step Six: Put the Solid Flashing Pieces in Place
Step flashing and skylights are meant to fit securely, preventing water from getting in between them. First, attach the bottom piece, followed by the side parts. Attach the top piece to the skylight by sliding it beneath the roofing.
Conclusion
You have a rundown of the steps needed to install your skylight. As you can see, this is a fairly straightforward endeavor that shouldn't alarm even the most novice of DIYers. Still, before getting started, check with your skylight manufacturer to ensure everything goes smoothly.

7 Vintage Bathroom Features That Never Go Out of Style
Your bathroom often shows signs of aging early on compared to other rooms in your home. Besides, bathrooms fall out of style quite quickly due to constant upgrades and design elements in the market. The craze for an elegant and luxurious bathroom is a thing, and everyone is racing to have the most luxurious bathroom. Amid this race, homeowners forget that most of these designs and upgrades will look outdated after a year or two. The best option to get a sophisticated and elegant bathroom is by taking the vintage route. Most vintage pieces have classic and timeless styles. They add a nostalgic feel to your bathroom. Recreate a classic and elegant bathroom using the following vintage bathroom features.
Your bathroom often shows signs of aging early on compared to other rooms in your home. Besides, bathrooms fall out of style quite quickly due to constant upgrades and design elements in the market. The craze for an elegant and luxurious bathroom is a thing, and everyone is racing to have the most luxurious bathroom. Amid this race, homeowners forget that most of these designs and upgrades will look outdated after a year or two. The best option to get a sophisticated and elegant bathroom is by taking the vintage route. Most vintage pieces have classic and timeless styles. They add a nostalgic feel to your bathroom. Recreate a classic and elegant bathroom using the following vintage bathroom features.
Oomph it With a Vintage Faucet
You don’t need to go over the board to recreate an expensive-looking bathroom. Achieve the luxurious look by adding vintage and quirky faucets to your bathroom. Pairing vintage faucets with a neutral-themed bathroom or a white vanity will give off a thought-out yet classy vibe. Whether you intend to replicate a retro vibe in your bathroom or recreate a luxurious bathroom, a vintage faucet is equal to the task. Go for vintage faucets with gold touches or porcelain handles to oomph the bathroom.
Soak Away the Stress With a Free-Standing Tub
A free-standing tub comes in numerous styles. Nonetheless, any design will add a hint of luxe, sculptural masterpiece, and chicness to any bathroom. Try to set up the free-standing tub close to a large window to connect with nature as you take a soaking bath. You can also use a big vintage art as a backdrop for the tub. You can also take advantage of a nook or an awkward corner in the bathroom. Add a plant stand or a tub-side stool next to the tub to recreate a spa-like experience.
Go All-Out With a Full-Vintage Bathroom Remodeling
If you desire a full-on vintage bathroom, remodel your bathroom into a retro masterpiece. Pick a period and fully flow with it. You can either go with the Georgian, Victorian, or Edwardian era. You can easily get periodic bathroom features in different stores, including vintage stores. All it takes is a skilled bathroom remodeling professional, vintage bathroom accessories, and enough space to bring timeless elegance to your bathroom. Stick to one period as you remodel the bathroom.
Glam it With Mirrors
Create a mystique feel in your bathroom by installing vintage-inspired mirror pieces. Adding an antique mirror with gold touches or a sort of funkiness will add so much depth and personality to a neutral or all-white bathroom. It rubs off the wintry feel exuded by an all-white bathroom. You don’t need to buy an awfully expensive antique mirror to get the antique charm in your bathroom. You can get cheap vintage mirrors in flea markets or eBay.
Add a Visual Interest in Your Bathroom With Period Lighting
A vintage lighting piece is a great option to recreate a timeless bathroom. Globe-shaped, industrial, antique metal, glass milk pendant light, ceramic, or frosted glass will add elegance to your bathroom. If your bathroom is tiny, exposed bulbs will do the trick.
Exposed Brass Fixtures
Create a vintage allure in your bathroom by installing exposed brass plumbing. The exposed brass piping and faucet complete a vintage-inspired bathroom when paired with a mosaic tiled floor. If you already have a free-standing vintage tub, exposed brass pipes will make the tub a centerpiece in your bathroom. If you intend to create an Instagram-worthy scene in your bathroom, the stand-alone tub surrounded by exposed brass fixtures is the real deal.
Let Your Bathroom Sink
Perch the sink on two legs or go for a pedestal sink. Create a custom look by exposing sink legs and piping. When you opt for exposed piping and legs, use copper, brass, or chrome-plated brass. Let the legs mimic exposed piping to replicate a vintage charm in your bathroom. You can mount a round porcelain sink on top of a wooden dresser and hang a statement piece lighting over the sink. Get as creative as you can with the sink.
Final Thoughts on Vintage Bathrooms
Vintage features in the bathroom never run out of style. They add gracefulness, vintage allure, and elegance to any bathroom. You can achieve any look with the right vintage pieces. You also need a skilled bathroom remodeling professional. Ensure you install or add vintage pieces that are moisture resistant to enjoy the retro vibe radiated by your bathroom.