

A resource for those seeking information on organizing and transforming spaces.

How to Give Your Home Exterior a Charming Antique Look
Is your home looking a little too plain for your liking? Maybe it is all those contemporary styling cues that are holding it back from giving you a better aesthetic appeal. If you want to spice things up, why not kick it old-school and give your home's exterior a charming antique look? Don’t worry, it doesn’t have to look dated in the process. Adding just a few vintage-inspired style upgrades can take your home from bland to stand-out. Here are a few ways that you can add some antique flair to the outside of your home.
Is your home looking a little too plain for your liking? Maybe it is all those contemporary styling cues that are holding it back from giving you a better aesthetic appeal. If you want to spice things up, why not kick it old-school and give your home's exterior a charming antique look? Don’t worry, it doesn’t have to look dated in the process. Adding just a few vintage-inspired style upgrades can take your home from bland to stand-out. Here are a few ways that you can add some antique flair to the outside of your home.
Install Copper Gutters
Copper gutters aren't a thing of the past anymore! Instead of suffering through a prolonged exterior remodel, just replace your current aluminum gutters with some copper ones. Copper has antimicrobial properties, which can reduce the amount of yucky sludge that builds up in your gutters over time. So, not only are copper gutters cool to look at, they're incredibly practical and sanitary.
Add a Vintage Front Door
A couple of minutes is all you need to convert your home into a chic antique gem. Putting up a new (but old-looking) door is a great first step, or you can simply switch out your current doorknobs for ceramic or crystal doorknobs. This is an inexpensive way to make even a contemporary door look older than it really is. You might even want to consider painting your door white, green, or perhaps a bright red.
Install a Metal Seam Roof
A metal seam roof can be a pricey upgrade, but it actually has a lot of benefits aside from just being visually appealing (which it certainly is). A metal seam roof will last longer than a standard shingled roof, plus it also yields a great return on investment when it comes time to sell your home. Talk to a professional residential roofer for questions pertaining to your specific situation. They can evaluate your home and see if it’s a good fit for you.
Add a Transom Window
A transom window is a window that is shaped as a half circle or rectangle and is above a bigger window or door. This type of window makes for an automatic aesthetic update. Sure, this is a more substantial upgrade than other things that you can do, but adding a transom window is a worthwhile upgrade. It allows more light into your home and makes it look a lot more vintage than your run-of-the-mill modern home.
It doesn't take all that much to upgrade your home into a vintage masterpiece. Your home will attract a lot more attention and possibly even give you a better return when it comes time to sell. Consider upgrading with these options for a great antique look.

Stripes Nouveau – 7 Ways to Decorate Your Home with Stripes
Most people play it safe when designing their interiors. After all, they will spend a lot of time in that space, and due to the cost and the time that it requires, redecorating is not done quite often. The downside of playing it safe is that we often end up with an underwhelming décor reminiscent of a motel or some other boring establishment.
Most people play it safe when designing their interiors. After all, they will spend a lot of time in that space, and due to the cost and the time that it requires, redecorating is not done quite often. The downside of playing it safe is that we often end up with an underwhelming décor reminiscent of a motel or some other boring establishment.
But fortunately, there are ways to spruce up your home without going overboard.
One of them is decorating with stripes, which can be both effective and subtle. If you are not sure how to include stripes in your place, here are a few ideas.
Create an Optical Illusion
One of the most common ways to make a room seem more spacious is by painting it white. However, you can create an illusion of an even bigger space by painting narrow stripes on one accent wall. You will accomplish the best effect by using a monochrome scheme of simple colors. Floor-to-ceiling stripes will make the room appear taller, while the different densities will make it look broader. Combine this look in the living room or the bedroom with simple pale wood furniture. Complete it with interesting artwork or light fixtures.
Mix and Match with Other Patterns
If it’s a really bold look that you’re after, try mixing stripes with other patterns. The key is to do it with a limited color palette. It’s best to stick to a maximum of three colors – one main and two accents. Of course, you can always add some white to everything. When the colors are toned down, almost all patterns can go with stripes, but some of the best ideas are floral, dots, checks, damask, paisley, and natural textures. Use rugs, upholstering, tablecloths, tile, and other surfaces to include patterns.
One Focal Point to Rule Them All
One accent piece with bold-colored stripes can do wonders for an otherwise underwhelming room. Here are a few ideas for you, depending on the room you want to treat with this pattern:
Bedroom: Well, the most obvious way to spruce up the bedroom with some stripes is by using your bed linen, throw pillows, and blankets. Before you do that, make sure you choose the best mattress for your sleeping habits, and then cover that beauty up with some green/white, purple/black, or a similar combo. You can also use a monochrome bed sheet and add a pattern with throw pillows.
Living room: The focal point in the living room can be just about anything – ranging from an area rug to an armchair or sofa.
Kitchen: Here, your options are somewhat limited, but you can try with some accent tiles or striped plates and tea mugs on an open shelf.
Bathroom: Similar to the kitchen, the bathroom can feature stripes with an interesting choice of tile. Also, you can use a shower curtain to make things more interesting.
Entryway: Two words: area rug.
Heads up!
Any room can benefit from striking stripes on the ceiling. The ceiling is not where we typically direct our interest, so your stripes won’t be too conspicuous. It will, however, be original – especially if you use warm and bold colors, such as yellow or orange. This will add a sense of warmth and fun to any room, including the bathroom and the kitchen.
Make It Subtle
Stripes don’t have to be dominant elements in the room. If you prefer subtle aesthetics, use a neutral monochrome palette to paint the walls. Two or three shades of grey can fit into a minimalist design without taking over the entire look.
Black & White
Black and white might be the simplest color combinations, but they are also the most dramatic ones. When used in small doses, black and white stripes can be the perfect accent, especially if the surrounding color scheme is limited. This combination can be used in upholstery, throw pillows, accent walls, drapery, and area rugs.
Horizontal Stripes
Vertical stripes are the classical choice, but horizontal is somewhat edgier and more modern. The trick with them is that they make rooms appear wider than they are. They are considered more playful and can be used in a variety of widths and colors.
The Bottom Line
Stripes can be incorporated into any style or color and combined with various other patterns. Just make sure to avoid colors that clash, use strong colors in small areas, and steer away from busy design elements. In any case, start small if you are feeling unsure about introducing patterns into your interiors.
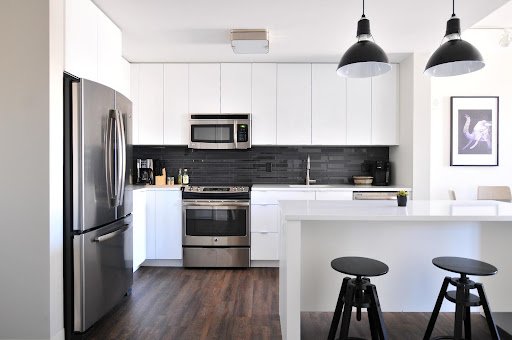
7 Ingenious Kitchen Remodeling Strategies
Follow these seven strategies to maximize your financial return on kitchen remodels.
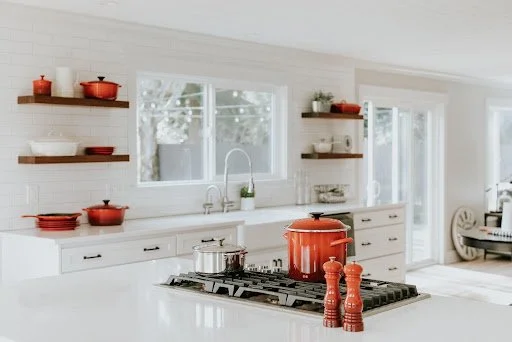
Follow these seven strategies to maximize your financial return on kitchen remodels.
For good reason, homeowners spend more money on kitchen remodeling than on any other home improvement project. Kitchens are the heart of the home and a source of pride for many people.
You can recoup a significant portion of your kitchen remodeling costs by increasing the value of your home. According to the National Association of REALTORS®' "Remodeling Impact Report," a complete kitchen renovation with a national median cost of $80,000 recovers approximately 75% of the initial project cost at home resale.
Homeowners are also enthusiastic about the project. Based on those who said they were happy or satisfied with their remodeling, those polled in the report gave their new kitchen a "joy score" of 9.8 (out of 10!).
Follow these seven tips to help ensure you get a good return on your kitchen remodels:
Make a plan, plan, plan.The planning phase of your kitchen remodel should take longer than the actual construction. If you plan ahead of time, you can reduce the amount of time you are inconvenienced by construction. You're also more likely to stick to your budget.
How much time should you dedicate to planning? At least six months is recommended by the National Kitchen and Bath Association. You won't be tempted to change your mind during construction and issue change orders, which will raise construction costs and reduce your return on investment.
Some planning advice:Examine your current kitchen: How big is the entrance to your kitchen? Many homeowners make the mistake of purchasing an extra-large refrigerator only to discover that it will not fit through the doorway. Create a drawing of your kitchen with measurements for doorways, walkways, counters, and so on to avoid mistakes like this. Don't forget about height.
Consider the following traffic patterns: Work aisles should be at least 42 inches wide for single cooks and at least 48 inches wide for multi-cook households.
Consider ergonomics when designing: Drawers or pull-out shelves in base cabinets, adjustable counter heights, and a wall oven instead of a range are all features that make a kitchen accessible to everyone — and enjoyable to work in.
Prepare for the unexpected:Expect the unexpected, even if you've planned down to the number of nails you'll need for your remodel. Allow for some wiggle room for finishing the remodel. Do you need it completed by Thanksgiving? Then aim to finish before Halloween.
Before you begin, select all of your fixtures and materials: Contractors will be able to make more accurate bids, and you will reduce the risk of delays due to backorders.
Don't be afraid to ask for help: A professional designer can make your kitchen remodel easier. Professionals assist in making style decisions, anticipating potential problems, and scheduling contractors. Most kitchen designers charge $65 to $250 per hour or 10% to 20% of the total project cost.
Be Honest About AppliancesWhen designing your new kitchen, it's easy to get carried away. A six-burner commercial-grade range and a luxury-brand refrigerator may be eye-catching, but they may not suit your cooking needs or lifestyle.
Appliances are essential tools for cooking and storing food. The design and functionality of the entire kitchen should be the focus of your kitchen remodel, not the tools. So, unless you're a fantastic cook who cooks frequently, spend your money on long-term features that add value, such as cabinets and flooring.
Then, choose appliances from reputable brands that have received high ratings in online reviews and "Consumer Reports." For example for range hoods, we could suggest CopperSmith.
Maintain the Same Footprint Nothing raises the cost of remodeling faster than moving plumbing pipes and electrical outlets and knocking down walls. This is usually where unanticipated problems arise.
As a result, if at all possible, keep appliances, water fixtures, and walls in the same place. Not only will you save money on demolition and reconstruction, but you will also reduce the amount of dust and debris generated by your project.
Don't Underestimate Lighting's PowerIn a kitchen, lighting can make or break the space. It can make it appear bigger and brighter. It will also assist you in working safely and efficiently. In your kitchen, you should have two types of lighting:
Task lighting: Because cabinets create such dark work areas, under-cabinet lighting should be on your must-have list. And, because you're remodeling, there's no better time to hardwire your lights. To eliminate shadows, plan for at least two fixtures per task area. Pendant lights are ideal for islands and other counters that do not have low cabinets. Recessed and track lighting work well over sinks and general prep areas where there are no cabinets overhead.
Ambient lighting is created in your kitchen by flush-mounted ceiling fixtures, wall sconces, and track lights. Include dimmer switches to control the intensity and mood of the lighting.
Be Quality-Conscious During kitchen remodeling, functionality and durability should be top priorities. Avoid low-quality deals and opt for low-maintenance products with long warranty periods. Solid-surface countertops, for example, maybe a little more expensive, but with proper care, they will look great for a long time.
And, if you're planning a move soon, products with long warranties are a selling point.Increase Storage, Not SpaceStorage will never go out of style, but if you're working with limited space, here are a few ways to add more:
Install cabinets that reach the ceiling: They may be more expensive, and you may need a stepladder to install them, but you'll gain valuable storage space for Christmas platters and other seasonal items. Furthermore, you will not have to dust the cabinet tops.Hang it up: Add hooks to the backs of closet doors for aprons, brooms, and mops, and mount small shelving units on unused wall areas and inside cabinet doors. Hang stock pots and large skillets on a ceiling-mounted rack.
Make Clear Communication With Your RemodelersMaintaining a positive relationship with your project manager or construction team is critical to staying on budget. Keep the sweetness in your project by doing the following:
Visit the project during working hours: Your presence communicates your dedication to quality. Create a communication routine: Install a message board on-site where you and the project manager can post daily updates. Subs and team leaders should have your email address and cell phone number.
Establish house rulesMake it clear about smoking, boombox noise levels, available restrooms, and parking.
Be considerateOffer refreshments (a little hospitality goes a long way), give praise when it's due, and refrain from bothering them with conversation, jokes, and questions while they're working. They will perform better if they are refreshed and allowed to concentrate on their work.
Remodeling SuggestionContractors will often set up a temporary kitchen or loan you a two-burner countertop as part of their remodeling services. More information can be found in What to Do About Dinner While Your Kitchen Is Being Remodeled.
Finally, here's a quick tip to help you stay calm during the construction: Plan a temporary kitchen alongside your new kitchen plans. You'll be happier (and less frustrated) if you can eat dinner while construction is going on.

Guest Post - How to Determine the Best Height for Your Home Fence
If you’re considering putting in a new fence or even replacing an old one, you’ve probably put lots of thought into what you want it to look like, including the materials you want to use, the style of the fence, and even its positioning. But have you considered the height of your fence? There are a number of factors that go into the choice of how high to build that are important to consider before you start buying materials.
If you’re considering putting in a new fence or even replacing an old one, you’ve probably put lots of thought into what you want it to look like, including the materials you want to use, the style of the fence, and even its positioning. But have you considered the height of your fence? There are a number of factors that go into the choice of how high to build that are important to consider before you start buying materials.
As you plan your final design, here are a few things you might ask that will help you determine what should be the best height of your fence.
1. Cost: Not all fences are made the same and choosing wrought iron over wood may make a difference in your budget. The higher the fence, the greater the cost, which means examining what you can afford. Fences generally come in standard sizes of 3, 3.5, 4, 6, and 8 feet. Choosing a standard size means readily available materials and quicker construction time. If you decide on a non-standard height, materials may have to be customized, which increases both construction time and cost.
2. Appearance: Generally, the higher the fence, the more imposing it appears; the lower, the more inviting it is. Combine this with the types or materials you choose and the desired look you’re going for may change. A 3-foot vinyl spaced white picket fence might say “charming,” while an 8-foot fully enclosed wooden fence says “leave me alone.”
3. Purpose: Deciding what you want your fence to do is important to determining height. If you are simply marking your property boundaries, a 3-foot chain link or wooden picket fence should suffice. If you’re trying to keep animals or children contained, a 4-foot fence may be enough (some larger or leaping dogs may require 6 feet). Keeping animals out necessitates little or no spacing between fence pickets and at least 4 feet in height. If you’re trying to keep deer out, you may need an 8-foot fence. Privacy fences usually start at 6 feet and go up to 8 feet, depending on the position of neighbors.
4. Pools: A pool fence is a special case and is often regulated by local or state ordinances. Most pool fences are at least 4-feet high and should have self-closing, self-latching gates. Be sure to check local regulations on the type of fence you must build around a pool.
5. Position: Most front-yard fences are designed to mark boundaries while allowing views of landscaping and the home’s exterior. It is, therefore, common to use 3-foot high fencing in the front of your home. Backyards are more often used for family gatherings, for play, and for allowing animals to run. It is thus more common to build at least 4 feet high in the rear of a home, with many opting for 6- or 8-foot privacy fences.
6. Regulations: Local ordinances and/or homeowner’s association regulations may restrict the height of your fence and the materials you can use. Check all local regulations before you build to avoid having to tear down a brand new fence that doesn’t meet code.
Written by Ivan Young

