

A resource for those seeking information on organizing and transforming spaces.
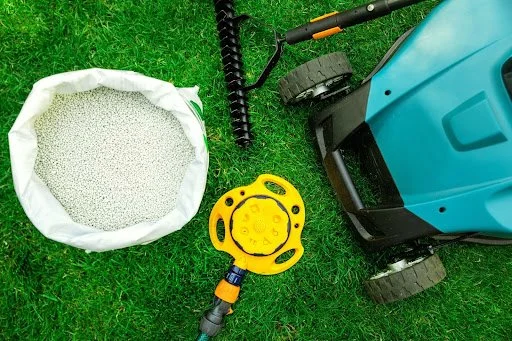
From Planning to Perfection: Tools That Transform Outdoor Operations
Outdoor projects offer both opportunity and complexity. From taking precise site measurements to mapping sun patterns and managing budgets, every step shapes the final result. Using the right tools can turn outdoor operations into a streamlined process, whether you are a landscape professional or a dedicated DIYer.
Outdoor projects offer both opportunity and complexity. From taking precise site measurements to mapping sun patterns and managing budgets, every step shapes the final result. Using the right tools can turn outdoor operations into a streamlined process, whether you are a landscape professional or a dedicated DIYer.
In this guide, you will learn how to:
• Assess your outdoor space with accurate measurements and site analysis
• Blend digital and analog landscape planning tools for design clarity
• Build realistic budgets and phased schedules to manage costs and timeline
• Select hand tools, power tools, and heavy equipment for each landscape task
• Follow a step-by-step outdoor project implementation plan from clearing to final styling
• Establish maintenance routines and explore eco-friendly landscaping innovations
Each section focuses on practical methods and recommended products that streamline planning and execution. By the end, you will have a clear roadmap and toolset to guide every phase of your outdoor project.
Let’s begin by assessing your outdoor space and laying the groundwork for a successful design.
Assessing Your Outdoor Space
Measuring & Mapping
Accurate dimensions are the foundation of any outdoor plan. Use a laser distance meter or measuring wheel to record length and width. Plot these figures on graph paper or in a landscape design app. For uneven terrain, consider a simple topographic survey. Mapping key points like property lines, hardscape, and utilities ensures a reliable base plan.
Sunlight & Microclimates
Track sun exposure and shade patterns to match plants and materials to real conditions. A sun-path diagram or mobile light meter app helps chart daily sunlight hours. Note areas of full sun, afternoon shade, and pockets of reflected heat near walls or pavement. Identifying these microclimates guides irrigation strategy and plant selection.
Site Constraints & Opportunities
Existing Features
Catalog trees, fences, patios, and underground utilities. Identify mature trees that offer shade or require protection. Mapping these elements highlights both challenges and built-in assets.
Terrain & Drainage
Evaluate slope direction and steepness to anticipate runoff zones. Perform a simple percolation test by digging small holes and timing water absorption. Mark any low spots prone to pooling. Addressing drainage early prevents erosion and water damage.
Digital & Analog Planning Tools
Blending digital and analog approaches to landscape planning helps landscape professionals refine ideas without limiting creativity. Modern outdoor design software and immersive visualization apps speed up concept testing. You can also rely onhelpful softwarefor task management and outdoor project management.
Traditional sketchbooks and vision boards ground the design process and reduce screen fatigue. Below are tools that work together to take plans from sketch to reality.
Landscape Design Software
Popular CAD and 3D modeling platforms simplify technical layouts and material choices:
• AutoCAD: Industry standard for precise 2D plans and detailed site drawings.
• SketchUp: Easy-to-use 3D modeling with terrain and plant libraries.
• Vectorworks Landmark: Combines hardscape design and plant database in one interface.
AR & VR Visualization Apps
Immersive apps let clients experience designs in real time:
• Morpholio AR SketchWalk: Overlay 3D concepts on an existing site using a smartphone.
• Augment: Place scale models in physical space to test proportions.
• IrisVR: Offers walk-through simulations for collaborative reviews.
Mood Boards & Sketching
Analog tools foster deeper focus and better memory:
• Portable notebooks and planners capture ideas anywhere.
• Paper feels more real to our brains, aiding recall and creativity.
• Vision boards with printed swatches help organize color palettes and materials.
• Ticking off tasks on tearable notepads adds satisfying progress tracking.
Budgeting, Scheduling & Resource Management
A successful outdoor project hinges on accurate budgets, timelines, and resource planning. By mapping costs and tasks early, teams avoid delays and budget overruns.
Breaking Down Costs
Start with six resource categories:
• People: hourly rates and crew sizes.
• Tools & equipment: purchase or rental fees.
• Materials & supplies: bulk vs. per-unit pricing.
• Facilities & space: storage or staging areas.
• Time: labor hours by phase.
• Money: contingency funds for unexpected needs.
Detail estimates using a spreadsheet, resource planning software, or an online planner. Link resource bookings to cost centers for clearer forecasting and real-time budget tracking.
Creating a Phased Timeline
Use a Gantt chart to map tasks, milestones, and dependencies. Combine with Kanban boards for workflow visibility. Apply resource leveling to adjust dates around crew availability or equipment constraints. Resource smoothing helps rebalance workloads without extending deadlines.
Prioritizing Features
Evaluate each feature by ROI and strategic fit. Simple frameworks like MoSCoW (Must have, Should have, Could have, Won’t have) guide which tasks move first. This ensures essential elements receive resources before lower-priority items.
Selecting the Right Tools & Equipment
Hand Tools vs. Power Tools
Hand tools offer precision for planting and trimming. Essential picks include sturdy shovels, trowels, ergonomic pruning shears for deadheading, and heavy-duty loppers for thicker branches. These lightweight tools let crews work in tight spots without fuel or battery concerns.
Power tools boost efficiency on larger jobs. Cordless string trimmers carve crisp edges around beds and fences. Electric tillers speed up soil prep and reduce manual strain. Look for battery-powered models to cut maintenance and eliminate gas storage.
Heavy Equipment & Rentals
Mini-excavators and skid-steer loaders handle excavation and grading on mid-scale sites. Plate compactors and garden equipment ensure a solid base for hardscape. Renting machines by the day aligns cost with project phase and avoids idle equipment expenses.
Safety & Maintenance
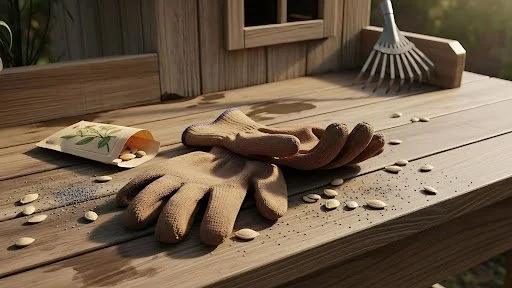
Equip every crew member with gloves, eye protection, and hard hats. Inspect tools before use to check for loose parts or frayed cords. After each shift, clean blades, lubricate moving parts, and sharpen cutting edges. Regular upkeep extends tool life and ensures jobsite safety.
Step-by-Step Implementation Guide
Site Clearing & Grading
Begin with a thorough site clearing to remove debris, old plants, and unwanted structures. Screen topsoil for reuse in planting beds.
• Remove roots, rocks, and concrete fragments.
• Level high and low spots for proper runoff.
Use skid-steers or laser-guided graders to achieve a consistent slope. Map sun and shade to align future plantings and structures.
Hardscape & Structures
Prepare a compacted subbase of crushed stone or gravel for patios, walkways, and retaining walls. Verify base levels with a laser level before laying pavers or blocks.
Base Preparation
• Spread and compact material in 4-inch lifts.
• Check grade with a straightedge.
Feature Installation
Install elements such as pergolas,firepit, and outdoor kitchen footings using local code requirements. Anchor fixtures with concrete and seal joints for weather resistance.
Irrigation & Planting
Install a drip-irrigation network with smart controllers and zone valves near key plant groups.
Controller Setup
• Mount the controller in a sheltered spot.
• Group emitters by water needs.
Plant in order of size: large trees and shrubs first, then perennials, annuals, and ground covers. Backfill with amended soil and apply 2 inches of mulch to conserve moisture.
Decor & Final Styling
Outline pathways and focal points with low-voltage or solar lights. Arrange furniture in conversation clusters and add outdoor rugs for comfort.
• Highlight water features or sculptures.
• Position planters and outdoor art.
Finish with a deep soak of all new plantings and review system functions. Perform a final walk-through to ensure every element works as intended.
Project Review
Check each zone against your timeline and budget. Document adjustments and take photos for records. Confirm permits are closed out and obtain client approval. This final review safeguards quality and ensures every detail aligns with the original plan.
Maintenance Best Practices
Regular maintenance keeps systems efficient and plants healthy. Follow these best practices to streamline care routines, reduce downtime, and control costs.
Watering Schedules & Smart Controllers
Plan irrigation tune-ups each late winter and winterize pumps by August to cut service costs by 10 to 15%. Embed soil moisture sensors and Wi-Fi controllers for real-time alerts on dry spots or pressure drops. Conduct monthly or quarterly inspections of filters, valves, and emitters to catch leaks early and reduce unplanned downtime by up to 45%.
Pruning, Fertilizing & Mulching
Prune shrubs and trees in late winter or early spring before new growth. Apply balanced slow-release fertilizers (N-P-K tailored to plant needs) in early spring and mid-summer. Lay 2 to 3 inches of organic mulch to conserve moisture, moderate soil temperature, and suppress weeds.
Equipment Upkeep
Sharpen mower blades and lubricate trimmer blades every 25 hours of use. Service irrigation pumps, replace aging belts, and update smart controller firmware via a CMMS dashboard for consistent work order tracking.
Sustainability & Eco-Friendly Innovations
Green Materials
Use recycled composite lumber and permeable pavers to cut waste and improve drainage.
Water-Conserving Technologies
Install drip-line irrigation with soilmoisture sensors and rainwater harvesting systems to lower water use.
Native Planting
Select local plant species adapted to your region to reduce maintenance and support local ecosystems.
Modular Kits
Choose prefabricated snap-together planter modules and modular hardscape kits for minimal on-site waste and easy assembly.
Conclusion
From initial measurements to final styling, a well-chosen set of landscape tools and a clear process can turn any outdoor project into a success story. By combining precise site assessment, digital and analog planning, detailed budgeting, and a phased implementation plan, you gain control over each step. Regular maintenance and sustainable choices help preserve your work and reduce long-term costs.
Key takeaways:
• Measure and map your site accurately to build a reliable base plan
• Use both outdoor design software and analog sketching to refine design ideas
• Create detailed budgets and phased schedules with built-in contingency funds
• Select the right mix of hand tools, power tools, and rental equipment
• Follow a structured sequence: clearing, grading, hardscaping, irrigation, planting, and styling
• Implement maintenance routines with smart controllers, seasonal tune-ups, and eco-friendly materials
With these landscape tools and management methods in hand, you can optimize outdoor operations and achieve perfection on any scale. Now it is time to bring your vision to life and transform outdoor operations into lasting value.
Ellie Williams

Ellie Williams studied at Miami State University and majored in Marketing with a minor in creative writing. She enjoys doing freelance writing on general business, wellness, and lifestyle tips. During her free time, she enjoys catching up with friends and family or attending local events.
Water heater repair Marietta: how homeowners can avoid costly emergency breakdowns
Water heater repair in Marietta is something most homeowners don’t think about until the day the hot water suddenly disappears.
We partnered with a home improvement company for this post. The opinions in the post are honest. All reviews and opinions expressed in this post are based on our personal views. We are excited because we know you will love it.
Water heater repair in Marietta is something most homeowners don’t think about until the day the hot water suddenly disappears.
I learned this the hard way one winter morning when the shower turned ice cold halfway through.
That moment quickly shifts your mindset from routine comfort to urgent problem-solving.
Understanding how these systems fail and what warning signs to watch can save you from stress, expense, and disruption.
Most breakdowns don’t happen overnight.
They build up quietly through small issues that go unnoticed.
Why water heaters fail when you least expect it
Water heaters work under constant pressure, heat, and mineral exposure.
Over time, sediment settles at the bottom of the tank and hardens.
This buildup forces the system to work harder and reduces efficiency.
In many Marietta homes, hard water accelerates this process.
I once visited a friend whose unit was making popping sounds for weeks.
He ignored it until the tank overheated and shut down completely.
That sound was trapped steam under sediment layers.
Ignoring small noises often leads to larger system failures, which is why timelywater heater repair Marietta is essential to prevent bigger issues.
Early warning signs homeowners should never ignore
Inconsistent water temperature
Fluctuating hot water is often the first sign that something is wrong.
You may notice it turns warm, then suddenly cold, then hot again.
This usually points to thermostat issues or sediment interference.
Catching this early can prevent full system failure.
Strange noises coming from the tank
Popping, rumbling, or banging sounds indicate internal buildup.
These noises mean the heater is struggling to maintain performance.
I’ve heard tanks that sounded like popcorn machines before they failed.
That’s never a good sign.
Rusty or discolored water
Brown or metallic water suggests corrosion inside the tank.
This can lead to leaks or contamination.
Once corrosion spreads, replacement may be the only option.
Water is pooling around the base
Leaks often start small and grow quickly.
A slight puddle can turn into major water damage if ignored.
Always investigate even minor moisture around the unit.
Simple maintenance habits that prevent major repairs
Flush the tank regularly
Flushing removes sediment buildup and improves efficiency.
Most professionals recommend doing this once or twice a year.
It’s a simple process that extends the lifespan of your system.
Check the anode rod
The anode rod protects the tank from rust.
Over time, it deteriorates and needs replacement.
Ignoring it allows corrosion to attack the tank directly.
Inspect pressure relief valves
These valves prevent dangerous pressure buildup.
If they fail, the system becomes unsafe.
Testing them periodically ensures proper function.
Real-life experience: how a small fix saved a major expense
A neighbor in Marietta noticed his water wasn’t getting as hot as usual.
He assumed it was just a seasonal temperature change.
After a quick inspection, a technician found heavy sediment buildup.
A simple flush and minor part replacement solved the issue.
If he had waited, the heating element would have burned out.
That repair would have cost significantly more.
Preventive action always costs less than emergency service.
When to call a professional instead of DIY
Not every issue should be handled alone.
Gas heaters, electrical components, and pressure systems require expertise.
Trying to fix complex issues without proper knowledge can make things worse.
I once attempted a DIY repair and ended up damaging the thermostat wiring.
That mistake doubled the repair cost.
Knowing your limits is part of smart homeownership.
Energy efficiency and cost savings go hand in hand
A well-maintained water heater uses less energy.
Sediment buildup forces the system to work harder and consume more power.
This increases utility bills over time.
Efficient systems heat water faster and maintain consistent temperature.
Regular servicing keeps operating costs low and performance high.
Tank vs tankless systems: what homeowners should know
Traditional tank systems
Tank heaters store hot water and are common in many homes.
They are reliable but require regular maintenance.
Sediment buildup is their biggest challenge.
Tankless systems
Tankless units heat water on demand.
They are energy-efficient and space-saving.
However, they still require descaling and maintenance.
Ignoring maintenance leads to reduced performance even in tankless models.
Seasonal tips for Marietta homeowners
Cold weather puts extra strain on water heaters.
Incoming water temperatures drop, forcing the system to work harder.
Insulating pipes and the tank can improve efficiency.
During summer, mineral buildup tends to accelerate due to higher usage.
Adjusting maintenance schedules based on seasons helps prevent breakdowns.
How proactive care protects your home investment
Your water heater is one of the most used appliances in your home.
Neglecting it risks not just inconvenience but also property damage.
Leaks can damage floors, walls, and nearby structures.
Routine inspections reduce these risks significantly.
I’ve seen cases where a neglected tank caused thousands in water damage.
That situation could have been avoided with basic maintenance.
Final thoughts on avoiding emergency breakdowns
Water heater repair Marietta situations often start with small, avoidable issues.
Paying attention to early warning signs makes all the difference.
Regular maintenance, timely repairs, and professional inspections keep systems running smoothly.
A little effort today prevents major disruptions tomorrow.
Hot water should be something you rely on, not worry about.

Pool Plastering vs Pool Resurfacing: What Homeowners Should Know
Pool plastering is one of the most important steps in keeping a swimming pool smooth, watertight, and visually appealing.
We partnered with a home improvement company for this post. The opinions in the post are honest. All reviews and opinions expressed in this post are based on our personal views. We are excited because we know you will love it.

Pool plastering is one of the most important steps in keeping a swimming pool smooth, watertight, and visually appealing.
Many homeowners only start thinking about their pool surface when something feels off under their feet.
I remember stepping into a neighbor’s pool during a backyard barbecue and immediately noticing the rough texture along the shallow end.
The water looked clear, but the surface felt gritty and uneven.
That moment showed how the condition of the interior finish affects the entire swimming experience.
Understanding the difference between pool plastering and resurfacing can help homeowners make smarter renovation decisions.
Choosing the right option can extend the life of the swimming pool while saving thousands of dollars in unnecessary renovations.You can learn more about the process by visiting pool plastering.
What Pool Plastering Actually Does
The plaster layer is the interior coating applied directly over the concrete shell of a swimming pool.
This finish creates the smooth surface swimmers feel when they move along the walls or steps.
It also acts as a protective barrier that seals the pool structure and prevents water from penetrating the concrete underneath.
Over time, chemical exposure, sunlight, and regular use slowly wear down that protective layer.
When that happens, the surface begins to lose its smooth texture and visual brightness.
A fresh plaster coat restores the interior finish while improving durability and appearance.
Most residential pools need a new plaster layer every 7 to 12 years, depending on water chemistry and maintenance habits.
A pool technician once told me that many homeowners mistake surface wear for simple staining.
They spend months trying to scrub discoloration away, only to realize the finish itself has deteriorated.
Applying a new plaster layer often makes the pool look brand new again.
Signs Your Pool Surface Needs Attention
Surface damage usually develops gradually, which makes it easy to overlook early warning signs.
One of the first clues is a rough or chalky texture underfoot.
Swimmers often notice this when they push off from the wall or walk along the shallow end.
Another sign is persistent staining that doesn't disappear even after chemical balancing and brushing.
Mineral deposits can settle into worn areas of the surface and create uneven colors.
Small cracks or tiny pits may also begin forming across the interior walls.
These tiny holes, sometimes called spalling, indicate the surface layer is breaking down.
A homeowner I spoke with once noticed white dust collecting in his pool filter every week.
That powder turned out to be deteriorating plaster slowly flaking away from the surface.
Addressing the issue early prevented much larger repairs later.
Pool Resurfacing: When Repairs Go Deeper
Resurfacing is a more extensive renovation process compared to standard plaster work.
Instead of simply applying a fresh coat, resurfacing involves removing the existing interior finish and installing a completely new surface system.
This step becomes necessary when the underlying material has deteriorated or when structural cracks appear in the pool shell.
Resurfacing also gives homeowners the opportunity to upgrade their pool finish to more durable materials.
Quartz finishes, pebble aggregates, and specialty coatings offer stronger protection than traditional plaster.
These finishes also change the visual appearance of the water by adding texture and depth.
I once saw a pool transformed with a pebble finish during a renovation project.
Before resurfacing, the water looked flat and dull.
After the new finish was installed, the pool reflected sunlight beautifully and looked like something you'd see at a luxury resort.
While resurfacing costs more upfront, it often provides longer-lasting durability.
The Cost Difference Homeowners Should Expect
Budget considerations play a major role when homeowners compare surface renovation options.
Applying a new plaster layer typically costs less because the underlying structure remains intact.
The process focuses on restoring the interior finish rather than rebuilding the entire surface system.
Resurfacing, however, requires additional labor to remove the existing material and install a new finish.
That extra construction work increases the overall project cost.
However, choosing the cheaper option when more serious structural damage exists can lead to repeated repairs later.
A homeowner in my neighborhood learned this lesson the hard way.
He replastered his pool twice within six years because the original structural damage had not been addressed.
Eventually, a full resurfacing project solved the underlying issue and prevented further deterioration.
This example shows why understanding the true condition of the pool is critical before making renovation decisions.
How Surface Materials Affect Pool Longevity
The material used for a pool’s interior finish plays a huge role in durability and maintenance.
Traditional plaster surfaces remain the most common option in residential pools.
They create a smooth, classic look and provide reliable performance when properly maintained.
Quartz finishes improve durability by mixing plaster with crushed quartz crystals.
This combination strengthens the surface and adds subtle shimmer under sunlight.
Pebble finishes go even further by embedding small natural stones into the surface layer.
These finishes are extremely durable and resist chemical wear much better than standard plaster.
A friend of mine recently upgraded to a pebble finish during a renovation project.
He immediately noticed that algae buildup became less frequent and that cleaning required far less effort.
Selecting the right finish can dramatically affect maintenance requirements and overall lifespan.
Maintenance Habits That Extend Surface Life
Even the best pool finish can deteriorate quickly without proper maintenance.
Water chemistry management is one of the most important factors.
When pH levels become unbalanced, acidic water can slowly dissolve interior surfaces.
Regular brushing also prevents mineral buildup and algae growth that damage finishes over time.
Routine inspections allow homeowners to catch small cracks or rough areas before they become major problems.
A pool professional once compared surface care to brushing your teeth.
Skipping routine maintenance might not cause immediate damage, but the problems slowly accumulate.
Consistent care helps extend the life of the interior finish and prevents expensive repairs later.
Homeowners who stay on top of maintenance often get several extra years out of their pool surface.
Making the Right Choice for Your Pool
Choosing between plaster repair and full resurfacing depends largely on the condition of the pool shell.
If the damage is limited to surface wear, applying a new plaster layer may be the most practical solution.
When deeper cracks, flaking surfaces, or structural deterioration appear, resurfacing is usually the better long-term investment.
Understanding what lies beneath the surface is key to making the right decision.
A professional inspection can reveal whether the issue is cosmetic or structural.
Once the right renovation method is chosen, the transformation can be dramatic.
A restored pool surface improves comfort, enhances appearance, and extends the life of the entire structure.
For many homeowners, it turns the pool back into the centerpiece of their backyard again.
The Ultimate Homeowner’s Guide to Annual Heating Maintenance
Annual heating maintenance is one of the most effective ways to keep your home comfortable, efficient, and safe throughout the colder months. A well‑maintained system runs more smoothly, experiences fewer breakdowns, and uses less energy to heat your home. Many homeowners don’t realize how much strain their heating system endures each winter, making routine service essential for long‑term performance. With a simple yearly tune‑up, you can avoid unexpected repairs and enjoy consistent, reliable warmth.
Annual heating maintenance is one of the most effective ways to keep your home comfortable, efficient, and safe throughout the colder months. A well‑maintained system runs more smoothly, experiences fewer breakdowns, and uses less energy to heat your home. Many homeowners don’t realize how much strain their heating system endures each winter, making routine service essential for long‑term performance. With a simple yearly tune‑up, you can avoid unexpected repairs and enjoy consistent, reliable warmth.
The Benefits
Annual heating maintenance offers a wide range of advantages that go far beyond basic comfort. A yearly tune‑up helps your system run more efficiently, last longer, and operate more safely, making it one of the smartest investments you can make in your home.
Improved Efficiency
A clean system doesn’t have to work as hard to heat your home, which means it uses less energy and delivers more consistent airflow. Removing dust and buildup from internal components helps the system operate at peak performance. Over time, this improved efficiency can lead to noticeable savings on your monthly utility bills.
Fewer Repairs
Most heating issues start small—loose connections, worn parts, or minor airflow problems. During a tune‑up, a technician can spot these early warning signs before they turn into costly repairs. Preventing breakdowns not only saves money but also ensures your home stays warm when you need it most.
Longer Lifespan
Heating systems last significantly longer when they’re maintained regularly. Tune‑ups reduce stress on motors, burners, and heat exchangers, helping each component perform better for more years. This means you can delay the expense of a full system replacement and get the most value from your investment.
Cleaner Air
Dust, debris, and allergens can build up inside your heating system and circulate through your home. Replacing filters and cleaning internal parts helps improve indoor air quality and reduces the amount of airborne particles your family breathes. This is especially beneficial for households with allergies or respiratory concerns.
Better Safety
Safety is one of the most important reasons to schedule annual maintenance. Technicians check for carbon monoxide leaks, gas line issues, and electrical hazards that could put your home at risk. A yearly inspection ensures your system operates safely and gives you peace of mind throughout the heating season.
The Warning Signs
Even with regular maintenance, certain symptoms indicate your system needs immediate attention. Unusual noises—such as banging, rattling, or squealing—often signal mechanical issues. Burning or musty smells can point to electrical problems or dust buildup inside the system. Uneven heating, cold spots, or weak airflow may indicate blocked ducts or failing components. Rising energy bills without a clear cause can also be a sign that your system is struggling. If your furnace cycles on and off frequently or produces a yellow burner flame, it’s important to call a professional right away to prevent further damage.
Tune‑Ups and Scheduling
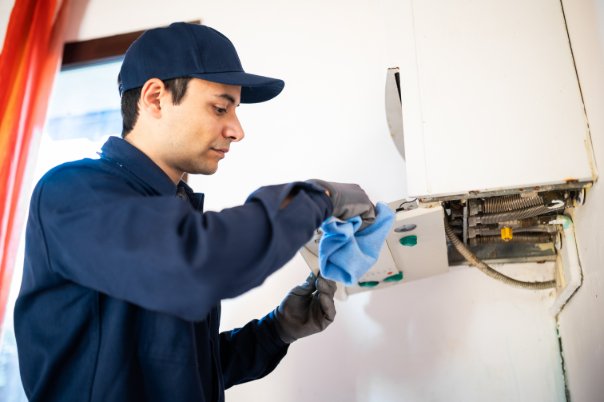
A professional tune‑up includes a thorough inspection, cleaning, and adjustment of your heating system. Technicians check electrical connections, test safety controls, clean burners or coils, verify airflow, and calibrate the thermostat to ensure accurate temperature control. This detailed process helps your system run more efficiently and reduces the risk of unexpected failures.
The best time to schedule maintenance is early fall, before temperatures drop and HVAC companies become busy. Booking service ahead of the cold season ensures your system is ready when you need it most. When choosing a technician, look for proper licensing, certifications, and experience with your specific system type. A reputable professional, such as someone like TRS Heating and Air Conditioning, will provide transparent pricing, clear communication, and reliable service, giving you confidence that your system is in good hands.
The DIY Tasks
Homeowners can support their heating system with a few simple maintenance tasks throughout the year. Replacing air filters regularly helps maintain proper airflow and reduces strain on the system. Keeping vents and returns clear of furniture, dust, and debris ensures warm air can circulate freely. Checking thermostat settings and replacing batteries when needed helps maintain consistent temperature control. While these tasks are helpful, anything involving internal components, gas lines, or electrical systems should always be left to a trained professional.
Annual heating maintenance is one of the most reliable ways to protect your home’s comfort, safety, and long‑term budget. A yearly tune‑up keeps your system running efficiently, reduces the risk of unexpected breakdowns, and helps prevent safety hazards like carbon monoxide leaks or electrical issues. By pairing professional service with simple at‑home upkeep, you can extend the life of your heating system and enjoy consistent, dependable warmth throughout the winter. With regular care and the right technician, maintaining your heating system becomes an easy habit that pays off year after year.