

A resource for those seeking information on organizing and transforming spaces.
Navigating Your Way Through NDIS Cleaning: A Comprehensive Guide
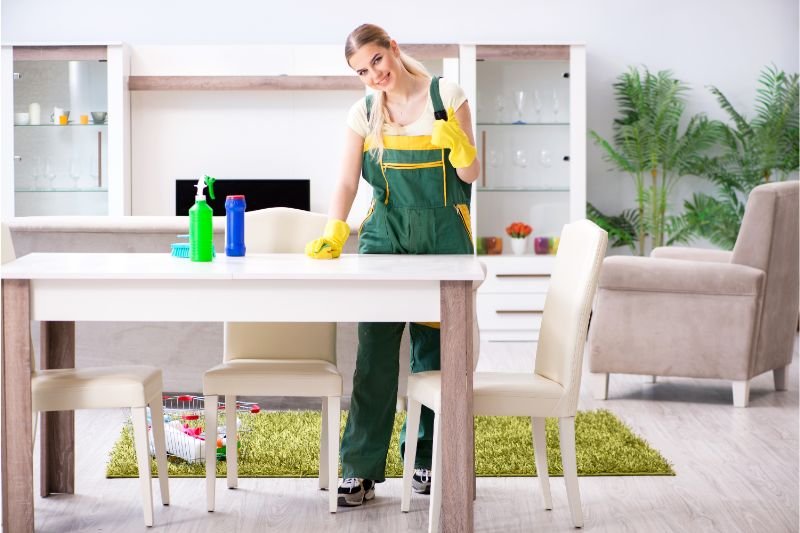
The realm of housekeeping may feel overwhelming, especially if you're juggling different responsibilities. What if you can craft a well-organized, clean environment that speaks to your lifestyle while adhering to the guidelines laid by the National Disability Insurance Scheme (NDIS)? Is it possible to achieve all this while still managing to have some time for yourself? This comprehensive guide aims to help you conquer the hurdles and intricacies of NDIS cleaning, offering a fresh, stress-free perspective in our homes and lives.
The realm of housekeeping may feel overwhelming, especially if you're juggling different responsibilities. What if you can craft a well-organized, clean environment that speaks to your lifestyle while adhering to the guidelines laid by the National Disability Insurance Scheme (NDIS)? Is it possible to achieve all this while still managing to have some time for yourself? This comprehensive guide aims to help you conquer the hurdles and intricacies of NDIS cleaning, offering a fresh, stress-free perspective in our homes and lives.
A neat, zhuzhed-up home doesn't necessarily mean you've spent an entire day scrubbing and sweeping. Mastering the art with NDIS cleaning procedures, systems, and tips can revamp your living space without indulging in a cleaning marathon. Here, we'll explore not only why NDIS-approved cleaning is crucial for maintaining a hospitable environment but also when and how to conduct it. Furthermore, we will delve into the valuable benefits and potential challenges this process might pose. This home detox journey awaits you, so let's dive in.
Why Should You Opt for NDIS Cleaning?
Cleaning is often viewed from a very practical aspect—it's something we do to maintain hygiene or keep our homes presentable. However, rummaging deeper, it plays a subtle yet indisputable role in one's emotional wellness and stability. Life within a clean, organized nest frees up mental space for creativity, relaxation, and overall well-being. This perspective becomes even more pivotal when seen through the lens of NDIS guidelines, which emphasize creating an enabling environment for individuals with disabilities.
Living in an uncluttered, well-organized space is no longer a mere luxury—it is a fundamental right. With a disabled person in the house, it becomes a necessity, a responsibility. The reason is simple accessibility. Rough edges, cluttered walkways, or cramped rooms can pose the often disregarded 'everyday' hazards for the disabled that might restrict their mobility or independence.
Who Can Help with NDIS Cleaning?
Stepping away from a disarrayed to a decluttered home can seem quite daunting, but this shift doesn’t have to be puzzling or tedious. The market is brimming with companies that offer NDIS-approved cleaning services, all equipped with professionally trained teams holding the right expertise to assist you in each step of your home detox odyssey.
Choosing a professional service for NDIS cleaning can help you maintain a healthy, accessible, and comfortable atmosphere for everyone in the home while alleviating the workload on your shoulders.
When Should You Opt for NDIS Cleaning?
The question here is not just about the right time but also about the frequency of professional assistance required according to your needs. A fortnightly thorough clean-up or a weekly dust-off could serve as a good rule of thumb.
How Does NDIS Cleaning Work?
Just like any other cleaning process, the NDIS cleaning process involves tedious steps but is more specific, focusing on accessibility, safety, hygiene, and comfort for individuals with disabilities.
What are the Benefits and Drawbacks of NDIS Cleaning?
The perks are immense—from an assurance of hygienic living space to mental peace. The potential drawback could be the cost involved, but the perks overpower this singular drawback easily.
Concluding Thoughts
A comfortable, accommodating, and neat living space is the foundation of a healthier, happier life—a philosophy that becomes all the more significant when catering to special needs. And remember, it’s not about achieving the picture-perfect 'ready-for-the-feature' home straight out of a home design magazine, but embracing a realistic approach fostered on understanding, love, and comfort.
Navigating the NDIS cleaning process may seem daunting initially, but with the right services and understanding, you can create a living space that marries functionality, comfort, accessibility, and aesthetics. Now let's get that feather duster out and get started, shall we?
Looking for reliable, professional NDIS cleaning services that cater to your specific needs? Make sure you choose a provider who understands the NDIS system and offers personalized, high-quality support. Don't settle for less when it comes to your well-being. Contact trusted NDIS-approved cleaning experts today and enjoy peace of mind with a clean, safe, and accessible environment!
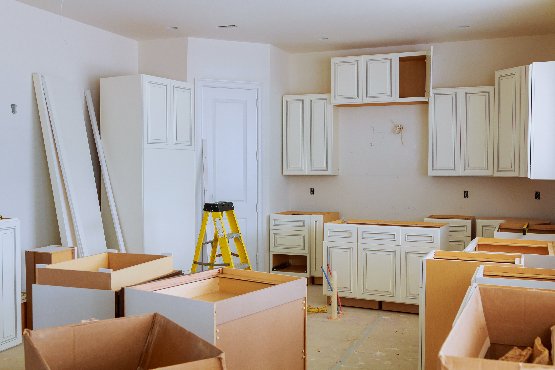
Keeping Your Home Clean and Organized During DIY Projects
DIY projects can be a rewarding way to improve your home and unleash your creativity. However, they often come with their fair share of mess. Keeping your living space clean and organized while tackling these tasks can enhance your experience and make the process more enjoyable. This article shares helpful strategies to manage clutter effectively, ensuring your projects run smoothly and your home remains tidy. By following these tips, you can create an efficient workspace that supports your DIY goals without overwhelming your home.
DIY projects can be a rewarding way to improve your home and unleash your creativity. However, they often come with their fair share of mess. Keeping your living space clean and organized while tackling these tasks can enhance your experience and make the process more enjoyable. This article shares helpful strategies to manage clutter effectively, ensuring your projects run smoothly and your home remains tidy. By following these tips, you can create an efficient workspace that supports your DIY goals without overwhelming your home.
Setting Up a Designated Work Area
Creating a specific area for your DIY projects can significantly reduce the chances of debris scattering throughout your home. This designated space should be equipped with all the necessary tools and materials, helping to keep everything organized and efficiently accessible. By containing the project in one area, you minimize the mess in the rest of your living space. Use drop cloths or plastic sheeting to protect floors and furniture from dust and debris. Regularly cleaning this area will also help maintain a pleasant workspace.
Implementing Waste Management Strategies
Having an effective waste management system in place is beneficial for keeping your home tidy while working on projects. One practical option is to rent a dumpster from places like DWR Waste Removal & Septic which can accommodate large amounts of debris and construction waste. This will prevent debris from piling up inside your home and ensure it is disposed of properly. When selecting a dumpster, consider the size that will best suit your needs, as well as your project's duration. Regularly transferring waste to the dumpster keeps your work area safe and clean.
Organizing Tools and Materials
Keeping tools and materials organized can greatly enhance the efficiency and cleanliness of your DIY project. Use clear bins or labeled containers to store supplies, helping you locate what you need quickly and easily. When organizing, consider grouping similar items together, such as screws, bolts, and adhesives, which will save you time during your project. Make it a habit to return tools to their designated spots after each use, to avoid clutter. An orderly workspace not only looks better but also promotes safety.
Cleaning as You Go
Incorporating a routine of cleaning up during the project can prevent overwhelming messes from forming. Instead of letting debris accumulate, take a few moments to tidy up after finishing specific tasks. Keeping up on sweeping away dust and collecting scraps and offcuts for disposal or recycling can make a big difference in lessening the work you need to do at the end of the project. Using a vacuum designed for workshop use can also aid in easily managing dust and small particles. Keeping your work area clean throughout the project makes it easier to focus on the tasks at hand.
Involving Everyone in the Project
If you’re working on a DIY project with family or friends, involving everyone in cleanup can make the process more manageable and even enjoyable. Assigning specific cleanup tasks to each person can ensure that debris is handled promptly and effectively. Encourage team members to take responsibility for their tools and materials, promoting a culture of respect for the shared workspace. This collaborative effort not only lightens the load but also fosters teamwork and camaraderie. After all, dealing with debris is part of the DIY experience, and sharing the responsibility can lead to a cleaner space and a more enjoyable project.
Keeping your home clean and organized during DIY projects doesn't have to be a daunting task. By setting up a designated workspace, implementing effective waste management strategies, organizing your tools and materials, maintaining cleanliness throughout the process, and involving those around you, you can create a pleasant environment that contributes to the success of your projects. Remember, a tidy workspace not only makes your DIY tasks more enjoyable but also helps you stay focused and safe. Embrace these practices, and you'll find that managing messes becomes a seamless part of your creative journey.

Kitchen Deep Cleaning: A Step-by-Step Guide to Transform Your Space
Discover expert kitchen deep cleaning tips and techniques to make your kitchen sparkle. Learn step-by-step methods and benefits of a thorough kitchen deep clean.
We partnered with a home improvement company for this post. The opinions in the post are honest. All reviews and opinions expressed in this post are based on our personal views. We are excited because we know you will love it.

As the central location where food is prepared, enjoyed, and stored, it’s no wonder the kitchen is considered the heart of the home. Just like a heart, it’s important to take proper care of your kitchen to promote healthy living and longevity.
As far as rooms go, it tops the list of spaces that should be cleaned regularly (and thoroughly). Simply put, a clean kitchen is a safe kitchen, and remaining on top of kitchen hygiene goes a long way in preventing food-borne illnesses, bacteria, mold growth, and even pests.
Because they’re used on a daily basis, kitchens receive a fair amount of wear and tear and can quickly become grimy. Although performing a routine surface-level clean, i.e. wiping down all surfaces, vacuuming/mopping floors, taking out the trash, cleaning stone countertops, or doing the dishes, is a great way to promote healthy living, there are times when a more thorough, deep clean is necessary. For expert methods and best practices, follow along for kitchen cleaning tips, grease removal techniques, and a deep cleaning checklist.
Why Kitchen Deep Cleaning is Essential
Kitchen sanitation is imperative to good health and hygiene. Because it’s where food is prepared and stored, kitchens are prime locations for germs and bacteria to thrive. Additionally, maintaining a clean kitchen can help prevent avoidable accidents. When spills are tended to immediately, sharp knives are put away, and oil is wiped up properly, this maintenance will aid in preventing any slips, cuts, and grease fires. For these reasons, it’s essential to perform a routine deep cleaning of your kitchen to avoid potentially harmful pathogens from spreading and keep members of your household out of harm’s way.
Beyond safety reasons, maintaining a clean kitchen increases the lifespan of your appliances and surfaces, which can be costly to fix if neglected and left to accumulate grease and grime. Interiors and exteriors of ovens, stovetops, refrigerators, microwaves, and countertops can become dirty over time and should therefore be wiped down and disinfected not only to avoid harmful bacteria growth, but also to promote longevity and usability.
Step-by-Step Kitchen Deep Cleaning Guide
So, what’s included in a kitchen deep clean? To conduct a thorough deep clean you’ll want to tackle a few key areas such as countertops, backsplashes, sink drains, cabinets, drawers, interiors and exteriors of appliances, and floors.
Although general cleaning should be performed weekly, experts recommend deep cleaning your kitchen at least once a month. A typical kitchen deep clean will take anywhere from 1 to 4 hours but greatly depends on how big your space is and how often you use your kitchen. The good news is, some of the best kitchen cleaners can be made from ingredients you likely already own such as baking soda, vinegar, dish soap, and water. Continue reading for a kitchen deep cleaning guide.
Countertops
Kitchen countertops come in a variety of materials such as granite, marble, laminate, quartz, and butcher block, to name a few.
To deep clean kitchen countertops:
First consider the material it’s made of (for example, you can’t use citrus or acid-based cleaners on granite or marble because this can damage or discolor the surface). After confirming the material of your countertops, you can determine the best cleaning solution and strategy suitable for your surfaces.
Wipe them down thoroughly from corner to corner using an appropriate cleaning solution and a clean microfiber cloth or towel.
Backsplashes
A kitchen backsplash, which protects walls from cooking-related splashes, can become layered with cooking grease and other oils over time, which can look and feel grimy.
To deep clean your backsplash:
Mix a solution of ½ teaspoon of dishwashing detergent and hot water in a spray bottle. Spray the solution onto the backsplash and allow it to sit for at least one minute.
Using a damp sponge or cloth, wipe away the solution.
Using a soft-bristle brush, scrub any grout lines by dipping the brush into a bit of baking soda and water, then wipe any residue away with a damp cloth or sponge.
Sink Drains
Because food inevitably winds up in the sink while doing dishes, drains can become clogged or smelly over time.
To deep clean your sink and drain:
Wipe down the sink walls and flush the drain by pouring in a 1:1 ratio of baking soda and vinegar.
Next, pour boiling water down the drain to flush the solution and any lingering food particles.
Cabinets and Drawers
After a while, kitchen cabinets and drawers can become crumb-filled and unorganized, which can attract pests and make for a stressful cooking experience.
To deep clean kitchen cabinets and drawers:
Remove all contents from inside and set them aside to reorganize later.
Using a vacuum, suck up any crumbs and other dust or debris that might be wedged in the corners and cracks.
Mix a solution of warm water and mild detergent to wipe down the interior of all cabinets and drawers.
Next, wipe the insides dry using a clean, dry cloth.
After the insides have properly dried, reorganize kitchen utensils, tools, and dinnerware within cabinets and drawers.
Appliances
Cleaning kitchen appliances is a major component of any kitchen deep cleaning session. The stove/oven, refrigerator, and microwave are each used regularly to prepare or store food and therefore can quickly become caked with grease and grime.
To deep clean a stove/oven:
First, remove all burners, grates, and oven racks. Allow them to soak in warm, soapy water for at least 15 minutes, then carefully scrub clean and set them aside to dry.
Remove any immediate, larger food particles from the stovetop surface.
Using an all-purpose cleaner, wipe down the surface, oven door, and knobs/handles.
For tough stains and stubborn grease marks, create a paste of baking soda, vinegar, and water. Using a soft-bristle brush, scrub the surface with the paste.
Using the same baking soda, vinegar, and water paste, apply the mixture liberally to your oven’s interior, allowing it to set for at least 20 minutes.
Use a wet sponge to wipe up the paste and follow up with a damp, microfiber cloth to clean leftover residue.
Reassemble burners, grates, and oven racks once fully dry.
To deep clean a refrigerator:
Unplug your fridge and carefully scoot it away from the wall.
Using a vacuum, suck up crumbs and dust from underneath your refrigerator.
Remove all contents inside your fridge, toss out expired items, and temporarily store perishable items in the freezer.
Take out any removable shelves and drawers for easier cleaning.
Using a sponge, wipe down the shelves, drawers, and interior walls in your fridge with mild dish soap and warm water.
Wipe the interior with a clean, dry microfiber cloth to absorb leftover residue.
Using the same mixture of mild dish soap and warm water, wipe the exterior of your fridge using a paper towel.
Plug your refrigerator back in, carefully push it back into place, insert cleaned shelves, and drawers, then return all food contents.
To deep clean a microwave:
Place a bowl of water and dish soap in the microwave and set for 2 minutes, then let it sit and steam for an additional 2 minutes (this will loosen up any stubborn food splatters).
Wipe down the interior ceiling, walls, and tray with a sponge.
Using an all-purpose cleaner, wipe down the exterior door and handle.
Floors
As a general cleaning rule of thumb, you should save cleaning the floors for last. Why? As we clean, crumbs, dust, and other particles tend to fall to the floor, so it’s best to tackle this area last to avoid having to repeat this step.
How to deep clean kitchen floors:
First, consider what material your floors are made of as not all floors should be treated the same. For example, hardwood floors will need to be treated differently from tile floors.
Perform an initial sweep and vacuum of your kitchen floors to remove the surface layer of crumbs, dust, and debris.
Using a cleaning solution that’s appropriate for your flooring type, mop the floors working from one side to the other.
Allow floors to dry thoroughly before stepping on them.
Final Thoughts on Maintaining a Clean Kitchen
The heart of the home should be treated with care, and routinely cleaning your kitchen on a weekly basis will help foster a healthy living area and keep your family safe from food-borne illnesses and avoidable accidents. Not to mention, a clean kitchen offers a clutter-free space that encourages healthy eating and makes for a more pleasant, stress-free cooking experience.
We hope this guide helps you transform your space—Happy cleaning!

What Happens if You Stop Cleaning Your Bathroom?
Staying on top of chores is hard. However, neglecting important rooms can have dire consequences. Here’s what happens if you stop cleaning your bathroom.

If the last thing you want to do after a long week is scour your bathroom, you’re in the majority. Very few people on this earth enjoy chores, especially the nasty ones. However, there are certain tasks, no matter how dirty, that are important to stay on top of. Cleaning your bathroom is one of them.
To truly understand the importance of this chore, read on to discover what happens if you stop cleaning your bathroom. You might be surprised by the unpleasant consequences.
You Invite Mold and Mildew Growth
Mold and mildew thrive in damp, humid conditions, making your bathroom their ideal growth environment. When you skip regular cleaning, moisture from showers and baths provides mold and mildew the perfect habitat.
You Let Fecal Matter Accumulate
Every time you flush your toilet, tiny droplets containing bacteria are released into the air and settle onto surfaces like your countertops, floor, walls, and yes—even your toothbrush if it’s exposed.
Wait—doesn’t flushing with the toilet seat down prevent this? No. Studies show that lidded and lidless flushes alike distribute pathogens through aerosolized particles.
Unaddressed, your toilet flushes make your bathroom a breeding ground for harmful bacteria, compromising the hygiene of your entire bathroom.
You Face the Health Risks of Mold and Fecal Matter
So why is mold and fecal matter accumulation a problem?
Let’s start with mold. Mold exposure can lead to respiratory issues, allergies, and other serious health problems. One specific problem is athlete’s foot, caused by a type of fungi that thrives in humid conditions.
Next, the presence of fecal matter increases the risk of infections and gastrointestinal illnesses from germs like E. coli.
Basically, an unattended bathroom poses a health risk to your lungs, skin, and stomach. So what can you do about it?
Helpful Bathroom Cleaning Tips
The best way to make your bathroom a consistently healthy place is to stay on top of cleaning. Here are some tips to help you keep your bathroom sparkling clean.
Create a Cleaning Schedule
The easiest way to let chores get away from you is to not have a plan for consistency. Break down bathroom tasks into daily, weekly, and monthly activities to ensure no area is overlooked. For example, you can disinfect the toilet bowl every day, sanitize all surfaces once a week, and scrub the grout once a month.
Use Effective, Nontoxic Cleaning Products
Bottom-shelf cleaners are usually weaker and more toxic than their higher-quality counterparts. When it comes to your bathroom and your health, investing a bit in cleaning supplies will pay off in the long run. You might even consider homemade cleaners with ingredients like lemon and baking soda for a truly nontoxic clean.
Ventilate Your Bathroom
Use exhaust fans or open windows to reduce humidity and prevent mold growth. Air purifiers can also help with mold growth, so use them in conjunction with great ventilation. Essentially, you want to make the bathroom as dry as possible to deter unwanted fungal guests.
Now that you know what happens if you stop cleaning your bathroom, are you ready to pick up a scrubber and go to town on yours? Even though bathroom cleaning isn’t the most pleasant of chores, being consistent with it will greatly benefit your health, comfort, and peace of mind.