

A resource for those seeking information on organizing and transforming spaces.

Everything You Need To Know About Owning a Pole Barn
There are many good reasons to own a pole barn. Here’s why some property owners should consider investing in one for work, projects, or extra space.
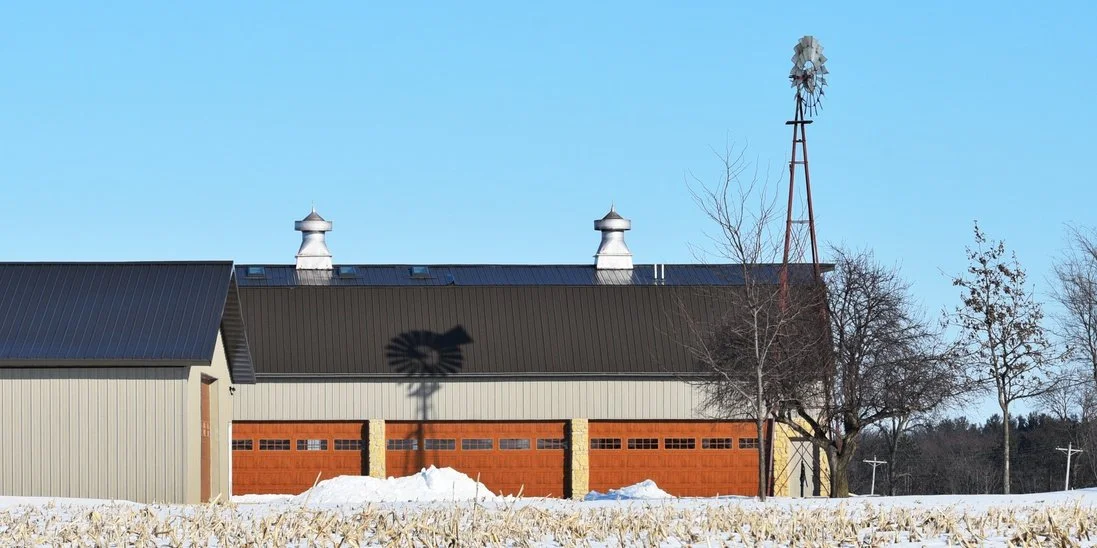
Pole barns have become increasingly popular among property owners seeking versatile, cost-effective building solutions. This construction method eliminates the need for a traditional concrete foundation, making it both faster and more affordable to build.
Here, we’ll explore everything you need to know about owning a pole barn to help you make informed decisions every step of the way.
What Exactly Is a Pole Barn?
A pole barn is a building constructed using the post-frame method where large wooden posts serve as the primary structural support. These posts, typically made from treated lumber, are embedded directly into the ground at depths ranging from four to eight feet, depending on local building codes and soil conditions.
The posts support horizontal beams called girts, which in turn support the roof trusses. This creates a framework that can span large distances without interior support columns, providing maximum usable space inside. The exterior is then clad with metal siding and roofing materials, though other options are available.
5 Key Benefits of Pole Barn Ownership
Owning a pole barn offers various benefits, including:
Versatility: These structures can serve numerous purposes, including storage, workshops, garages, event spaces, and even residential buildings.
Durability: Pole barns are designed to withstand harsh weather conditions, offering long-lasting protection for your belongings or activities.
Quick construction: Post-frame buildings can be assembled quickly and efficiently, reducing labor costs and construction time.
Spacious interiors: The absence of interior load-bearing walls allows for large, open spaces that can be tailored to specific needs.
Customizability: The design and materials used for pole barns can easily be customized to match aesthetic preferences or practical requirements.
Planning and Construction
Building a pole barn requires careful planning and execution to ensure a sturdy, functional structure. Start by selecting an appropriate location with solid ground and good drainage to prevent water damage. Next, design a layout tailored to your intended use, factoring in dimensions, access points, and any additional features such as lofts or partitions.
Once your plans are finalized, acquire high-quality materials, including treated posts, durable metal panels, and proper hardware. During construction, ensure accurate post spacing and alignment, as these will provide the structural framework for the entire barn. Finally, knowing what season is best to start your pole barn build will ensure there are no interruptions or delays.
Maintenance and Longevity
Pole barns require less maintenance than many building types, but regular inspections are still necessary to prevent small issues from becoming expensive problems. Check the posts, foundation, roof, gutters, and siding annually to inspect for mold, rot, and insect infestations.
Proper ventilation prevents condensation that can damage stored items and building materials. Be sure to seal gaps where rodents might enter, keep vegetation trimmed away from the building, and address any wood damage promptly.
Pole barns offer compelling advantages for many property owners, but they’re not the right solution for everyone. By considering everything you need to know about owning a pole barn, you can decide whether you should invest in one yourself.

Physical Vs. Virtual Staging: Which Saves More Time And Space?
Imagine scrolling through a real estate listing. The rooms are empty. It’s hard to picture where the couch would go. The space feels cold, maybe even smaller than it is.
We partnered with a real estate company for this post. The opinions in the post are honest. All reviews and opinions expressed in this post are based on our personal views. We are excited because we know you will love it.

Imagine scrolling through a real estate listing. The rooms are empty. It’s hard to picture where the couch would go. The space feels cold, maybe even smaller than it is.
Now, flip to another listing. The same room is filled with cozy furniture, art on the walls, and soft lighting. Suddenly, the space feels alive. That’s the power of staging.
But here’s the big question—do you need to haul furniture in to make that happen? Or is there a faster, cleaner way to show your home’s full potential? Let’s break down both methods and see which one truly saves time and space.
What Is Physical Staging?
Physical staging is the traditional route. It involves renting furniture, hiring a stager, and setting everything up in person. Tables, chairs, rugs, lamps—it all gets moved in to make the space feel lived in. This method has its perks. Buyers walking through an open house can touch, see, and feel the room's setup. It creates a real-world vibe.
But here’s the downside:
It takes days, sometimes weeks, to coordinate.
You may need to move out your own furniture or personal items.
Large rental items need to be stored and transported.
The cost isn’t small—and it adds up quickly.
For homes that are already furnished or for high-end luxury listings, physical presentation can make sense. But for others, it can feel like a mountain of work just to list a home.
What Is Virtual Staging?
This one’s much easier—and quicker. This happens completely online. Staggers take real photos of your rooms and then digitally add furniture, rugs, wall art, and more. You’re not touching a single piece of furniture, yet your listing gets a fully styled look. And with many Professional Virtual Staging Services available, you’ll get access to fast edits, realistic designs, and custom setups. They reflect the actual space—not just generic templates that feel out of place for the home’s layout or location.
Here’s more on why many homeowners and real estate agents are choosing this route:
No furniture rental, movers, or packing.
Just send in the photos, and get beautifully staged images in return.
You can choose different styles and update them with a click.
It’s perfect for online listings where photos make the first impression.
This method helps you market your space without disrupting your daily routine. And for buyers scrolling through listings, it creates an instant connection.
Time-Saving Comparison
Physical presentation can take a serious time. From booking a stager to moving out existing furniture and bringing in new pieces, the process can stretch out for days or even weeks.
Virtual staging? It can happen in just a few days. Once the photos are taken, the rest happens behind the scenes. No disruptions at home or waiting for furniture deliveries. Just fast, professional visuals, often ready in 48 to 72 hours.
If you're on a deadline to sell—or just want to get your listing live without delay—a digital presentation can shave off days of prep time.
Space-Saving Comparison
Let’s face it—space is everything when selling a home. Physical setup for property presentation often means moving items around or finding places to store clutter. And in small homes, that can be a problem. Overcrowded rooms shrink the space visually and physically.
A virtual presentation doesn’t need you to move a single thing. In fact, designers can work around clutter or edit it out digitally. The result is a clean, open space that buyers can imagine themselves in, without heading into a warehouse.
It also leaves your real-life space untouched. So, whether you're living in the home or prepping it from afar, your routine stays just the way it is.
So, Which Option Works Best for You?
Each method has its place. Physical setup for property presentation still works well for large homes, model units, or open houses where walk-in appeal is key. It also suits sellers with time, budget, and space to spare.
Virtual staging fits modern needs. It's fast, tidy, flexible, and affordable. It's also ideal for vacant homes, remote sellers, or anyone looking to list quickly without added stress.
Some sellers even mix both—physically key rooms and using a digital option for the rest. This way, they balance cost, time, and presentation.
Final Thoughts
Both options help your home look its best. But if you’re short on time or space—or just want to sell smarter—virtual staging makes a strong case. The tools are better, the visuals are sharper, and the turnaround is faster than ever. With one simple step, you can transform your listing photos and catch more eyes online.
So, before moving heavy furniture or clearing out closets, ask yourself this—could a digital touch save you days of work and still seal the deal?

Common Mold Types Found in Singapore Homes
In Singapore, the humid climate is a common cause of mold growth in domestic homes. The warm temperature and the presence of dense moisture levels ensure favorable conditions for the development of mold. Not many homeowners know that the various forms of mold could impact their property in several ways. Some molds are the causative agents of mild allergies; others cause grave respiratory diseases. Thus, you should know the kinds of molds that can appear in the home setting. This guide provides insight into the prevalent types of molds that may be present in Singaporean homes, their impacts, and why prompt mold removal must be prioritized.
We partnered with a home improvement company for this post. The opinions in the post are honest. All reviews and opinions expressed in this post are based on our personal views. We are excited because we know you will love it.
In Singapore, the humid climate is a common cause of mold growth in domestic homes. The warm temperature and the presence of dense moisture levels ensure favorable conditions for the development of mold. Not many homeowners know that the various forms of mold could impact their property in several ways. Some molds are the causative agents of mild allergies; others cause grave respiratory diseases. Thus, you should know the kinds of molds that can appear in the home setting. This guide provides insight into the prevalent types of molds that may be present in Singaporean homes, their impacts, and why prompt mold removal must be prioritized.
1. Aspergillus
A typical mold found in Singapore is Aspergillus. It grows on wet walls, air conditioners, and food. This mould grows rapidly within warm, moist conditions, so homes in the tropics are very susceptible.
Key facts:
Found frequently in bathrooms and the kitchen.
It is capable of causing allergies.
Sometimes resulting in respiratory infections.
Exposure to Aspergillus can result in cough, wheezing, and skin irritation. The risks are higher in the case of individuals whose immunity is low. Thus, it should be eliminated as soon as possible, and the humidity inside the home should be low.
2. Cladosporium
Cladosporium can develop in warm and cool locations, hence it is very adaptable. It is frequently present in Singapore dwellings, where it is present in textiles, wood, and on windows.
Key facts:
Looks like black or olive-green spots.
It can provoke asthma.
Frequent in curtains and air ducts.
This mold sheds its spores into the air, which are easy to inhale. Nasal congestion, itchiness of the eyes, and a sore throat are seen in susceptible people. Its spread can be prevented by regularly cleaning the household fabrics and wooden furniture.
3. Penicillium
Penicillium feeds off the carpets, wallpaper, and insulation in which water-damaged materials are present. Although it is applied in the production of antibiotics, some of its species are poisonous to ingest.
Key facts:
Is it blue or green in velvet texture?
Generates powerful musty odors.
Associated with allergies and asthma attacks.
Penicillium is transferred rapidly by spores in the air. Consequently, early diagnosis is essential. When you can smell mustiness in your home, inspect dark, moist areas and check for hidden mold.
4. Stachybotrys (Black Mold)
One of the highly toxic types of mold that can occur in Singapore houses is Stachybotrys, or toxic black mold. It favors water-damaged materials and cellulose-rich materials like wood and paper.
Key facts:
Looks black or dark green.
Forms toxic mycotoxins.
Related to severe respiratory problems.
Acute cases lead to chronic coughing, headaches, and fatigue when exposed to on a long-term basis. It may also, in certain situations, impact the nervous system. Thus, it is highly recommended that professionals remove Stachybotrys.
5. Alternaria
Alternaria is a rapidly growing mold that tends to grow in the shower, under the sink, and also around the window. It may also manifest itself in highly exposed moisture in walls and tiles.
Key facts:
Dark green or brown in a fuzzy texture.
Gives allergic rhinitis and asthma attacks.
Grows rapidly in wet locations.
Alternaria grows fast to cover a big area in a few days. Its growth can be prevented by controlling the inside humidity and enhancing indoor ventilation.
6. Mucor
Mucor tends to be white or grey and thickly abundant. It is usually present in Singapore households' air conditioning systems, wet carpets, and moisture-prone walls.
Key facts:
Grows fast under wet conditions.
May result in respiratory infection.
Seen frequently in proximity to HVAC systems.
In isolated instances, Mucor may lead to mucormycosis, a fatal fungus. It should be prevented by regularly cleaning air conditioners and maintaining adequate moisture control.
7. Fusarium
Fusarium grows better in cooler and wet locations and can even survive in low temperatures. It tends to attach to carpets, fabrics, and wallpapers.
Key facts:
Looks pink, white, or reddish.
Gives skin rashes and respiratory irritation.
It can produce detrimental toxins.
Since Fusarium propagates not only through the surfaces but also with the help of the air, then leaks and the situation with moisture should be promptly resolved. Otherwise, it is capable of contaminating several locations at home.
8. Trichoderma
Trichoderma grows in wet wood, paper, and carpet materials. Although there are harmless species, others will destroy construction materials and give rise to allergies.
Key facts:
White or green in colour.
Makes enzymes that degrade wood.
It can bring on a cough and be irritating to the skin.
Besides the health hazards, Trichoderma may also destroy the wooden structures in your house. An immediate removal would keep the air quality and safety at an acceptable level.
9. Aureobasidium
Aureobasidium commonly occurs on painted walls, wood surfaces, and window frames. It may begin as pink or brown and thereafter acquire a black color.
Key facts:
Usual in damp, moist areas.
Irritates the skin and eyes.
Grows wallpaper and furniture.
Due to its ability to stain woods or painted surfaces, Aureobasidium might not be noticed for a long time. Inspections can help detect it early.
10. Chaetomium
Chaetomium is common in building structures damaged by water and has a strong musty odor. It develops on wooden buildings, wallpaper, and drywall.
Key facts:
The texture is cotton-like with a white start.
Blacks or darkens to green.
May result in breathing problems and skin complications.
It is a type of mold that can live in high humidity for quite a long time. The most suitable way to prevent them is to fix water leaks immediately.
Conclusion
The humid weather in Singapore exposes houses to molds, each causing various health and building hazards. Whether it is inconvenient common Aspergillus or deadly Stachybotrys, early detection and mold remediation can save your home and your health. It is essential to maintain good ventilation, keep the house dry by managing humidity, and repair water leaks to prevent this.
In severe cases, hiring a mold removal company in Singapore ensures safe and thorough elimination. Identifying these types of molds and their risks can help you achieve a healthier, safer, and cleaner living area where your family can reside. Even though mold can be found in humidity, this does not necessarily have to be the case in your house as long as proper caution is taken.

Best Practices To Reduce Humidity in Your Attic
If you notice signs of water damage in your attic, find out how to properly insulate and regulate humidity levels in your home with these maintenance tips.
A hot, humid climate can take a toll on your home, especially your attic. High humidity levels can lead to mold growth, warped wood, and damage to your walls and ceilings.
By managing attic humidity, you can protect your home’s structure, keep the air inside healthier, and prevent the need for expensive repairs down the line. Follow these best practices to reduce the humidity in your attic and insulate and regulate your home’s temperature.
Ensure Proper Ventilation
Good air circulation effectively removes excess moisture in your attic. Install ridge vents and soffit vents if your attic needs ventilation support. These installments allow for continuous airflow that pushes out warm, moist air and brings in fresh air. Using attic fans can also improve ventilation so that the space stays cool even during hot summer months.
Seal Gaps and Leaks
Tiny openings in your roof, walls, or attic floor can allow moist air to seep in. Check for cracks, gaps, or unsealed ducts, particularly around plumbing vents, chimney openings, and light fixtures. Use caulk or weatherstripping to seal these areas and prevent excess moisture from entering and accumulating in your attic.
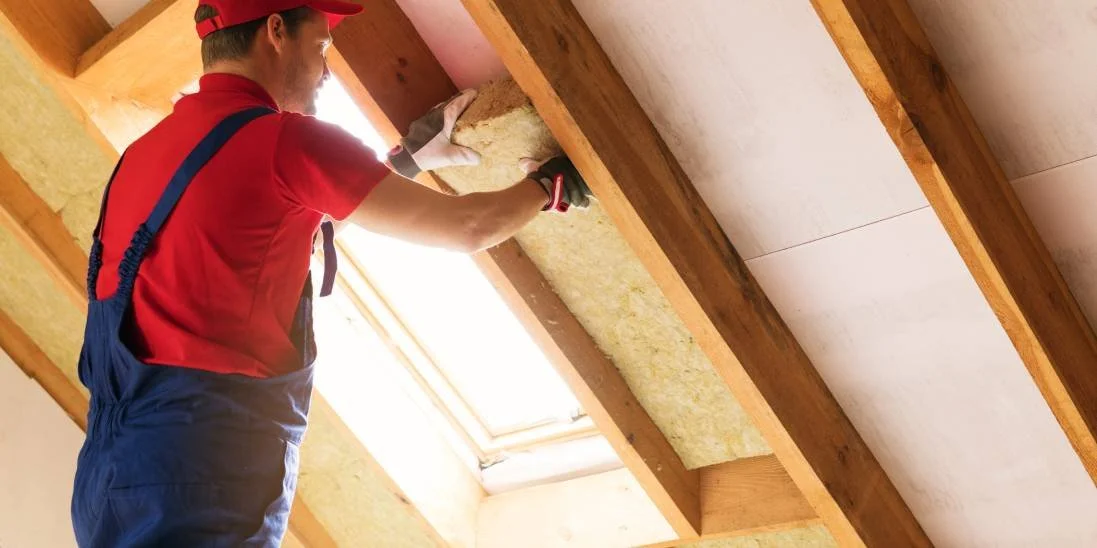
Insulate Your Attic
Invest in high-quality insulation to regulate the temperature in your attic and prevent warm, humid air from condensing on cool surfaces. Focus on areas such as the attic floor and roof deck, and consider adding a radiant barrier to reflect heat and reduce moisture buildup.
Control Moisture Sources
Humidity in other parts of your house often rises and accumulates in the attic. Minimize moisture buildup by keeping an eye on common sources throughout your home. Fix plumbing leaks, use exhaust fans in your kitchen and bathrooms, and avoid drying clothes indoors.
Additionally, incorporating preventative measures around your roof can mitigate rainwater-related moisture problems in your attic. Use flat roof drainage techniques if applicable, and check that your gutters and roof drainage systems are working properly.
Use a Dehumidifier
Dehumidifiers are effective if you live in a particularly humid climate or experience frequent rain. If excess moisture persists after insulating and checking the structure for damage, a dehumidifier will reduce the humidity in your attic for long-term support.
Consult With Professionals
If you’ve tried these best practices but continue to notice damp conditions, mold growth, or persistent water damage in your attic, it’s time to seek professional help. A licensed contractor or roofing expert can assess the situation, identify underlying issues, and provide tailored solutions to keep your attic dry and safe.