

A resource for those seeking information on organizing and transforming spaces.

Seasonal Timing and Budgeting for San Antonio Tree Disease Treatment
Tree diseases can spread rapidly in a warm, dry climate such as San Antonio's. Trees stressed by heat, soil compaction, or incorrect irrigation are susceptible to fungal diseases and opportunistic pests. Waiting until the leaves brown out or limbs decline might turn a simple problem into an expensive removal. With a good plan for timing, diagnosis, and budgeting, homeowners can swiftly triage issues, extend the life of precious shade trees, and prevent unnecessary expenses. This article covers what to look for, when to act according to the seasons in your area, how to pick between a DIY approach and expert care, and how to prevent recurrent outbreaks with consistent, sensible maintenance.
We partnered with a home improvement company. for this post. The opinions in the post are honest. All reviews and opinions expressed in this post are based on our personal views. We are excited because we know you will love it.

Tree diseases can spread rapidly in a warm, dry climate such as San Antonio's. Trees stressed by heat, soil compaction, or incorrect irrigation are susceptible to fungal diseases and opportunistic pests. Waiting until the leaves brown out or limbs decline might turn a simple problem into an expensive removal. With a good plan for timing, diagnosis, and budgeting, homeowners can swiftly triage issues, extend the life of precious shade trees, and prevent unnecessary expenses. This article covers what to look for, when to act according to the seasons in your area, how to pick between a DIY approach and expert care, and how to prevent recurrent outbreaks with consistent, sensible maintenance.
Spot Symptoms Early: What to Watch For
Most diseases begin very subtly. Look for uneven leaf discolouration, thinning canopies, dieback at branch tips, leaf spots that increase in size, sunken or cracked bark, and mushrooms or conks at the base that indicate internal decay or root problems. Many difficulties are mirrored, so look for patterns: Is it only one species? Are the symptoms related to a recent drought, lawn renovation, or pruning? Track when and how much change occurs, take clear pictures, and keep a weekly track of progress. If several nearby trees show the same signs of damage, a contagious virus may be at work, and quick action may be necessary. For additional context on local options, some homeowners review resources about San Antonio Tree Disease Treatment to understand next steps and common approaches better.
Watch for early warning signs and quarantine the affected area before it spreads. Disinfect pruning tools between cuts, and throw away diseased leaves or twigs in the garbage, not compost. Don't over-fertilize a stressed tree. This can promote poor new growth that is much more susceptible. Document symptoms and consider a diagnostic consultation if the decline increases. Early detection generally allows for focused pruning and cultural repairs, as opposed to more invasive or recurring operations.
Plan Actions Around San Antonio's Climate
Local seasons influence illness pressure and the time of appropriate treatment. Spring is quick flushes of new growth that are vulnerable to foliar fungus, while early summer heat stresses root systems and invites cankers and wilt pathogens. Sudden heavy rainfall may increase fungus activity after protracted dry spells. In general, schedule a full inspection toward the end of winter or very early in spring so you may schedule pruning and preventive maintenance before extreme heat hits. Many systemic therapies and cultural corrections (e.g., mulch refreshes, irrigation checks and soil additions) are most effective if provided in advance of active disease periods.
Heat management is important. During peak summer conditions, focus on deep, infrequent watering to the root zone and avoid nonessential pruning to minimize stress. "If you have to prune for safety reasons, make sure you make clean cuts on the outside of the branch collar and sanitize tools often to reduce the spread of disease." In early October, reevaluate mulch depth, and remove leaf litter from species prone to disease. Where winter dormancy occurs, it provides an opportunity for structural trimming and cleanliness without inducing new susceptible growth.
Treatment Paths: DIY Steps vs. Professional Care
Homeowners can solve some difficulties well. Proper watering, correct mulching, careful mowing to avoid trunk wounds, and cleaning up diseased debris are cultural controls that go a long way. Small ornamentals with mild foliar problems may benefit from over-the-counter products labeled for such problems when used exactly as directed. But if it is advanced, or if there are symptoms of interior rot or the canopy is disappearing rapidly, a professional assessment is required. Proper selective pruning of large trees requires particular equipment and training, and prescription-only treatments, when necessary, must be applied by a licensed professional.
Significant dieback, deep bark splits, fungal fruiting bodies on trunks, or a rapid decline in species known to be disease-susceptible should prompt an expert inspection. Experienced arborists can discern between look-alike conditions such as drought stress or fungal cankers and suggest a plan of action: sanitation pruning, root zone care, possible lab tests, and, if required, targeted treatments. This method helps eliminate guesswork and reduces the risk of wasting time and money on ineffective cures.
Budget Planning Without Surprises
Costs depend on the size of the tree, access, safety requirements, and the complexity of the treatment. To maintain control, break down your plan into phases and budget for assessment first. A thorough diagnosis saves you from splurging on wide, unfocused solutions. Then reserve cash to reduce immediate risk, e.g., remove dangerous deadwood or stabilize a weakened limb to prevent secondary damage. For immediate work, budget for cultural fixes (soil aeration, mulching, irrigation tune-ups) to aid recovery and reduce future disease pressure. Such steps tend to create lasting value, because they target fundamental issues, not symptoms.
Ask for written scopes that specify what is included, what success looks like, and what follow-up may be needed to avoid surprise charges. Talk about site logistics. Fence access, tight gates, and surrounding structures can create change orders. If you have many trees, prioritize them based on risk and importance: high-value shade trees that anchor the comfort and energy efficiency of your yard often warrant an earlier investment. Lastly, plan for monitoring. A brief seasonal check-up is cheaper than emergency work once a problem has worsened.
Prevention That Works Over Time
"The best defense is consistent fundamentals. Apply 2–4 inches of mulch around the drip line, but keep a few inches away from the trunk to prevent rot. Water deeply and rarely, especially in hot weather (soil surface dries significantly between waterings). Avoid frequent shallow watering; this will foster weak roots near the surface. Prevent mechanical damage from string trimmers and bumps from mowers create access places for microorganisms. Rake away leaf litter from disease-prone species and remove dead or infected twigs immediately, disinfecting instruments with a mild disinfectant between cuts.
The right plant in the right place is as important as anything. Select species that are appropriate for your local soils, sun exposure, and water availability. Space plants enough for mature size to prevent stress. Prune throughout the early life of the tree to maintain structure so fewer major cuts are needed later. Look for pattern changes in each season.
If the problems are localized in a limb, it might be a pruning repair. If the problems are throughout the canopy, it might be a root zone issue. By taking regular observations and documenting a few dated images, you can notice tiny adjustments before they become serious concerns.
Healthy trees provide shade, comfort, and curb appeal, but they don't stay resilient by accident. Learning the early signs of common problems, timing your activities with local weather patterns, and creating a realistic budget for diagnosis, immediate care, and prevention will reduce risk and retain the value of your environment. Make notes, re-evaluate, and solve issues as they arise. Long-term tree health and fewer costly shocks are best achieved with well-timed small steps based on observation and excellent procedures.

10 Simple Steps for Successful House Restumping
Have you ever walked into your home and noticed sloping floors or cracks along your walls? Are you worried about the stability of the stumps supporting your property? If so, you’re not alone—many Australian homes depend on stumps to keep everything level and secure. But over time, those stumps can deteriorate, leading to all sorts of structural woes.
Have you ever walked into your home and noticed sloping floors or cracks along your walls? Are you worried about the stability of the stumps supporting your property? If so, you’re not alone—many Australian homes depend on stumps to keep everything level and secure. But over time, those stumps can deteriorate, leading to all sorts of structural woes.
In this post, we’ll look at 10 simple steps for successful house restumping. We’ll cover how to spot the signs that your home needs restumping, explain what the process involves, and show you how to keep everything in tip-top condition once the work is done. Along the way, we’ll answer your biggest questions, including “How long does it take to restump a house?” and “Can you restump a house yourself?” By the end, you’ll feel confident about your next move, whether you plan to restump yourself or hire a seasoned professional.
Step 1: Understanding House Restumping
What Is House Restumping?
House restumping is the process of replacing the old stumps that support the foundations of a home. Many Australian properties rely on wooden stumps, which can decay or weaken over time. During restumping, these supports are removed, and new stumps—made from either timber or steel—are placed in their correct positions. This process helps maintain a level floor, reduces structural strain, and prevents further damage.
In older homes, stumps often fail because of pests, moisture, or general wear and tear. By swapping them out, you’re effectively giving your home a fresh start from the ground up. Restumping can be a major project, but once it’s done, you can relax knowing your property is stable for years to come.
Why Is It Necessary?
You might wonder why house restumping is so important, especially if your floors only have a minor slope or you notice a few cracks here and there. The truth is, small signs of stump failure can lead to massive headaches if left unchecked. A slanted floor can make furniture placement awkward, and in severe cases, the shifting foundation can distort door frames or windows.
Beyond the cosmetic consequences, failing stumps can jeopardise your home’s structural integrity. Wood rot, termites, and excessive moisture can quickly turn a safe dwelling into a risky environment. By restumping promptly, you’ll protect your investment, avoid more expensive repairs, and maintain a solid base for daily life.
Step 2: Identifying the Signs Your Home Needs Restumping
Common Clues in Australian Homes
Australian weather can be unpredictable. Heavy rainfall and warm, humid conditions often lead to damp soil and a rise in pests like termites. If your stumps are wooden, these factors can cause them to degrade faster than expected. Signs to watch for include visible rot at the base of stumps, a noticeable bounce or ‘give’ in your floors, and cracks forming in your interior walls.
At times, you may observe windows that refuse to close properly or doors that jam without explanation. Uneven flooring is another giveaway—if your couch appears to sit at an odd angle, your stumps might be on their last legs. Although these symptoms aren’t always guaranteed indicators of serious damage, they do warrant a closer look.
Problems After Restumping: What to Expect
Interestingly, even after restumping, you might run into a few concerns. These problems after restumping could include minor cracks reappearing, slight changes in floor level, or having to readjust doors once the new stumps settle in. That said, most of these issues are minor and can be remedied quickly by a professional.
A key point to remember is that the house might shift slightly as it settles onto the new stumps. If you choose a reliable restumping professional, any necessary adjustments are usually part of a follow-up service. This helps ensure your home remains level in the months that follow, giving you peace of mind.
Step 3: Assessing the Scope of Work
How Many Stumps per Square Metre?
One of the most common queries is: “How many stumps per square metre does my home need?” While there isn’t a single, universal number, a typical guide is to place stumps in line with the property’s existing bearers and joists. Depending on the layout, you might see stumps at roughly two-metre intervals along each beam.
The exact count depends on the weight load each stump must handle, the soil conditions, and the design of your property. A good rule of thumb is to obtain a detailed plan from your engineer or restumping professional. Having precise calculations prevents you from overdoing it—and equally, it avoids situations where you don’t install enough support.
Site Inspection and Planning
Before you begin any physical work, arrange a thorough site inspection. A professional inspection will highlight underlying issues like soil instability, drainage problems, or existing termite infestations. Addressing these concerns ahead of time often saves you from nasty surprises during the restumping process.
Once you know the condition of your site, you can figure out the best plan for restumping. This involves deciding the type, size, and positioning of stumps, as well as establishing the overall timeline. With a solid plan in hand, you’ll be able to budget effectively and minimise delays that can throw the project off-course.
Step 4: DIY vs. Professional Restumping
Can You Restump a House Yourself?
It’s fair to wonder, “Can you restump a house yourself?” There’s no doubt that a capable and experienced DIY enthusiast might pull it off. However, restumping is no small undertaking. It involves safely lifting your home, removing old stumps, pouring new foundations, and realigning everything.
In many Australian states, you may need a permit or specific licences to handle restumping. Moreover, one minor miscalculation could affect the structural integrity of your entire property. If you’re unsure, it’s best to work alongside a qualified contractor who has a wealth of industry experience. Even partial DIY can be fortified by professional advice, ensuring you don’t end up with costly mistakes.
Understanding Local Regulations and Permits
Whenever you start work that involves structural support, there are usually local regulations in place. Councils often require a building permit for restumping, and you might also need inspections at certain points in the project. Ignoring permits can lead to fines or, in the worst-case scenario, forced demolition of new work.
In addition, a professional restumping team can help with paperwork and liaise with local authorities. By getting everything in writing, you make sure the job meets Australian Building Standards and that you’re covered for future resale. It’s yet another reason why many homeowners opt for professional help rather than going solo.
Step 5: Preparing Your Property
Securing the Structure and Surroundings
Before anyone starts jacking up the house, it’s vital to secure the building and its surroundings. Clear the area of obstacles like garden furniture, pots, and any décor. Inside, move fragile items such as mirrors and decorative wall hangings to a safe place. This minimises the chance of breakage once the house shifts slightly.
Next, consider the safety of your household members. Children and pets, in particular, should be kept well away from the work area. During the lifting phase, hazards include unstable floorboards or accidental knocks to the support beams. By taking these precautions, you create a safer environment and keep everyone protected throughout the process.
How Long Does It Take to Restump a House?
Naturally, you might be wondering, “How long does it take to restump a house?” or “How long does restumping take?” The answer depends on factors such as the number of stumps replaced, the condition of the soil, and the weather. Typically, a standard-sized home might be completed within one to two weeks.
If the job involves extensive damage, you might face a delay of several days or more. Rainy conditions can slow progress because muddy ground makes it harder to work, and concrete footings need time to set. When planning your timetable, it’s wise to include a bit of leeway. An experienced restumping contractor will give you a more precise estimate once they’ve seen the site.
Step 6: Choosing the Right Materials
Timber vs. Steel Stumps
When deciding on stumps, many homeowners compare timber vs. steel. Timber stumps are traditional, cost-effective, and relatively simple to install. But they can also be more vulnerable to termites and rotting, especially in damp conditions. On the other hand, steel stumps are prized for their durability and termite resistance, making them a popular choice across much of Australia.
However, steel comes with a higher price tag upfront. Also, steel stumps can rust if they aren’t coated and maintained properly. The best choice often depends on your local climate, budget, and personal preference. Whichever route you choose, make sure the stumps are rated for Australian standards, as this guarantees a higher level of reliability.
Selecting the Best Method for Your Home
Beyond the basic material selection, you’ll need to decide the best installation method. For instance, some homeowners opt for concrete footings to secure stumps firmly in place, while others prefer a direct in-ground method for speed. Your decision might be guided by soil type: if you have loose or sandy soil, concrete footings create a more stable foundation.
It’s good to work closely with your engineer or contractor to assess the property’s layout and unique characteristics. By choosing the method that aligns with your environment, you reduce the risk of shifting over time. Once your new stumps are locked in place, your home will have the robust support it needs.
Step 7: How to Restump a House
Lifting and Supporting the House
The first step in how to restump a house involves carefully lifting the property off its current stumps. Heavy-duty jacks are used at specific points under the house to provide even support. This operation requires a cautious approach because any uneven pressure can crack floors, walls, or other structural elements.
Once the house is lifted, durable support beams or temporary props are put in place to hold it steady. The old stumps are then removed, and the holes are cleared of debris. At this stage, it’s crucial to confirm the ground is level and stable before installing the new stumps. If done methodically, this ensures a smoother transition once you lower the house back down.
How to Restump a Very Low House
Restumping a very low house adds another layer of difficulty because there’s limited room to manoeuvre. In such cases, professionals might use specialised lifting equipment or remove sections of flooring to gain better access. While this can be more disruptive inside the home, it’s sometimes the only way to reach the stumps effectively.
If you attempt it yourself, be prepared for tight spaces and the need for extra safety gear. It’s often prudent to hire a knowledgeable contractor for a very low house, as they’ll have the right tools, experience, and techniques to handle the cramped conditions. With the proper approach, even the lowest homes can be safely and accurately restumped.
Step 8: Levelling and Aligning the Structure
Ensuring Accurate Measurements
Once the new stumps are in place, the next priority is to make sure the house is perfectly level. Laser levels, spirit levels, and string lines can all help confirm accuracy. It’s easy to overlook slight misalignments, and those small discrepancies can translate into bigger issues later, such as uneven floors and stressed frames.
Professionals typically measure from multiple reference points around the property. This process might be repeated several times throughout the restumping, especially in older homes where the original structure has shifted extensively. By using precise instruments, you can verify the whole house is as straight and even as possible.
Avoiding Future Problems After Restumping
Keeping the house true to level once it’s back on its stumps is a balancing act. You might need to fine-tune the stump heights before the final full settling occurs. A house that’s just been restumped can shift slightly as the soil compresses or adjusts under the new supports.
If you’re worried about ongoing settling, don’t stress too much. A qualified contractor generally offers a follow-up inspection to correct any small deviations that arise in the months post-restump. By scheduling a check-up, you catch any problems early and ensure the level remains spot on for long-term stability. This practice also helps prevent recurrent cracks and doors sticking down the track.
Step 9: Final Inspections and Certifications
Meeting Australian Building Standards
Your newly restumped home should align with all Australian Building Standards. These guidelines focus on everything from the materials used to the techniques employed during construction. Meeting these requirements is essential not only for safety but also for maintaining the property’s value. When it’s time to sell, a potential buyer might request proof that the house meets official codes.
Building standards can vary slightly between states and territories. So, if you’re unsure, consult a local building surveyor or speak with your contractor. They’ll clarify which rules apply and confirm that your restumping job ticks all the right boxes. Achieving compliance also means you have documentation showing the work has been done properly.
Obtaining Approval and Documentation
Most local councils require you to submit building applications or notices before restumping begins. After the project, you’ll often need an inspection to ensure the work complies with the permit requirements. It’s a good idea to keep copies of all paperwork, certificates, and inspection reports. These documents prove that the job was carried out legally and can be invaluable if you ever face questions from insurers or future buyers.
If there are any minor issues, you may be given time to rectify them before final approval. Having all your paperwork in order makes everything smoother. Once you have the official green light, you can happily declare your home is restumped and fully certified.
Step 10: Maintaining Your Re-stumped Home
Post-Restumping Care
Now that your home is fully supported on fresh stumps, you can finally breathe a sigh of relief. However, it’s still vital to keep an eye on things. In the initial months, doors might need slight readjustments, and you may spot small cracks in the plaster as the building settles. This is entirely normal and often requires only minor touch-ups.
To reduce extra stress on the new foundation, keep the area around stumps free from pooling water. Good drainage is especially important in Australia’s unpredictable weather. Ensure guttering and downpipes direct water away from your home’s base. If you spot any concerning movement or significant cracking, contact your restumping professional for advice.
Regular Maintenance and Checks
Long-term success with a restumped home hinges on consistent maintenance. Every year or two, inspect the underside of the house for any signs of rust (if you chose steel) or dampness and termite activity (if you went with timber). Catching problems early allows for quick fixes before they escalate.
Additionally, keep an eye on landscaping changes near your stumps. Piling up garden beds against the house or introducing new drainage paths could alter the soil composition, which can then impact your stumps’ stability. By scheduling routine checks, you’ll prolong your home’s life and enjoy a safer living space for decades to come.
Conclusion
Thinking about house restumping might seem daunting at first, but it doesn’t have to be. By following these 10 simple steps, you’ll soon discover that a sturdy, level home is well within reach. From spotting the early warning signs in your property to understanding exactly how to restump a house, each stage ensures you stay informed. Even if the process feels overwhelming, the right advice, permits, and professional assistance can give you the peace of mind you need.
If you’re wondering, “How long does it take to restump a house?” or “Can you restump a house yourself?” you now have a clearer idea of what’s involved. Whether you choose timber or steel, your decision will depend on factors like budget, climate, and personal preference. With proper maintenance and professional guidance, you can prevent future structural issues and enjoy a more secure, valuable home.
Ultimately, house restumping is about preserving the heart of your home. By securing strong foundations, you’re investing in both safety and longevity. If you're considering house restumping in Melbourne, now is the perfect time to act.

5 Key Benefits of Regular Tree Trimming at Home
Trees are one of the most valuable features of a home's outdoor space. They enhance
aesthetic appeal, provide shade, and even improve property value. However, keeping trees
healthy and visually pleasing requires routine care, and regular tree trimming is an essential part
of this process. For new homeowners, understanding the importance of tree maintenance can
save both time and money while fostering a safer and more beautiful environment.
Trees are one of the most valuable features of a home's outdoor space. They enhance aesthetic appeal, provide shade, and even improve property value. However, keeping trees healthy and visually pleasing requires routine care, and regular tree trimming is an essential part of this process. For new homeowners, understanding the importance of tree maintenance can save both time and money while fostering a safer and more beautiful environment.
This article will explore five key benefits of regular tree trimming and why it is a vital investment for your home and landscape.
Enhances Aesthetic Appeal
Well-trimmed trees contribute significantly to the visual harmony of your outdoor space. Overgrown branches can make a property look unkempt, distracting from the beauty of the landscape. Regular pruning shapes trees to a uniform and attractive form, allowing their natural beauty to stand out.
Beyond shaping individual trees, trimming ensures they complement the overall design of your yard. Whether the goal is to create a sleek, modern look or a rustic, naturally lush space, properly maintained trees can serve as focal points or seamlessly blend into the background.
Curb appeal is more than just a buzzword—it plays a significant role in creating a welcoming atmosphere. Trees with balanced structures and healthy foliage not only reflect meticulous care but also elevate the charm of your home. This becomes particularly valuable if you plan to host guests or sell your property in the future.
Promotes Tree Health
Just like humans need regular health checkups, trees benefit from routine care. Trimming removes dead, diseased, or pest-infested branches, preventing them from further harming the tree. This practice improves airflow and sunlight exposure, helping trees grow stronger and healthier.
Overgrowth can place unnecessary strain on branches, making them more likely to break or affect the tree's structural integrity. Regular pruning reduces this stress and redirects nutrients to the most vital parts of the plant. The result is not only a healthier tree but also one that can stand up to seasonal changes or storms.
Ensures Safety
Overhanging branches, particularly those near driveways, walkways, or roofs, can pose a safety hazard. Falling branches are a common cause of damage during storms, leading to expensive repairs or, worse, injuries. Regular trimming helps mitigate these risks by removing weak or precarious branches before they become a danger.
Branches growing too close to power lines, windows, or other structures can also create hazardous situations. Investing in periodic trimming ensures that trees remain a safe distance from these vulnerable areas. This preventative measure can save homeowners significant time and financial stress in the long run.
Encourages Better Fruit and Flower Production
For homeowners with fruit-bearing or flowering trees, trimming is an effective way to enhance output. By removing unproductive or overcrowded branches, trees can direct more energy and nutrients toward producing healthier fruits, blooms, or foliage.
Trees with abundant flowering or fruit production add immense value to any property. Whether it's a blossoming cherry tree in spring or a citrus tree bearing fruit in summer, regular pruning maximizes the beauty and functionality of these assets.
Reduces Pest and Disease Issues
Trees can sometimes attract unwanted guests like insects, fungi, or rodents. Overgrown branches that touch walls or roofs provide easy access for pests, turning your home or attic into a nesting ground. Additionally, dead or decaying branches are breeding grounds for diseases that can spread to other parts of your yard.
Pruning keeps pests and diseases in check and prevents cross-contamination between trees or shrubs in your garden. This practice is not only beneficial for the health of individual trees but also for maintaining a thriving, pest-free landscape.
Final Thoughts
Trees are a long-term investment for any home, providing shade, beauty, and character to your property. Regular trimming is the key to preserving their health and ensuring they continue to thrive for years to come.
Keeping your trees well-maintained doesn’t have to be difficult. If you’re short on time, simply contact a professional tree trimming service like AJ’s Tree Services to handle it for you. By incorporating trimming into your routine landscape care, you’ll enjoy a safer, healthier, and more beautiful outdoor space that reflects the pride you take in your home.
The Benefits of Selling Land with Existing Timber Rights
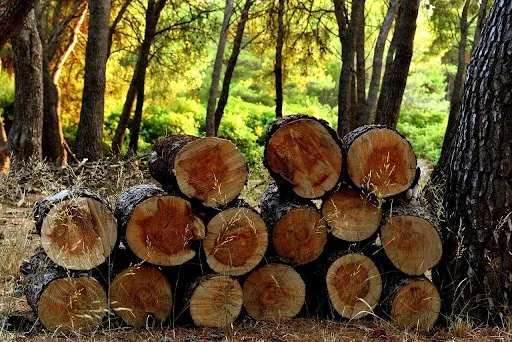
Selling land with existing timber rights offers a compelling opportunity for landowners, combining the immediate financial benefits of a land sale with the enduring value of forestry assets. This arrangement allows sellers to maximize the property's worth by highlighting its potential for sustainable timber harvesting, which can appeal to buyers interested in long-term investment or resource management. Whether you’re an investor seeking profit, a property owner aiming to divest, or someone inheriting wooded acreage, leveraging timber rights can elevate your land's appeal and open doors to mutually beneficial transactions for both parties.
We partnered with a real estate company for this post. The opinions in the post are honest. All reviews and opinions expressed in this post are based on our personal views. We are excited because we know you will love it.
Selling land with existing timber rights offers a compelling opportunity for landowners, combining the immediate financial benefits of a land sale with the enduring value of forestry assets. This arrangement allows sellers to maximize the property's worth by highlighting its potential for sustainable timber harvesting, which can appeal to buyers interested in long-term investment or resource management. Whether you’re an investor seeking profit, a property owner aiming to divest, or someone inheriting wooded acreage, leveraging timber rights can elevate your land's appeal and open doors to mutually beneficial transactions for both parties.
Increased Land Value Through Timber Appraisal
When selling land with timber rights, the value of the trees on the property is often appraised separately from the land itself. This dual valuation process can boost the total worth of the property. Timber, as a renewable resource, holds intrinsic value due to its wide-ranging uses in construction, paper production, and even renewable energy. Buyers see this as an investment opportunity, allowing them to generate revenue over time through sustainable logging practices. For sellers, this additional valuation means a potentially higher price tag for the land. A forested property with mature or market-ready timber will often command premium offers compared to bare or deforested acreage. This is especially true in regions where timber-related industries thrive, as buyers in these areas are more likely to see the immediate and long-term financial benefits of owning such land.
Broader Buyer Appeal
Properties with existing timber rights attract a diverse range of buyers, from commercial logging companies to private investors and conservation groups. Commercial buyers might be interested in harvesting and selling the timber for profit, while conservationists may seek to preserve the forest for ecological or recreational purposes. This broad appeal gives sellers an edge in negotiations and widens the pool of potential offers. Buyers may be drawn to the passive income opportunities timber rights provide, allowing sellers to pitch their land as a profitable and sustainable investment. Additionally, timbered properties often come with scenic beauty, which further enhances their desirability to individuals or organizations looking for dual-purpose land investments, combining aesthetics with utility.
Long-Term Sustainability and Environmental Incentives
Timbered properties often align with modern environmental trends. Sustainable forestry practices, such as selective cutting and replanting, ensure that the land continues to generate income while preserving its ecological health. Sellers can emphasize these environmentally friendly aspects when marketing the land, appealing to buyers who prioritize sustainability in their investments. Moreover, certain jurisdictions offer tax incentives for maintaining forested land or engaging in responsible timber harvesting. Highlighting these potential savings can further persuade buyers, making timbered properties an even more attractive option. For sellers, this adds to the property’s allure without requiring significant upfront investments in marketing or enhancements.
Simplified Sales Process for Landowners
One of the biggest advantages of selling land with timber rights is the streamlined nature of the transaction, particularly when engaging with companies specializing in fast and hassle-free land purchases. For example, working with buyers who provide Fast Land Offers can eliminate lengthy negotiation cycles and ensure a quick, efficient closing. These buyers are often well-versed in evaluating timbered properties, meaning sellers don’t need to spend extra time educating potential buyers about the value of the land and its resources. This ease of sale can be particularly advantageous for those looking to sell inherited land or divest quickly due to financial or personal reasons. Sellers can also avoid the complexities of splitting timber rights from land ownership, ensuring the process remains straightforward.
Unlocking the Hidden Wealth in Your Land
Selling land with timber rights isn't just about passing on property; it's about leveraging the hidden wealth that forests offer. Mature trees can represent decades of growth, and their value can significantly enhance the financial return from selling the land. Buyers recognize the economic benefits of acquiring a dual-purpose property, while sellers gain the satisfaction of maximizing their asset's potential. Additionally, the sale of timbered land often creates a win-win scenario. Buyers inherit a renewable resource that can be harvested sustainably, while sellers achieve financial liquidity, sometimes at a premium. In essence, timber rights add a layer of strategic opportunity to land sales that bare properties cannot match.
Conclusion
Selling land with existing timber rights offers a strategic advantage for landowners aiming to unlock both financial and ecological potential. Timber rights add significant value to the property, increasing its attractiveness to a broader range of buyers, including investors and developers interested in sustainable resources. This added appeal often translates to higher profitability, making it a lucrative endeavor for sellers. By collaborating with the right buyers, emphasizing the benefits of sustainable harvesting, and showcasing the long-term growth potential of the land, sellers can ensure a rewarding transaction while positioning the property for future ecological and economic value..