

A resource for those seeking information on organizing and transforming spaces.
Signs It's Time to Have Your Home's Gutters Replaced
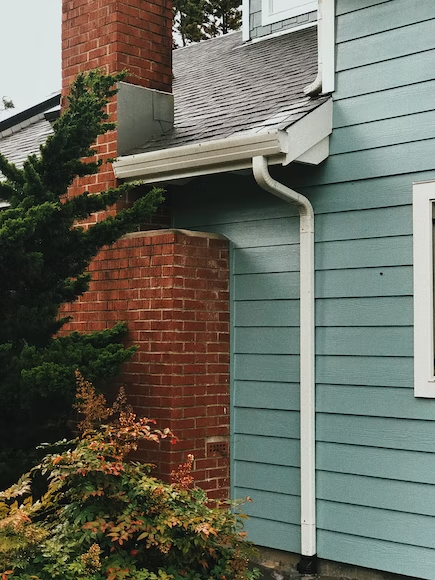
Gutters are essential components of your home's exterior. They help protect your foundation and siding from water damage, and they channel rainwater away from your house. But like all things, gutters don't last forever—eventually, they will need to be replaced. Knowing the signs that indicate it's time for a gutter upgrade can save you a lot of headaches in the future. Let's go over some of the most common signs that you need to have your gutters replaced.
Gutters are essential components of your home's exterior. They help protect your foundation and siding from water damage, and they channel rainwater away from your house. But like all things, gutters don't last forever—eventually, they will need to be replaced. Knowing the signs that indicate it's time for a gutter upgrade can save you a lot of headaches in the future. Let's go over some of the most common signs that you need to have your gutters replaced.
Cracks and Leaks
One of the first things you should check when determining whether or not your gutters need replacing is their condition. If you notice any cracks or leaks, then it's likely time to upgrade them. Cracks and leaks can lead to water damage, which can cause costly repairs down the road. Furthermore, if there are gaps between sections of gutter, this could mean that sections have shifted or come apart due to age or exposure to weather conditions.
Clogged Gutters
Gutters become clogged with debris such as leaves and sticks over time. This prevents them from doing their job properly and allows water to pool in certain areas instead of being diverted away from your home properly. If you find yourself frequently having to clean out your gutters, it may be time for an upgrade—gutters with larger openings can reduce clogs by allowing more water flow through more quickly and efficiently. Aluminum gutter installation may also be a good option for your home.
Rust Spots
If you notice any rust spots on your gutters, this is another sign that they need replacing soon. Not only do rust spots reduce the aesthetic appeal of your home’s exterior but they also increase the likelihood of corrosion or other structural issues occurring in the future, which could lead to costly repairs if left unchecked.
In conclusion, there are several signs that indicate it's time for a gutter replacement at your home such as cracks and leaks in existing gutters, frequent clogging problems, and rust spots on metal components. These are all indications that proper maintenance is needed in order for your gutters to work effectively at protecting both your siding and foundation from water damage caused by rainwater runoff from storms or melting snow during winter months. If you recognize any of these signs at your house, make sure you contact a local professional as soon as possible for an assessment so you can be sure that all necessary repairs or upgrades are completed promptly before any further harm is done by Mother Nature!
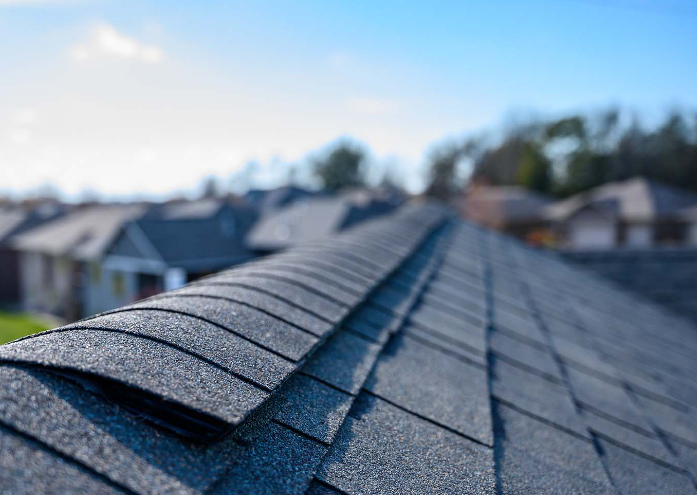
5 Things to Do When You Need Roofing Service
When you need to hire a roofing service, there are a few important steps you should take in order to ensure that the job is completed properly and safely. To help make this process easier, here are five essential things to do when you need a quality roofing service:
When you need to hire a roofing service, there are a few important steps you should take in order to ensure that the job is completed properly and safely. To help make this process easier, here are five essential things to do when you need a quality roofing service:
Do Your Research:
Before making any decisions, it’s important to do your research and ensure that the company or individual you’re looking into hiring for the job is reputable and has a good history of providing reliable services. Look up customer reviews online, ask friends or family members if they have worked with any particular companies, or contact local trade organizations such as the National Roofing Contractors Association (NRCA) for more information.
Ask For References:
A good roofing contractor should be able to provide references from past clients who can vouch for their workmanship and professionalism. Make sure to check out those references thoroughly before making any final decisions – this will give you an idea of what kind of service to expect and will also help you avoid any potential problems down the line.
Get Several Quotes:
Don’t just go with the first quote – get several different quotes from different contractors so that you can compare prices and services offered. This will also give you an opportunity to ask questions about each contractor’s experience, methods, safety protocols, materials used, etc., which will help you assess which one is best suited for the job at hand.
Look for Licensing & Insurance:
Before signing anything or agreeing to work with a specific contractor, make sure they have both proper licensing and insurance in place. Licensed roofers should be able to provide proof of both upon request; failing that, it might be best to look elsewhere for your roofing service needs.
Get Everything In Writing:
Always make sure that everything is laid out in writing before beginning a project – this includes costs associated with the project (including materials), estimated timeline for completion, warranties provided on materials used/work done, payment schedules/terms of agreement between both parties involved (including subcontractors), etc.. This will not only protect your interests but it will also provide peace of mind knowing that everything is documented and agreed upon ahead of time instead of at the close of a project when surprises may occur due to misunderstandings between both parties involved throughout the process.
By following these five essential steps when looking into hiring a roofing contractor or service provider ,you can rest assured in knowing that your project will be completed correctly according to standards set by industry professionals - all while ensuring that everyone involved understands exactly what's expected when it comes down to costs incurred and timeline expectations . Not only does this save time & money in the long run however it also helps keep your home safe from potential weather-related damages due to improper installation techniques; something that no homeowner wants!
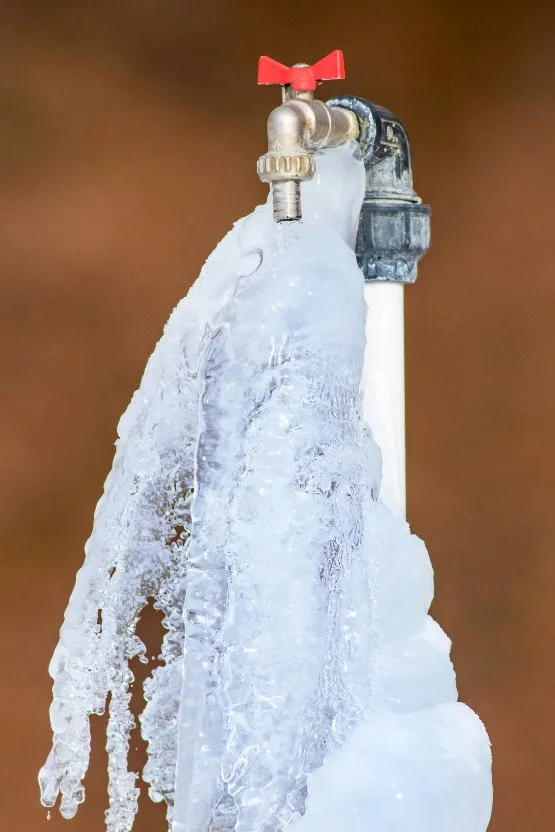
6 Tricks to Help Thaw Frozen Pipes
Winter weather can be harsh on our homes, and one of the most common issues during colder months is frozen pipes. If you’re dealing with frozen pipes in your home, don’t panic—there are a few simple tricks you can try that may help thaw those pipes quickly and easily. Read on for five tips to help you thaw frozen pipes and get your plumbing flowing again.
Winter weather can be harsh on our homes, and one of the most common issues during colder months is frozen pipes. If you’re dealing with frozen pipes in your home, don’t panic—there are a few simple tricks you can try that may help thaw those pipes quickly and easily. Read on for five tips to help you thaw frozen pipes and get your plumbing flowing again.
Open Up Faucets & Allow Water to Flow
The first step should be to open up faucets and allow water to flow through the pipe system. This will minimize pressure buildup behind the icy blockage and make it easier for the ice to melt. Start by opening up hot water faucets on both ends of the pipeline, then switch over to cold water faucets if necessary.
Use Space Heaters or Hair Dryers
If you have space heaters or hair dryers available, they can be used to generate heat around the affected area in an effort to thaw the frozen pipe. Place your space heater or hair dryer at least four inches away from the frozen section of pipe and aim it directly at the pipe for about 10 minutes at a time before taking a break and allowing any melted ice to flush out of the system. Continue this process until all of the ice has melted away completely.
Wrap Heated Towels Around Pipes
If space heaters or hair dryers are not available, soaked towels heated in a microwave can also be used as an alternative method for providing warmth around affected areas and melting away stubborn ice blocks. Wet several towels with warm (not hot) water then microwave them for two minutes at a time before wrapping them around sections of frozen pipe until all of the ice melts away completely.
Use Hot Water Bottles
Using hot water bottles is another way homeowners can provide warmth around sections of frozen pipes without having access to space heaters or hair dryers, although these bottles will need frequent refilling as their contents cool down after some time has passed.
Using your stove is another great way to heat up water for a hot water bottle. To do this, simply fill a pot or large container with tap water and transfer it to the stove. Turn your burner on high and heat the water until it begins to boil. Once it has boiled, turn off the heat and use an oven mitt to transfer the hot water to your hot water bottle. Be sure to test its temperature before using, and never fill a hot water bottle with boiling water as it can cause serious burns! Additionally, always use a pot or container that is large enough for all of the water you plan on using, as overflow can be dangerous.
Use Your Water Heater to Your Advantage
Your water heater can also be used to help thaw frozen pipes. Check your water heater’s settings and turn the temperature up slightly (it should never exceed 120 degrees Fahrenheit) in order to ensure that warmer temperatures are flowing through the pipes. Keeping the temperature set at a higher level will help provide extra heat around any frozen sections of pipe, helping to thaw the ice more quickly. Be sure to check the temperature at regular intervals to ensure it’s not getting too hot—and turn your heater back down after all of the ice has melted away from your pipes.
Call a Professional Plumber
When working with any type of plumbing issue, it's always best practice to call a professional plumber or Pipeworks Services who can assess damage properly and recommend potential solutions in order to get your plumbing back up and running again safely and effectively as soon as possible. Calling a professional plumber sooner rather than later could save you money over time by preventing additional damage from occurring due to prolonged exposure from cold temperatures outside or inside your home.
Frozen pipes are no fun, but luckily there are plenty of steps homeowners can take in order to thaw those pesky icy blocks quickly and effectively. The next time you find yourself dealing with frozen pipes, start by opening up faucets so that pressure isn't building up behind any icy blockages then move onto using space heaters/hair dryer (if available), heated towels wrapped around pipes, hot water bottles placed against affected areas, and finally, call a professional plumber when needed. Following these five tips will help ensure that your plumbing gets back up and running again safely and efficiently in no time.

Guidelines Of Split Air Conditioning Installation
The split air conditioning installation is a critical job. If it is carried out properly then the unit will provide you with the finest performance. But if it is not carried out efficiently then you will never get a proper cooling effect in the room and there may be recurrent breakdown of the system. If you want to save money on the regular repairs, then it is advisable to get your split AC installed only by a professional. This is not a “DIY Sunday” job, and you should never put your hands in something where you do not understand its ways and means.
The split air conditioning installation is a critical job. If it is carried out properly then the unit will provide you with the finest performance. But if it is not carried out efficiently then you will never get a proper cooling effect in the room and there may be recurrent breakdown of the system. If you want to save money on the regular repairs, then it is advisable to get your split AC installed only by a professional. This is not a “DIY Sunday” job, and you should never put your hands in something where you do not understand its ways and means.
How To Install Split Air Conditioning
Installing an AC professionally needs experience and learning. It does take proper practice. There may be gas leakage if the AC is not installed professionally. There are a lot of factors that you need to consider when you are getting the split AC installed.
In the very beginning, you need to check the exact location for the installation of the indoor and outdoor AC unit. Only after a proper identification of the place you can begin with the steps of installation. As the name goes, the indoor AC unit needs to be installed inside a room whereas the outdoor AC unit is meant to be installed outside. If you place the indoor unit just over your bed, then you ensure maximum cooling. Now, if you do not wish for the chilled air right above your head then you can always change the position of the louvers. During the air conditioning installation, the indoor unit must be at least 10 feet above the floor. Then the cool air will circulate throughout the room and will not just cool the roof. The indoor unit must be installed at a convenient place so that it is easy to clean the filters. It is imperative to place the outdoor unit in open air so that the condenser and compressor receive free flowing air.
There are a lot of factors that need to be considered during the split air conditioning installation. They are:
#1. Strength of Wall
When you are installing an indoor unit, it is vital to ensure that the wall is strong enough to hold the weight of split AC. You will not be able to determine this on your own and would need the help of a professional.
#2. Proper Spacing Between AC Unit and Wall
When installing the split AC indoors you would need to give a gap of 15 cm on the top and sides to ensure the proper flow of air.
#3. Maintain Proper Height from Ground
If you want proper cooling in the indoor area where you are planning to install split air conditioning, then you need to mount the unit at least 8 to 10 feet above the ground for the proper circulation of cool air inside the room.
#4. Correct Tilt Angle
When you are getting the aluminum bracket fixed on the wall, make sure to give it a slight angle so that when the indoor unit of AC gets fixed, it is also at the slight angle. This angle will help in providing unrestricted flow of the condensed water from the drainpipe.
#5. Accurate Location of Outdoor AC Unit
If you want proper cooling from the split AC unit then you must get the outdoor unit mounted at a proper location which is away from the direct sunlight. It should be an open space so that the hot air can easily dissipate from the condenser.
In the end, split air conditioning installation is a tough job, and you would need a proper guidance from a professional technician. It is advised to not install the split AC unit all by yourself. This is because a professional understands all the technical details regarding the machine in a much better way.