

A resource for those seeking information on organizing and transforming spaces.

Closing Process Explained: What to Expect When Selling to a Cash Buyer in Indiana
Selling your Indiana home to a cash buyer is faster and simpler than a traditional sale. If you know what to expect. Here is a clear, step-by-step look at how the closing process works.
We partnered with a real estate company for this post. The opinions in the post are honest. All reviews and opinions expressed in this post are based on our personal views. We are excited because we know you will love it.
Selling your Indiana home to a cash buyer is faster and simpler than a traditional sale. If you know what to expect. Here is a clear, step-by-step look at how the closing process works.
If you have been thinking about selling your home to a cash buyer in Indiana, you probably have questions about how the closing process works. It can feel unfamiliar, and that is completely normal. Most people have only ever sold a home the traditional way through a real estate agent, mortgage lenders, and weeks of back-and-forth paperwork. Cash sales are different, and in many ways, much simpler. This guide walks you through exactly what happens from the moment you accept an offer to the day you hand over the keys.
How a Cash Sale Differs from a Regular Home Sale
In a traditional home sale, there is a buyer, a seller, and usually a mortgage lender in the middle. That lender needs to approve the loan, order an appraisal, and sign off on dozens of conditions before closing can happen. This is where delays come from. Cash buyers skip all of that. They are purchasing your home with funds they already have, so there is no waiting on a bank.
In Indiana, this makes a big difference in your timeline. A traditional sale can take 45 to 60 days or more to close. A cash sale, depending on your situation, can close in as little as 7 to 14 days. That speed is one of the main reasons homeowners choose to sell to cash buyers. When they are dealing with a tight timeline, an inherited property, or a home that needs repairs.
Working with a reliable company like Simple Quarters means you get a straightforward process without the usual headaches of showings, negotiations, and financing fall-throughs. They make fair cash offers and handle most of the heavy lifting for you.
From Offer to Signed Agreement: What Happens First
Once you reach out to a cash buyer, they will typically want to learn about your property. They may ask for basic details like the address, square footage, condition of the home, and any known issues. Some buyers will schedule a quick walkthrough, while others can make an initial offer based on the information you provide.
After reviewing your home, the cash buyer will present you with a written offer. This offer usually has no financing contingency, which means it will not fall apart because a lender backed out. Take your time reading it. You are not obligated to accept, and you can ask questions or negotiate terms if something does not feel right.
In Indiana, a cash offer typically comes with fewer contingencies than a traditional offer. That means less risk of the deal collapsing at the last minute.
What Goes on During the Due Diligence Period
Even with cash buyers, there is usually a short due diligence window. This is when the buyer verifies the condition of the property and confirms there are no major title issues. In Indiana, this period is often shorter than in a traditional sale, sometimes just a few days.
During this time, the buyer may order a title search. This is a standard process where a title company reviews public records to make sure the property has a clean ownership history and no outstanding liens or judgments. If any issues come up, they are usually handled before closing, so there are no surprises at the table.
Step 1
Offer accepted
Step 2
Title search ordered
Step 3
Title issues resolved
Step 4
Closing date set
Step 5
Documents signed
Step 6
Funds received
Paperwork You Will Sign at Closing
Closing day in Indiana involves signing a set of legal documents. You do not need to memorize all of them, but it helps to know what you are looking at. A title agent or closing attorney will typically guide you through each document and explain what you are signing.
Common documents include the settlement statement (which shows all costs and credits), the deed (which transfers ownership to the buyer), and any required Indiana disclosures. You may also sign a bill of sale if personal property, like appliances, is included in the sale.
Settlement statement (HUD-1 or Closing Disclosure)
Warranty deed or quitclaim deed
Indiana seller disclosure form
Bill of sale (if applicable)
Transfer tax documents
Getting Paid: How Funds Are Transferred
One of the most common questions sellers have is: When do I actually get my money? In a cash sale, payment is made at or shortly after closing. The most common method is a wire transfer directly to your bank account. Some buyers may offer a certified check, though wire transfers are more common for security and speed.
In Indiana, the closing agent handles the transfer of funds. They collect the money from the buyer, confirm that all documents have been signed and conditions are met, and then release the funds to you. This usually happens the same day as closing, though it can occasionally take until the next business day for the wire to fully clear on your end.
Common Things That Can Slow Down a Cash Closing
Cash sales are faster, but they can still hit snags. Knowing what to watch for can help you avoid delays.
Title issues are the most common holdup. If there are old liens on the property, an error in a previous deed, or an unresolved ownership dispute, those need to be cleared before closing. In Indiana, unpaid property taxes or HOA dues can also create delays if not addressed early in the process.
Seller-related delays can also happen. If you have not yet vacated the property or gathered all the required documents, closing might need to be pushed back. It is a good idea to start gathering your mortgage payoff statement, utility account information, and any warranty documents for appliances or systems as soon as you sign the purchase agreement.
Selling your Indiana home to a cash buyer is one of the most straightforward ways to move on quickly and with confidence. When you understand each step of the closing process ahead of time, there are no surprises: just a clean, simple transaction that puts money in your pocket fast.
FAQs
1. How long does it take to close on a cash home sale in Indiana?
Most cash sales in Indiana close in about 7 to 14 days, depending on title work and how quickly documents are completed. In some simple cases, it can move even faster if there are no title issues or delays in paperwork.
2. Do I still need to do inspections or repairs when selling to a cash buyer?
Usually no major repairs are required. Many cash buyers purchase homes “as-is,” meaning you don’t have to fix anything before closing. However, the buyer may still do a basic walkthrough or inspection for their own evaluation.
3. When do I receive my money after closing a cash sale?
In most cases, you receive your funds on the same day as closing through a wire transfer from the title company. Sometimes, it may take until the next business day for the transfer to fully clear in your bank account.

What Homeowners Regret Most After a Renovation
Discover the biggest renovation regrets homeowners face and learn how proper planning can help you avoid those same costly remodeling mistakes.
A home renovation can completely transform the way a space looks and functions, but not every remodeling project ends with total satisfaction. In fact, many homeowners look back on their projects wishing they had made different choices along the way. Understanding what homeowners regret most after a renovation can help others avoid the same costly mistakes and create a smoother remodeling experience from start to finish.
Failing to Set a Realistic Budget
One of the most common regrets is failing to establish a realistic budget. Renovation costs can rise quickly when unexpected structural issues, material delays, or design changes appear mid-project.
Many homeowners focus only on the visible upgrades without accounting for hidden expenses like permits, labor adjustments, or temporary living arrangements. A contingency fund of at least 10–20% can help absorb surprises without derailing the project.
Choosing Trends Over Functionality
Another major regret is prioritizing trends over long-term functionality. While trendy finishes and layouts may look appealing on social media, they do not always fit a homeowner’s lifestyle or age well over time.
Open shelving, ultra-modern fixtures, or overly customized features can lose their appeal quickly. Homeowners who focus on timeless design and practical functionality are often happier with the final result years later.
Lack of Communication With Contractors
Poor communication with contractors is another issue that frequently leads to dissatisfaction. Misunderstandings about timelines, materials, or project expectations can create frustration on both sides.
Before construction begins, homeowners should take time to discuss detailed plans, scheduling expectations, and contingency procedures. Knowing the critical questions to ask before starting any remodeling project can help homeowners feel more prepared and confident before committing to a renovation plan.
Underestimating the Disruption
Many homeowners also regret underestimating how disruptive renovations can be. Noise, dust, limited access to rooms, and extended project timelines can affect daily routines more than expected.
Kitchen remodels, for example, may leave families without a functional cooking space for weeks. Preparing alternative living arrangements and setting realistic expectations beforehand can reduce stress throughout the process.
Using Low-Quality Materials
Choosing cheaper materials to save money is another common source of regret. While staying within budget is important, low-quality flooring, cabinetry, or fixtures often wear out faster and require replacement sooner than expected.
In many cases, investing slightly more upfront results in better durability and lower long-term costs.
Renovate Without Regrets
What homeowners regret most after a renovation usually comes down to rushed decisions and insufficient planning. Renovations are significant investments, and taking extra time to think through goals, budgets, and functionality can make a substantial difference in the final outcome. Homeowners who approach remodeling with patience, clear communication, and realistic expectations are far more likely to enjoy both the process and the finished space for years to come.

A Quick Guide to the Most Common Roof Problems
Learn about the most common roofing issues, their causes, and practical solutions to keep your roof in good condition and prevent costly damage.

A well-maintained roof protects your home from weather and structural damage, yet many homeowners overlook early warning signs. Understanding the most common roof problems helps you act quickly and avoid expensive repairs. From leaks to damaged shingles, each issue has clear causes and practical solutions when addressed in time.
Leaks and Moisture Damage
Roof leaks often start small but can quickly lead to serious interior damage. Water stains on ceilings or walls usually point to a compromised roofing system. Cracked flashing, worn seals around vents, or missing shingles often allow water to enter. Prompt repair is essential. Sealing gaps and replacing damaged materials can stop the spread of moisture and protect insulation and drywall.
Damaged or Missing Shingles
Shingles serve as the first layer of defense against the elements. Strong winds, aging, and poor installation can cause them to loosen or fall off. When shingles go missing, the underlayment becomes exposed and vulnerable. Replacing individual shingles right away helps maintain the roof’s integrity. Ignoring this issue can lead to leaks and structural wear over time.
Clogged Gutters and Drainage Issues
Gutters direct water away from your roof and foundation, but debris can block proper flow. Leaves and dirt buildup cause water to pool on the roof, increasing the risk of leaks and rot. Learning how to fix a clogged gutter can prevent these problems before they escalate. Regular cleaning and proper gutter alignment ensure water drains efficiently and reduces pressure on the roofing system.
Flashing Failures
Flashing protects areas where the roof meets vertical surfaces such as chimneys or walls. Over time, flashing can crack or pull away due to temperature changes or poor installation. Once it fails, water can seep into vulnerable areas. Repairing or replacing flashing restores a tight seal and prevents hidden damage that often goes unnoticed until it becomes severe.
Poor Ventilation
Roof ventilation helps control both temperature and moisture inside the attic space. When air cannot circulate properly, excess heat and dampness begin to accumulate, which can weaken roofing materials and shorten their durability over time. Improving ventilation with ridge vents or attic fans helps maintain balance and protects the roof from long-term stress.
Aging Roof Materials
Every roof has a limited lifespan. As materials age, they lose their ability to protect against weather. Shingles may curl, crack, or lose granules, which weakens their performance. Regular inspections allow you to spot signs of aging early. Planning for replacement before failure prevents sudden damage and costly emergency repairs.
Staying Ahead of Roof Issues
Keeping up with maintenance and inspections makes a significant difference in preventing the most common roof problems. By addressing issues early and taking a proactive approach, homeowners can extend the life of their roof and avoid unnecessary expenses.
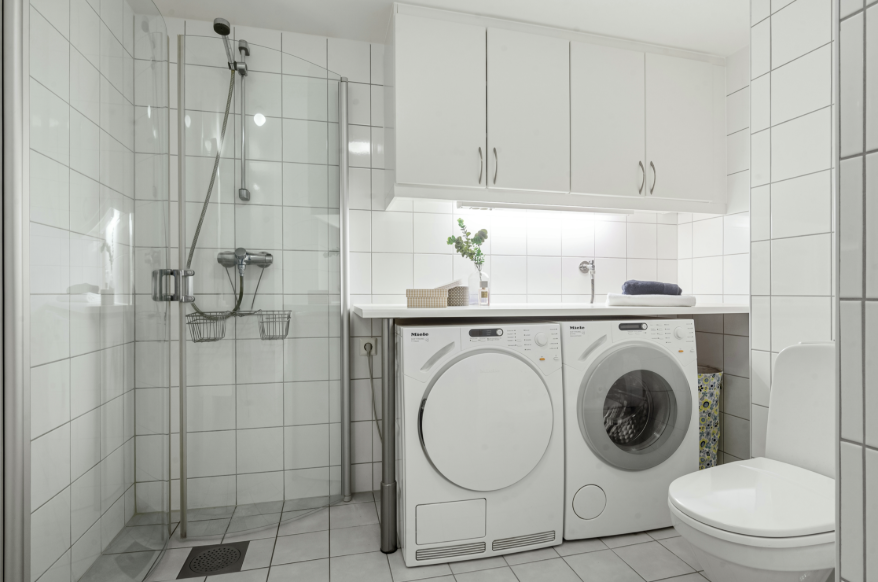
How to Keep Your Dryer Running at Peak Performance All Year Long
A clothes dryer is one of the most relied-upon appliances in any household. When it runs smoothly, it saves time, energy, and effort. But like any machine, it needs consistent care to stay efficient and safe. By following a few practical steps, you can keep your dryer performing at its best throughout the year.
A clothes dryer is one of the most relied-upon appliances in any household. When it runs smoothly, it saves time, energy, and effort. But like any machine, it needs consistent care to stay efficient and safe. By following a few practical steps, you can keep your dryer performing at its best throughout the year.
Clean the Lint Trap After Every Load
The lint trap is the first line of defense against clogs and overheating. Cleaning it after each cycle ensures proper airflow and reduces strain on the motor. A clogged lint screen forces the dryer to work harder, which can shorten its lifespan and increase energy use.
This simple habit takes seconds but makes a big difference in performance and safety. Over time, lint buildup can also create a fire hazard, so staying consistent with this step is one of the easiest ways to protect your home.
Clean and Maintain the Dryer Vent System
Your dryer’s vent system is responsible for carrying heat and moisture safely out of the appliance. As months go by, lint and debris can collect inside the ductwork, blocking airflow and increasing the risk of overheating or fire. Scheduling professional dryer vent duct cleaning at least once a year helps remove hidden buildup that regular cleaning can’t reach. This service not only improves efficiency but also protects your home from potential risks.
A clean vent system allows the dryer to operate with less strain, which means shorter drying times and lower energy bills. By relying on expert cleaning, you ensure that your dryer’s vent system remains safe, efficient, and capable of supporting peak performance all year long.
Check the Drum and Seals for Wear
The dryer drum and door seals play a key role in keeping heat inside during operation. If seals are worn or cracked, hot air escapes, forcing the dryer to run longer. Inspecting these parts regularly and replacing them when needed helps maintain consistent drying times and prevents unnecessary energy waste.
A well-sealed drum also ensures that clothes dry evenly, reducing the need for repeat cycles and helping fabrics last longer. By staying proactive with seal maintenance, you safeguard your dryer’s efficiency and extend its overall service life.
Keep the Exterior and Interior Clean
Dust and dirt can accumulate around the dryer’s exterior and inside the drum. Wiping down surfaces and vacuuming around the appliance prevents particles from entering the system. A clean dryer also reduces the chance of odors transferring to clothes.
Periodic deep cleaning of the drum ensures fabrics come out fresh and lint-free. Taking the time to clean both the inside and outside of the dryer helps it run more smoothly and keeps your laundry area looking neat.
Monitor Drying Times for Efficiency
Longer drying cycles are often a sign of restricted airflow or worn components. If you notice clothes taking longer to dry, it’s time to troubleshoot. Start by checking the lint trap and vent system, then move on to seals and heating elements.
Addressing issues early prevents costly repairs and keeps the dryer running smoothly. Paying attention to drying times also helps you spot problems before they become serious, saving both money and frustration.
Schedule Regular Professional Maintenance
While routine cleaning is essential, professional servicing provides a deeper level of care. Technicians can inspect electrical connections, heating elements, and safety features to ensure everything is working properly.
Annual maintenance helps extend the dryer’s lifespan and gives you peace of mind that your appliance is safe and efficient. Professional checkups are especially important for older dryers, which may need more frequent attention to stay reliable.
Use the Dryer Responsibly to Prevent Strain
Overloading the dryer or running back-to-back cycles without breaks can strain the motor and heating system. Following manufacturer guidelines for load size and giving the dryer time to cool between cycles helps prevent overheating.
Responsible use not only protects the appliance but also improves drying results. By treating the dryer with care, you can avoid unnecessary wear and keep it performing well for years. Consistently practicing these habits ensures your dryer remains dependable, efficient, and ready to handle everyday laundry needs without interruption.
Conclusion
Keeping your dryer at peak performance all year long comes down to consistent care and smart habits. From cleaning the lint trap to scheduling professional dryer vent duct cleaning, each step contributes to efficiency, safety, and longevity. With regular attention and responsible use, your dryer will continue to serve your household reliably for years to come.

