

A resource for those seeking information on organizing and transforming spaces.
How To Reduce Road Noise in a Small Backyard
Traffic noise ruining your backyard breaks? Try these practical updates that help working mothers create a calmer outdoor space without losing room.
Have you ever stepped outside after a long day hoping for a bit of peace, only to hear steady traffic? A small backyard can feel especially exposed to road noise, and it doesn’t take much to make the space feel less relaxing.
The good news is you don’t need a huge yard or a full redesign! A few smart, intentional changes can help you take back that sense of calm. Here’s how to reduce road noise in a small backyard.
Start by Listening to What’s Really Happening
Before you change anything, spend a little time just listening. You’ll notice the noise shifts throughout the day, especially if you live near a busy intersection or school route. Morning traffic might feel lighter, while evenings can bring a steady hum of engines.
As you pay attention, try to figure out where the sound is coming from. You might find it’s mostly coming from one direction, which is actually helpful because it tells you where to focus your efforts.
Let a Solid Fence Do the Heavy Lifting
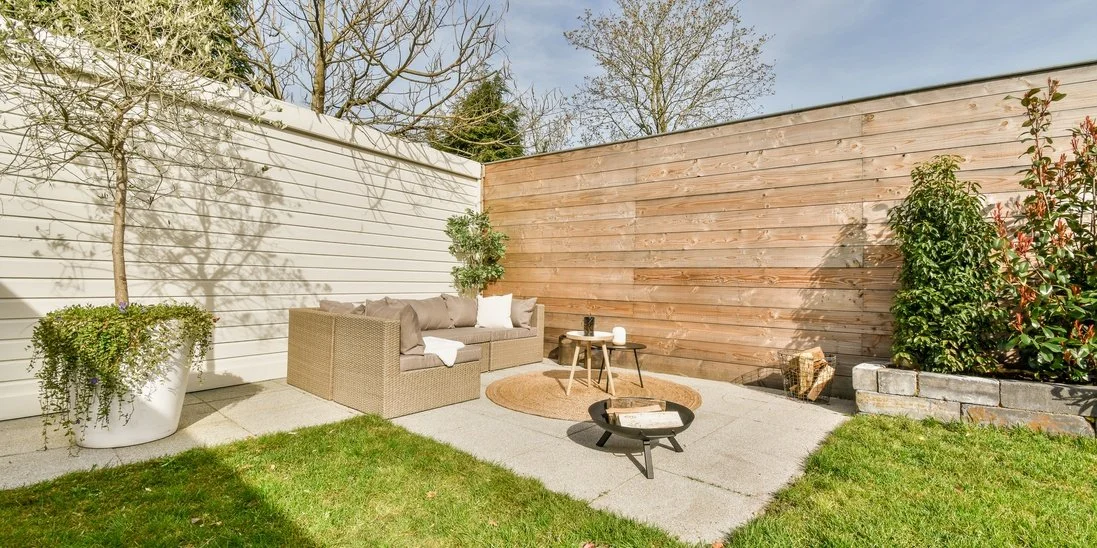
Once you understand the direction of the noise, a solid fence becomes your first real line of defense. When it’s built well, it blocks a direct path for sound and immediately takes the edge off traffic noise. You’ll want to avoid designs with gaps or spacing between boards because sound slips through those openings easily. Height also plays a role, so if your local rules allow it, going taller usually helps.
The material itself isn’t as important as how tightly everything fits together. If your yard slopes, make sure the fence follows that grade so sound doesn’t sneak underneath.
Take a Quick Look at Local Rules First
Before you fall in love with a design, check your city or HOA guidelines. That is one of the important questions to ask before hiring a fence contractor. Height limits and visibility rules can affect what you’re allowed to build, especially near driveways or streets. A good contractor will walk you through permits and help you avoid surprises later, so don’t hesitate to ask early!
Bring in Plants to Soften the Space
Plants won’t block traffic noise on their own, but they do change how the yard feels. When you add dense greenery near your fence, the space starts to feel more enclosed and less exposed to the road.
Evergreen shrubs work especially well because they stay full year-round. You’ll want to choose varieties that handle your local climate and sunlight conditions so they stay healthy without constant upkeep. Just be sure to give them enough room to grow so they don’t crowd your fence or turn into extra maintenance you didn’t plan for.
Shift Your Seating Where It Feels Quieter
If you move your seating area even a few feet away from the road, you may notice the noise softens a bit. Try placing chairs in the quietest corner of your yard and see how it feels. You might also find it helps to turn seating inward, facing your home or garden instead of the street. That small shift changes your focus and makes the space feel more private.
If your current setup doesn’t work well, don’t be afraid to rethink it! A small patio or seating nook can be moved or rebuilt with simple materials like pavers or an outdoor rug. Just keep convenience in mind too, especially if you like to keep an eye on kids from inside the house.
Add Background Sound to Take the Edge Off
When traffic noise feels sharp or unpredictable, a steady background sound can help balance it out. A small water feature often works well because the sound stays consistent and blends into the background instead of competing for attention.
If you prefer something more flexible, adding outdoor speakers can help you set a calmer mood during dinners or weekend time outside. Keep the volume low and place them near your seating area so the sound supports your space instead of overwhelming it.
You might also find simple options like wind chimes or a quiet outdoor fan surprisingly helpful, especially on still days when traffic feels louder than usual.
Create a More Sheltered Corner
If you want your backyard to feel more like a retreat, a simple structure like a pergola can help define the space. It won’t block all the noise, but it does create a sense of separation that makes the yard feel more intentional and less exposed.
Adding outdoor curtains on the side facing the road can also increase privacy and soften sound a bit more. Just make sure you choose materials that can handle weather and are easy to clean, since road dust tends to settle in busy areas.
Try to keep the design open enough that you still get airflow and visibility! You want to feel connected to the yard, not boxed in.
Soften the Hard Surfaces
Hard surfaces tend to bounce sound around, which can make traffic feel louder than it really is. When you add cushions or an outdoor rug, you help absorb some of that reflection. It’s a small change, but it makes the space feel noticeably more comfortable.
Keep Your Yard Functional
It’s easy to get carried away when you’re trying to solve a noise problem, but a small backyard still needs to feel usable. Before adding anything permanent, take a moment to picture how much space you’ll actually have left. Vertical features like wall-mounted fountains or built-in seating can help you save room while still improving comfort. The goal is to make the space feel better, not smaller!
Be Realistic About What You Can Achieve
Even with the best setup, you won’t completely reduce road noise in a small backyard. What you can do is soften it enough that your backyard feels calm and enjoyable again.
Start with one change! You might be surprised how much a solid fence or a better seating layout improves the feel of the space on its own. From there, you can decide what else is worth adding.
When you focus on the path the sound travels and make small, thoughtful adjustments, your backyard starts to feel like yours again. And after a busy day, that quiet moment outside becomes something you can actually look forward to.

How to Organise a Kitchen So It Actually Stays That Way
The kitchen is usually the first room in a house to fall out of order and the hardest to keep organised, because it gets used constantly by everyone in the household, often several times a day. Unlike a closet or a garage, you cannot simply close the door on it when things slip. A pile of post on the counter, a drawer of mismatched lids, or a cupboard where nothing quite fits, and within a week the whole room can feel like it is working against you rather than for you.
We partnered with a home improvement company for this post. The opinions in the post are honest. All reviews and opinions expressed in this post are based on our personal views. We are excited because we know you will love it.
The kitchen is usually the first room in a house to fall out of order and the hardest to keep organised, because it gets used constantly by everyone in the household, often several times a day. Unlike a closet or a garage, you cannot simply close the door on it when things slip. A pile of post on the counter, a drawer of mismatched lids, or a cupboard where nothing quite fits, and within a week the whole room can feel like it is working against you rather than for you.
The good news is that a genuinely organised kitchen is less about willpower and more about setting the space up properly in the first place, so that putting things away is actually the easier option than leaving them out. Get the structure right, and the day-to-day tidiness tends to take care of itself.
Organise by Zone, Not by Surface
The biggest mistake in kitchen organising is thinking in terms of surfaces, the counter, the drawer, the cupboard, rather than tasks. A kitchen that is organised by zone groups everything needed for one activity in the same place, so you are never crossing the room mid-task to find something, and nothing ends up living somewhere just because there was a gap.
A simple version of this looks like:
Prep zone: chopping boards, knives, mixing bowls and measuring equipment, close to a clear stretch of worktop
Cooking zone: pots, pans, utensils, oils and spices near the hob, so nothing needs carrying across the room mid-recipe
Cleaning zone: washing up liquid, cloths, bin and recycling together near the sink
Everyday zone: mugs, plates and cutlery near the dishwasher or drying rack, since these get used and put away most often
Once items live where they are actually used, tidying up stops being a chore and starts being the path of least resistance. It also makes it far easier to spot when something genuinely does not have a home, which is usually the first sign that a category of items needs a proper sort rather than another squeeze into an already full drawer.
Let the Cabinetry Do the Organising Work
Storage design has more influence on how organised a kitchen stays than any amount of decluttering effort. Deep drawers with proper dividers hold far more than a low cupboard, and they let you see everything at a glance instead of stacking items on top of each other and forgetting what is at the bottom. Pull-out larders make better use of narrow gaps than a standard cupboard ever could, and a dedicated bin drawer keeps recycling out of sight without it becoming a dumping ground on the floor.
This is one of the reasons a well-planned shaker kitchen, by Smile Kitchens, tends to stay tidier for longer than an older kitchen with shallow cabinets and awkward corner units. When drawers and cupboards are sized around what actually needs to live in them, from baking trays to small appliances, there is simply less pressure on the counters and less temptation to leave things out because there was nowhere sensible to put them.
If you are working with an existing kitchen rather than starting from scratch, even small upgrades can make a real difference. Adding drawer dividers, a slide-out bin, or a simple corner carousel is usually enough to unlock storage that a kitchen already has but is not using well.
Watch the Places Clutter Naturally Collects
Every kitchen has one or two spots that attract clutter no matter how organised the rest of the room is. It is often the counter nearest the door, where post, keys and school bags land the moment someone walks in, or the drawer nearest the kettle, which somehow ends up holding everything from spare batteries to takeaway menus.
Rather than fighting these spots, it is usually more effective to design around them. Giving the "landing zone" near the door a proper tray or small basket, and accepting that one drawer will always be a catch-all rather than pretending it will stay perfectly sorted, takes the pressure off the rest of the kitchen and stops the clutter spreading further.
Build in a Daily Reset
Organising a kitchen once is only half the job. Keeping it that way depends on a couple of small daily habits rather than one big weekend clear-out. A five-minute reset before bed, clearing the counters, loading the dishwasher and wiping down surfaces, means the room starts every morning the way it is supposed to look, rather than slowly sliding into clutter over the week.
The "one-touch" rule helps here too: put an item away the first time you pick it up, rather than setting it down "for now" somewhere else. It sounds small, but it is usually the difference between a kitchen that stays organised and one that needs a full reset every few weeks.
Keep the Pantry Working For You
Food storage is often where kitchen organisation breaks down fastest, because it is easy to lose track of what you already have. Decanting dry goods into clear, labelled containers makes stock visible at a glance and stops half-used bags getting pushed to the back and forgotten. Grouping items by type, baking, breakfast, snacks, tins, rather than by when they were bought, also makes it far easier to see what needs restocking before you shop, and cuts down on buying duplicates of things you already have.
It is worth doing a proper pantry reset every few months rather than only when things get visibly out of hand. Checking dates, consolidating half-empty containers and returning items to their proper zone takes far less time than letting the whole cupboard drift out of order again.
A well-organised kitchen is not about owning fewer things or living a more minimal life. It is about making sure everything has a logical home, so tidying up takes minutes rather than hours, and the room stays functional even on the busiest days, whether that is a rushed weekday breakfast or hosting a full family dinner.
Downsizing Your Home: A Practical Guide for Empty Nesters
When the kids leave home, a large house can feel like extra upkeep you no longer need. Downsizing offers a way to reduce costs, simplify your daily routine, and unlock equity for your next chapter. Whether you plan to travel more, focus on hobbies, or cut back on maintenance, a smaller home can suit your current lifestyle.
When the kids leave home, a large house can feel like extra upkeep you no longer need. Downsizing offers a way to reduce costs, simplify your daily routine, and unlock equity for your next chapter. Whether you plan to travel more, focus on hobbies, or cut back on maintenance, a smaller home can suit your current lifestyle.
In this guide, you will discover downsizing tips for empty nesters on how to:
• Spot the signs that it’s time to move on
• Create a realistic timeline and plan for aging in place
• Sort and declutter your belongings room by room
• Estimate moving expenses and use home equity wisely
• Compare property types and find the right community
• Organize a smooth packing and moving process
• Style a compact space for maximum comfort
Ready to see if downsizing is the right move? Let’s start by exploring why and when empty nesters choose to downsize their homes.
Why and When to Downsize
Empty nesters often find that a large family home no longer fits their lifestyle or goals. Downsizing offers both practical and emotional benefits. This section provides empty nesters downsizing tips by highlighting key reasons and signs that it may be time to move.
Financial Benefits
Moving to a smaller home can lower mortgage payments, property taxes, and utility bills. Selling a large house also frees equity to boost retirement funds, travel, or other plans. Reduced maintenance costs add up over time.
Lifestyle and Emotional Gains
Smaller, easier-to-manage spaces save time on chores and upkeep. That extra time can go toward hobbies, social activities, and travel. Decluttering can reduce stress, sharpen focus, and improve sleep. A simplified home also feels more welcoming for spontaneous gatherings.
Timing Considerations
The empty nest milestone, when children move out, is a natural trigger to reassess space needs. Emotional readiness plays a role, as honoring memories while making room for new priorities helps ease the transition.
Experts recommend starting decluttering and planning six months to two years before a move to avoid last-minute pressure. Many empty nesters say they wish they had downsized earlier, so watch for signs of underused space and rising upkeep burdens.
Planning and Future-Proofing Your Move
Setting realistic timelines
Experts suggest beginning the downsizing process 1 to 2 years before your target move date. Sell or remove excess furniture 6 to 9 months before listing. Create a month-by-month plan that breaks down tasks such as:
• Sorting belongings room by room
• Packing and labeling boxes by room or function
• Setting aside an “open first” box with essentials
• Scheduling movers or DIY transport
• Allowing buffer days for delays and final walkthroughs
Assessing aging-in-place features
Choose a single-level layout with zero-step entryways and wider doorways to support mobility. Plan for lever-style door handles, reinforced walls for grab bars, and non-slip flooring. These features add safety and comfort as your needs evolve.
Evaluating future needs
Reflect on your daily routines to decide how many bedrooms and bathrooms you actually use. Design multi-purpose spaces, for example, a guest room that doubles as an office. Prioritize built-in cabinetry and vertical shelving to maximize storage and adapt to changing lifestyles.
Decluttering and Categorizing Your Belongings
A clear plan keeps the process on track and reduces stress. Aim to begin 12 to 24 months before your move. The first step is a detailed inventory to guide your sorting decisions.
Inventory and categorization
Create a list of items in each room and note what you plan to keep. Check if each furniture piece fits your new space. Sort everything into keep, donate, sell, or discard. Sell large items six to nine months before listing to stage the home and find buyers.
Room-by-room strategy
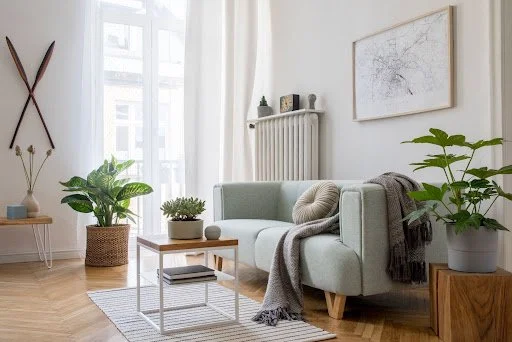
Work through your home in a set order to build momentum. A suggested sequence is: vehicle, living room, bedroom, closet, bathroom, kitchen, home office, guest spaces, and storage areas. Focus on one room at a time and complete sorting before moving on.
Piling method
• Keep: essentials and space-friendly items
• Donate: good-condition pieces
• Discard: broken or unusable objects
Managing sentimental items
Tackle keepsakes last. Reviewing these with a clear head avoids decision fatigue. Photograph or digitize items you cannot part with. Set a limit on how many you keep to honor memories while saving space.
Financial and Practical Considerations
Moving to a smaller home affects your budget now and later. Outline key costs, tap into home equity wisely, and plan for ongoing fees to avoid surprises.
Check yourcredit score early on to determine what mortgage terms or home equity loan rates you may qualify for. Draft a detailed spreadsheet to track all line items and update it as estimates firm up. Review your budget at each planning milestone to stay on track.
Budgeting your move
• Obtain multiple moving quotes and compare services
• Account for packing supplies, labor, or professional packers
• Factor in short-term storage if needed
• Include realtor commissions and closing costs
• Build in a 10 percent contingency fund for unexpected fees
Equity and tax considerations
Calculate net sale proceeds by subtracting your remaining mortgage balance, selling costs, and taxes from your sale price.
Remember the IRS allows up to $250,000 of capital gains exclusion for single filers and $500,000 for joint filers if you meet the two-out-of-five-year residency rule.
Consult a tax advisor to explore strategies like timing your sale or qualifying for primary residence exemptions.
Maintenance and ongoing costs
• Compare utility rates and estimate monthly bills
• Review insurance premiums and property tax changes
• If you join an HOA, study fee schedules and reserve fund policies
• Set aside at least 1 percent of the new home’s value annually for repairs
• Maintain an emergency fund to cover unexpected maintenance
Choosing Your Next Home
Selecting a downsized home means balancing comfort, costs, and lifestyle. Focus on property type, access needs, and upkeep to find a fit that supports your goals.
Comparing Home Types
Condos and townhomes simplify life with shared maintenance, giving you more time for hobbies and travel. They often feature pools, fitness centers, and lock-and-leave security. HOA fees vary, so factor in monthly dues.
55+ communities cater to mature residents with organized activities, clubhouses, and enhanced safety measures. These neighborhoods foster social ties but may restrict younger guests.
Single-story houses deliver privacy and outdoor space without shared walls. You can customize both interior and exterior, though yard care and repairs become your responsibility.
Accessibility and Maintenance
Plan for aging in place by choosing single-level floor plans, step-free entryways, and wider doorways. Condos and 55+ communities often cover exterior upkeep, snow removal, and landscaping in HOA fees. In a single-family home, budget for annual maintenance and emergency repairs. Set aside at least 1 percent of your home’s value each year.
Location and Community Factors
Prioritize walkability, transit access, and proximity to healthcare services. Check neighborhood safety ratings and nearby social clubs or volunteer opportunities. A supportive community enhances both convenience and quality of life as you settle into your next chapter.
Streamlining Your Move
Moving day runs more smoothly when you streamline each step. Use the following strategies to plan packing, schedule services, and choose the right movers.
Packing and labeling tips
• Color-code boxes by room (e.g., red for kitchen, blue for bedroom)
• Write contents and destination on each label
• Pack fragile items in sturdy boxes with cushioning
• Reserve an "open first" box with essentials: toiletries, chargers, basic tools
Logistics and scheduling
Plan utility transfers at least two weeks before move day. Schedule shut-off and activation dates for electricity, water, internet, and phone. Arrange mail forwarding with the postal service. Confirm elevator or parking permits for movers. Create a move-day timeline assigning tasks like loading, cleaning, and the final walkthrough.
DIY vs professional movers
DIY moves cut costs but require more time and muscle. Professional movers handle heavy lifting and offer insurance but add to expenses. Consider hybrid options: hire pros for bulky items and move smaller boxes yourself. Request binding estimates from at least two companies and verify online reviews before booking.
Optimizing and Styling Smaller Spaces
Downsizing does not mean sacrificing style or comfort. With the right choices, a compact home can feel open, organized, and inviting.
Multifunctional Furniture
Choose pieces that serve more than one purpose:
• Storage ottomans or benches
• Sofa beds or daybeds
• Expandable dining tables
Properly scaled furniture prevents overcrowding and keeps pathways clear. A guest room can double as a home office with a fold-down desk.
Maximizing Storage
Use built-in and hidden solutions:
• Under-bed drawers and closet organizers
• Ceiling-height shelves and wall-mounted hooks
• Woven baskets or decorative bins for quick cleanup
These ideas leverage vertical space and under-furniture areas to reduce visible clutter.
Design and Color Techniques
Light paint colors and glossy finishes reflect natural light. Strategically placed mirrors open sightlines. A cohesive palette across walls, rugs, and accessories unifies the space. Keep surfaces clear to enhance flow and maintain an airy feel.
Conclusion
Downsizing your home as an empty nester is more than a move to a smaller space. It is an opportunity to align your living environment with your current lifestyle, financial goals, and long-term needs. By following the steps in this guide, you can navigate each phase of the process with confidence.
Key takeaways:
• Recognize the signs that it is time to downsize, from underused rooms to rising upkeep costs
• Build a realistic timeline and factor in aging-in-place features for future comfort
• Declutter methodically using room-by-room sorting and manage sentimental items last
• Plan your budget carefully, tap into home equity wisely, and allow for ongoing expenses
• Compare home types, prioritize accessibility, and choose communities that match your lifestyle
• Streamline the move with clear packing, logistics planning, and the right mix of DIY and professional help
• Style your new space using multifunctionalfurniture, smart storage, and light-enhancing design techniques
Keep these empty nesters downsizing tips on hand to guide each step of your transition.
Sara Young

Sarah Young holds a Bachelor's in Marketing Communications from California Lutheran University. She enjoys running her website glitternglue.com where she can share her own and others' thoughts on lifestyle tips! During her spare time, she enjoys going to the beach with her dog or painting nature murals.

Supporting Sleep: Better Rest for the Whole Family
When you have a family, getting enough sleep can feel like a distant dream. Between nighttime feedings, toddler nightmares, and your own racing mind, a full night of uninterrupted rest often seems impossible. But sleep isn't a luxury; it's a fundamental part of health for everyone in your household. Improving sleep for the whole family is a process, but with a few consistent strategies, you can create a more restful home for everyone.
We partnered with a healthcare company. for this post. The opinions in the post are honest. All reviews and opinions expressed in this post are based on our personal views. We are excited because we know you will love it.
When you have a family, getting enough sleep can feel like a distant dream. Between nighttime feedings, toddler nightmares, and your own racing mind, a full night of uninterrupted rest often seems impossible. But sleep isn't a luxury; it's a fundamental part of health for everyone in your household. Improving sleep for the whole family is a process, but with a few consistent strategies, you can create a more restful home for everyone.
Why Sleep Matters for Parents
We all know how important sleep is for children's growth and development. But for parents, getting enough rest is just as critical. Being chronically sleep-deprived can make you more irritable and less patient. It also affects your thinking, making it harder to focus, solve problems, and manage the daily logistics of family life. Getting enough sleep is a form of self-care that directly benefits your children, allowing you to be a more present, energetic, and engaged parent.
When you're well-rested, you have more emotional and mental energy to handle the challenges of parenting. You can respond to a toddler's tantrum more calmly, help with homework more effectively, and find more joy in everyday moments. Prioritizing your own sleep isn't selfish; it's a necessary step toward building a healthier and happier family dynamic.
Creating a Relaxing Bedtime Routine
A predictable bedtime routine tells your body and mind it's time to wind down. This isn't just for kids; adults also benefit from this transition period. An effective routine doesn't have to be complicated. The goal is to shift from the day's high energy to a state of calm. An hour before bed, start by dimming the lights and turning off all screens, as the blue light can interfere with melatonin production.
Think about adding calming activities that the whole family can enjoy together or separately. This might include a warm bath or shower, reading books aloud, listening to quiet music or a calming podcast, or doing gentle stretching or simple breathing exercises.
Having a structured nighttime routine helps regulate your body's internal clock, making it easier to fall asleep and wake up naturally. The key is to find what works for your family and stick with it.
Exploring Natural Sleep Aids
For adults who still struggle to unwind, even with a solid routine, some natural aids can help you relax. Many people turn to herbal teas like chamomile or valerian root to feel calmer before bed. Supplements such as magnesium are also used to help relax muscles and quiet the nervous system.
In recent years, other options have gained attention for their potential to support rest. For adults, products containing CBD are sometimes used to help manage stress and encourage a more relaxed state before sleep. As with any supplement, it's wise to speak with a healthcare provider before adding something new to your routine to make sure it's the right choice for you.
Environmental Factors for Rest
Your sleep environment plays a big role in how well you rest. A few small adjustments to the bedroom can make a huge difference for everyone in the family. Try to create a space that is cool, dark, and quiet.
Darkness: Use blackout curtains or shades to block out streetlights and early morning sun. Cover or remove any electronics with bright indicator lights.
Temperature: A cooler room temperature generally helps you sleep better. Experts often recommend keeping it between 60 and 67 degrees Fahrenheit.
Sound: If outside noise is a problem, a white noise machine can help mask disruptive sounds. For parents who are light sleepers, earplugs can be a simple solution.
Optimizing the bedroom for sleep reinforces the purpose of the space. It signals to your brain that this room is for rest and relaxation, not work or entertainment.
Consistency is Key for All Ages
The single most effective strategy for better sleep is consistency. Going to bed and waking up at roughly the same time every day, even on weekends, helps anchor your body's circadian rhythm. When your internal clock is stable, it's much easier to fall asleep at night and feel alert during the day.
This principle applies to everyone, from your youngest child to yourself. While it can be tempting to let schedules slide on a Friday night, staying within an hour of your normal bedtime and wake-up time can prevent the "social jetlag" that makes Monday mornings so difficult. These habits are a core part of good family sleep hygiene and build a strong foundation for lifelong healthy sleep patterns.
Making these changes takes time and patience, especially with children. But working together as a family and staying consistent helps you transform your home into a sanctuary for rest and rejuvenation.