

A resource for those seeking information on organizing and transforming spaces.

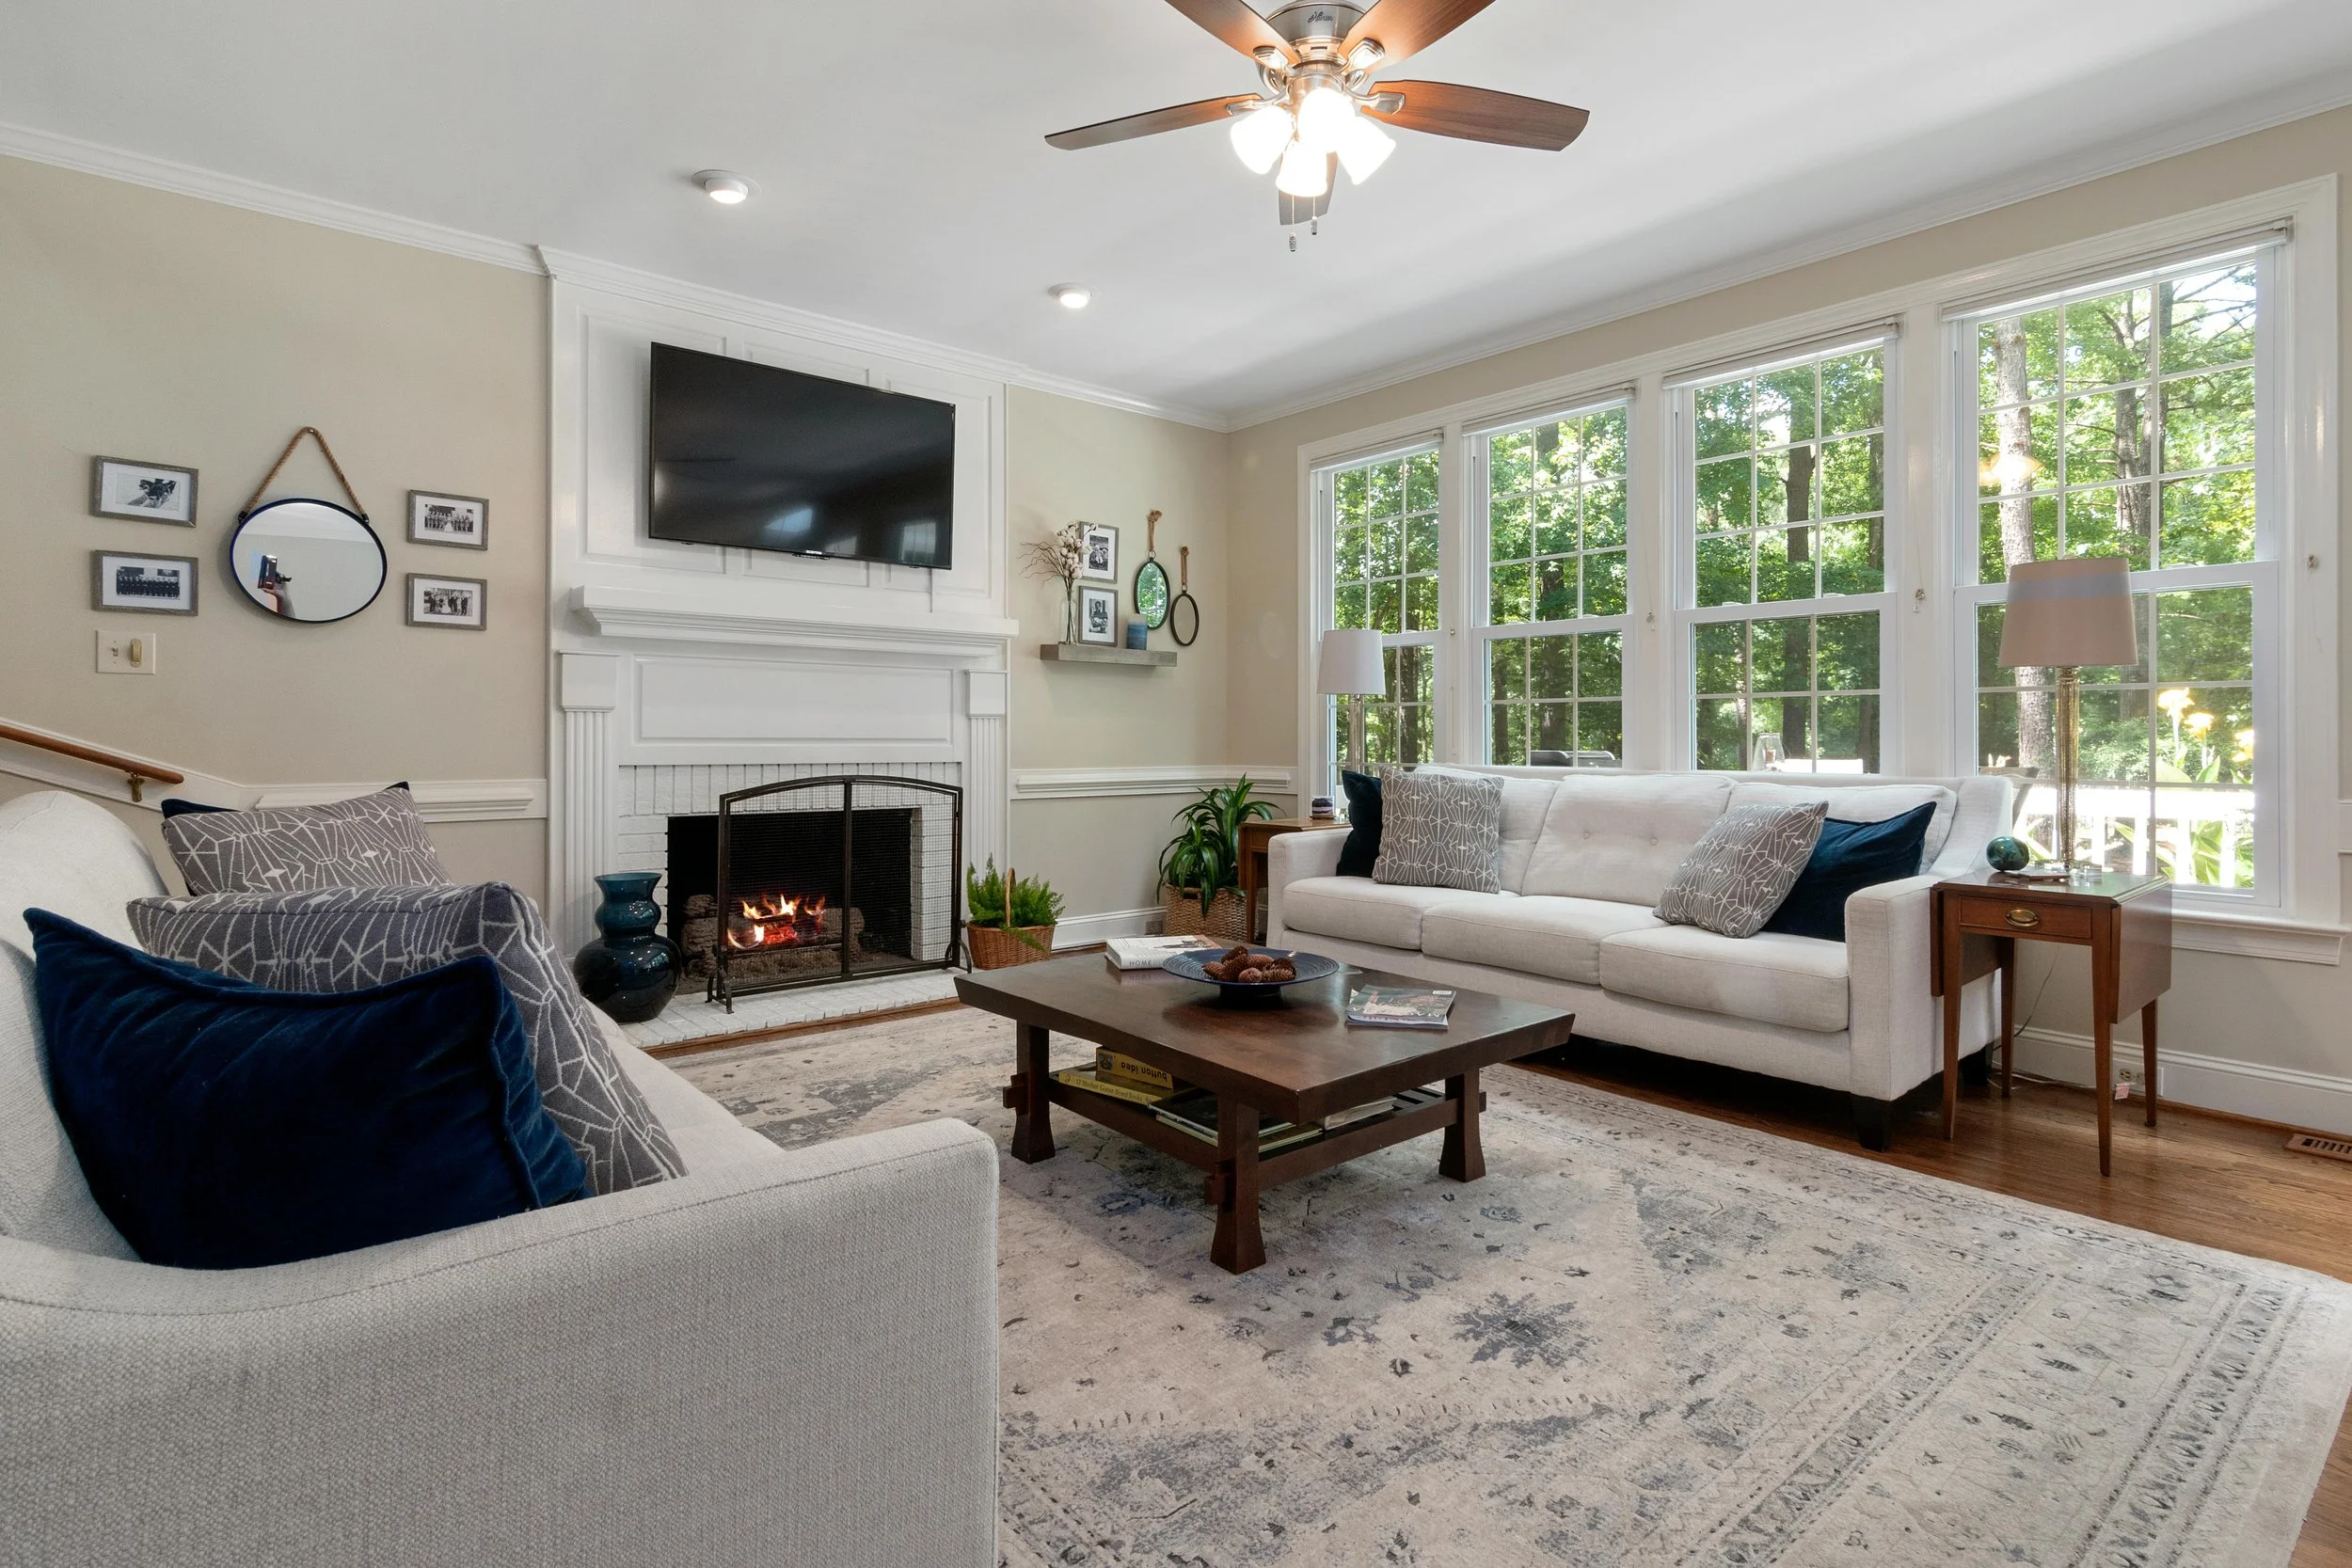
Ways to Prepare Your Home for the Rainy Season
Prepare your home for the rainy season with practical maintenance tips that help prevent leaks, water damage, and costly repairs during heavy rainfall.
When the rainy season arrives, homes are exposed to increased moisture, heavy downpours, and potential water damage. Without proper preparation, rain can lead to leaks, mold growth, foundation issues, and costly repairs. Taking time to implement the ways to prepare your home for the rainy season can protect your property and give you peace of mind. From roof maintenance to improving drainage, small preventative steps can make a significant difference in keeping your home safe and dry.
Inspect and Maintain Your Roof
Your roof is the first line of defense against rain, making it one of the most important areas to inspect before the rainy season begins. Over time, shingles can crack, loosen, or fall off due to age or weather exposure. Even minor roof damage can allow water to seep into your attic and walls during heavy rain.
Start by visually inspecting your roof for missing or damaged shingles. Look for signs of sagging areas or debris buildup that could trap moisture. If you notice any issues, scheduling repairs promptly can prevent small problems from turning into major leaks. Professional roof inspections can also help identify hidden weaknesses that may not be obvious from the ground.
Clean and Repair Gutters and Downspouts
Gutters and downspouts play a crucial role in directing rainwater away from your home. When they become clogged with leaves, dirt, or debris, water can overflow and collect around your foundation. This can eventually lead to basement flooding, soil erosion, or structural damage.
Before the rainy season begins, thoroughly clean out your gutters and check that water flows freely through the downspouts. Make sure downspouts direct water several feet away from your home. Installing gutter guards can also help reduce debris buildup and make maintenance easier throughout the season.
Seal Windows and Doors
Rain often finds its way into homes through small gaps around windows and doors. Over time, weatherstripping and caulking can deteriorate, allowing moisture to seep indoors. This can cause water damage, drafts, and increased humidity inside your home. With doors and other entrances, it’s equally important to know the best types of mats to prevent rainwater from entering the home.
Inspect the edges of your windows and doors for cracks or worn seals. Reapply caulk where necessary and replace old weatherstripping to create a tighter barrier against moisture. Proper sealing not only keeps rainwater out but also improves your home's energy efficiency by reducing drafts.
Improve Yard Drainage
Poor drainage around your home can create serious problems during periods of heavy rainfall. Water that pools near your foundation can slowly seep into basements or crawl spaces, leading to mold growth and structural damage.
Start by checking the slope of the ground around your home. Ideally, the soil should slope away from the foundation to guide water outward. If pooling occurs in certain areas, consider adding soil to improve grading or installing drainage solutions such as French drains or gravel trenches. Maintaining proper yard drainage can greatly reduce the risk of water entering your home.
Prepare for a Safer Rainy Season
Preparing your home for the rainy season does not have to be complicated, but it does require attention to key areas that protect your property from moisture. Regular roof inspections, properly functioning gutters, sealed windows and doors, and effective drainage all play a role in preventing water damage.
By addressing these areas before heavy rains arrive, homeowners can reduce the risk of costly repairs and maintain a safe, comfortable living environment throughout the season. A little preparation now can go a long way toward protecting your home from the challenges that rainy weather can bring.

Water heater repair Marietta: how homeowners can avoid costly emergency breakdowns
Water heater repair in Marietta is something most homeowners don’t think about until the day the hot water suddenly disappears.
We partnered with a home improvement company for this post. The opinions in the post are honest. All reviews and opinions expressed in this post are based on our personal views. We are excited because we know you will love it.

Water heater repair in Marietta is something most homeowners don’t think about until the day the hot water suddenly disappears.
I learned this the hard way one winter morning when the shower turned ice cold halfway through.
That moment quickly shifts your mindset from routine comfort to urgent problem-solving.
Understanding how these systems fail and what warning signs to watch can save you from stress, expense, and disruption.
Most breakdowns don’t happen overnight.
They build up quietly through small issues that go unnoticed.
Why water heaters fail when you least expect it
Water heaters work under constant pressure, heat, and mineral exposure.
Over time, sediment settles at the bottom of the tank and hardens.
This buildup forces the system to work harder and reduces efficiency.
In many Marietta homes, hard water accelerates this process.
I once visited a friend whose unit was making popping sounds for weeks.
He ignored it until the tank overheated and shut down completely.
That sound was trapped steam under sediment layers.
Ignoring small noises often leads to larger system failures, which is why timelywater heater repair Marietta is essential to prevent bigger issues.
Early warning signs homeowners should never ignore
Inconsistent water temperature
Fluctuating hot water is often the first sign that something is wrong.
You may notice it turns warm, then suddenly cold, then hot again.
This usually points to thermostat issues or sediment interference.
Catching this early can prevent full system failure.
Strange noises coming from the tank
Popping, rumbling, or banging sounds indicate internal buildup.
These noises mean the heater is struggling to maintain performance.
I’ve heard tanks that sounded like popcorn machines before they failed.
That’s never a good sign.
Rusty or discolored water
Brown or metallic water suggests corrosion inside the tank.
This can lead to leaks or contamination.
Once corrosion spreads, replacement may be the only option.
Water is pooling around the base
Leaks often start small and grow quickly.
A slight puddle can turn into major water damage if ignored.
Always investigate even minor moisture around the unit.
Simple maintenance habits that prevent major repairs
Flush the tank regularly
Flushing removes sediment buildup and improves efficiency.
Most professionals recommend doing this once or twice a year.
It’s a simple process that extends the lifespan of your system.
Check the anode rod
The anode rod protects the tank from rust.
Over time, it deteriorates and needs replacement.
Ignoring it allows corrosion to attack the tank directly.
Inspect pressure relief valves
These valves prevent dangerous pressure buildup.
If they fail, the system becomes unsafe.
Testing them periodically ensures proper function.
Real-life experience: how a small fix saved a major expense
A neighbor in Marietta noticed his water wasn’t getting as hot as usual.
He assumed it was just a seasonal temperature change.
After a quick inspection, a technician found heavy sediment buildup.
A simple flush and minor part replacement solved the issue.
If he had waited, the heating element would have burned out.
That repair would have cost significantly more.
Preventive action always costs less than emergency service.
When to call a professional instead of DIY
Not every issue should be handled alone.
Gas heaters, electrical components, and pressure systems require expertise.
Trying to fix complex issues without proper knowledge can make things worse.
I once attempted a DIY repair and ended up damaging the thermostat wiring.
That mistake doubled the repair cost.
Knowing your limits is part of smart homeownership.
Energy efficiency and cost savings go hand in hand
A well-maintained water heater uses less energy.
Sediment buildup forces the system to work harder and consume more power.
This increases utility bills over time.
Efficient systems heat water faster and maintain consistent temperature.
Regular servicing keeps operating costs low and performance high.
Tank vs tankless systems: what homeowners should know
Traditional tank systems
Tank heaters store hot water and are common in many homes.
They are reliable but require regular maintenance.
Sediment buildup is their biggest challenge.
Tankless systems
Tankless units heat water on demand.
They are energy-efficient and space-saving.
However, they still require descaling and maintenance.
Ignoring maintenance leads to reduced performance even in tankless models.
Seasonal tips for Marietta homeowners
Cold weather puts extra strain on water heaters.
Incoming water temperatures drop, forcing the system to work harder.
Insulating pipes and the tank can improve efficiency.
During summer, mineral buildup tends to accelerate due to higher usage.
Adjusting maintenance schedules based on seasons helps prevent breakdowns.
How proactive care protects your home investment
Your water heater is one of the most used appliances in your home.
Neglecting it risks not just inconvenience but also property damage.
Leaks can damage floors, walls, and nearby structures.
Routine inspections reduce these risks significantly.
I’ve seen cases where a neglected tank caused thousands in water damage.
That situation could have been avoided with basic maintenance.
Final thoughts on avoiding emergency breakdowns
Water heater repair Marietta situations often start with small, avoidable issues.
Paying attention to early warning signs makes all the difference.
Regular maintenance, timely repairs, and professional inspections keep systems running smoothly.
A little effort today prevents major disruptions tomorrow.
Hot water should be something you rely on, not worry about.
Simple Home Modifications That Support Better Mobility
Mobility inside the home should feel natural and safe, yet many houses are not designed with accessibility in mind. Narrow pathways, slippery floors, and poorly placed furniture can make everyday movement more difficult than it needs to be.
Mobility inside the home should feel natural and safe, yet many houses are not designed with accessibility in mind. Narrow pathways, slippery floors, and poorly placed furniture can make everyday movement more difficult than it needs to be.
The good news is that improving mobility at home often requires only simple adjustments. Small modifications such as better lighting, supportive fixtures, and thoughtful furniture placement can make daily activities easier and safer. These practical changes help create a living environment that supports independence and comfort for people who want to move around their homes with greater confidence.
Creating Open and Accessible Pathways
One of the most effective ways to improve mobility at home is to ensure that movement between rooms is simple and unobstructed. Many homes contain small barriers that can easily interfere with safe movement.
Furniture placed too close together can limit walking space, especially for individuals who use mobility aids such as walkers or canes. Rearranging furniture to create wider pathways allows for smoother transitions between areas of the home. Clutter is another common issue that affects accessibility. Items left on the floor, loose cables, and decorative objects placed in walkways can quickly become tripping hazards. Keeping pathways clear helps reduce the risk of accidents while making movement more comfortable.
These simple changes create a safer and more accessible environment without requiring major construction.
Adding Support Where Movement Happens Most
Certain areas of the home require more physical effort than others. Bathrooms, entryways, and staircases often involve movements that challenge balance and stability.
Installing grab bars is one of the easiest ways to increase support in these areas. Grab bars placed near toilets, inside showers, and next to bathtubs allow individuals to steady themselves while sitting, standing, or shifting weight. Handrails along staircases provide additional balance when moving between levels of the home. Even in single level homes, support handles near entrances or steps can make a noticeable difference. Many modern grab bars are designed to blend into the overall look of a home, which means safety improvements do not need to compromise aesthetics.
Understanding Mobility Challenges and Home Design
For individuals living with conditions that affect movement, the design of a home environment becomes even more important. Neurological conditions, balance issues, and muscle weakness can make everyday activities more difficult, especially when the home layout does not support safe movement. Simple adjustments such as wider hallways, grab bars, minimal clutter, and stable flooring can greatly improve safety and accessibility. These changes allow individuals to move more freely and perform daily tasks with less strain.
People who experience more complex mobility challenges often benefit from professional guidance as well. Visiting a movement disorder clinic can help individuals better understand how neurological conditions affect movement and how their home environment can be adapted to support their needs.
Making Bathrooms Safer and Easier to Use
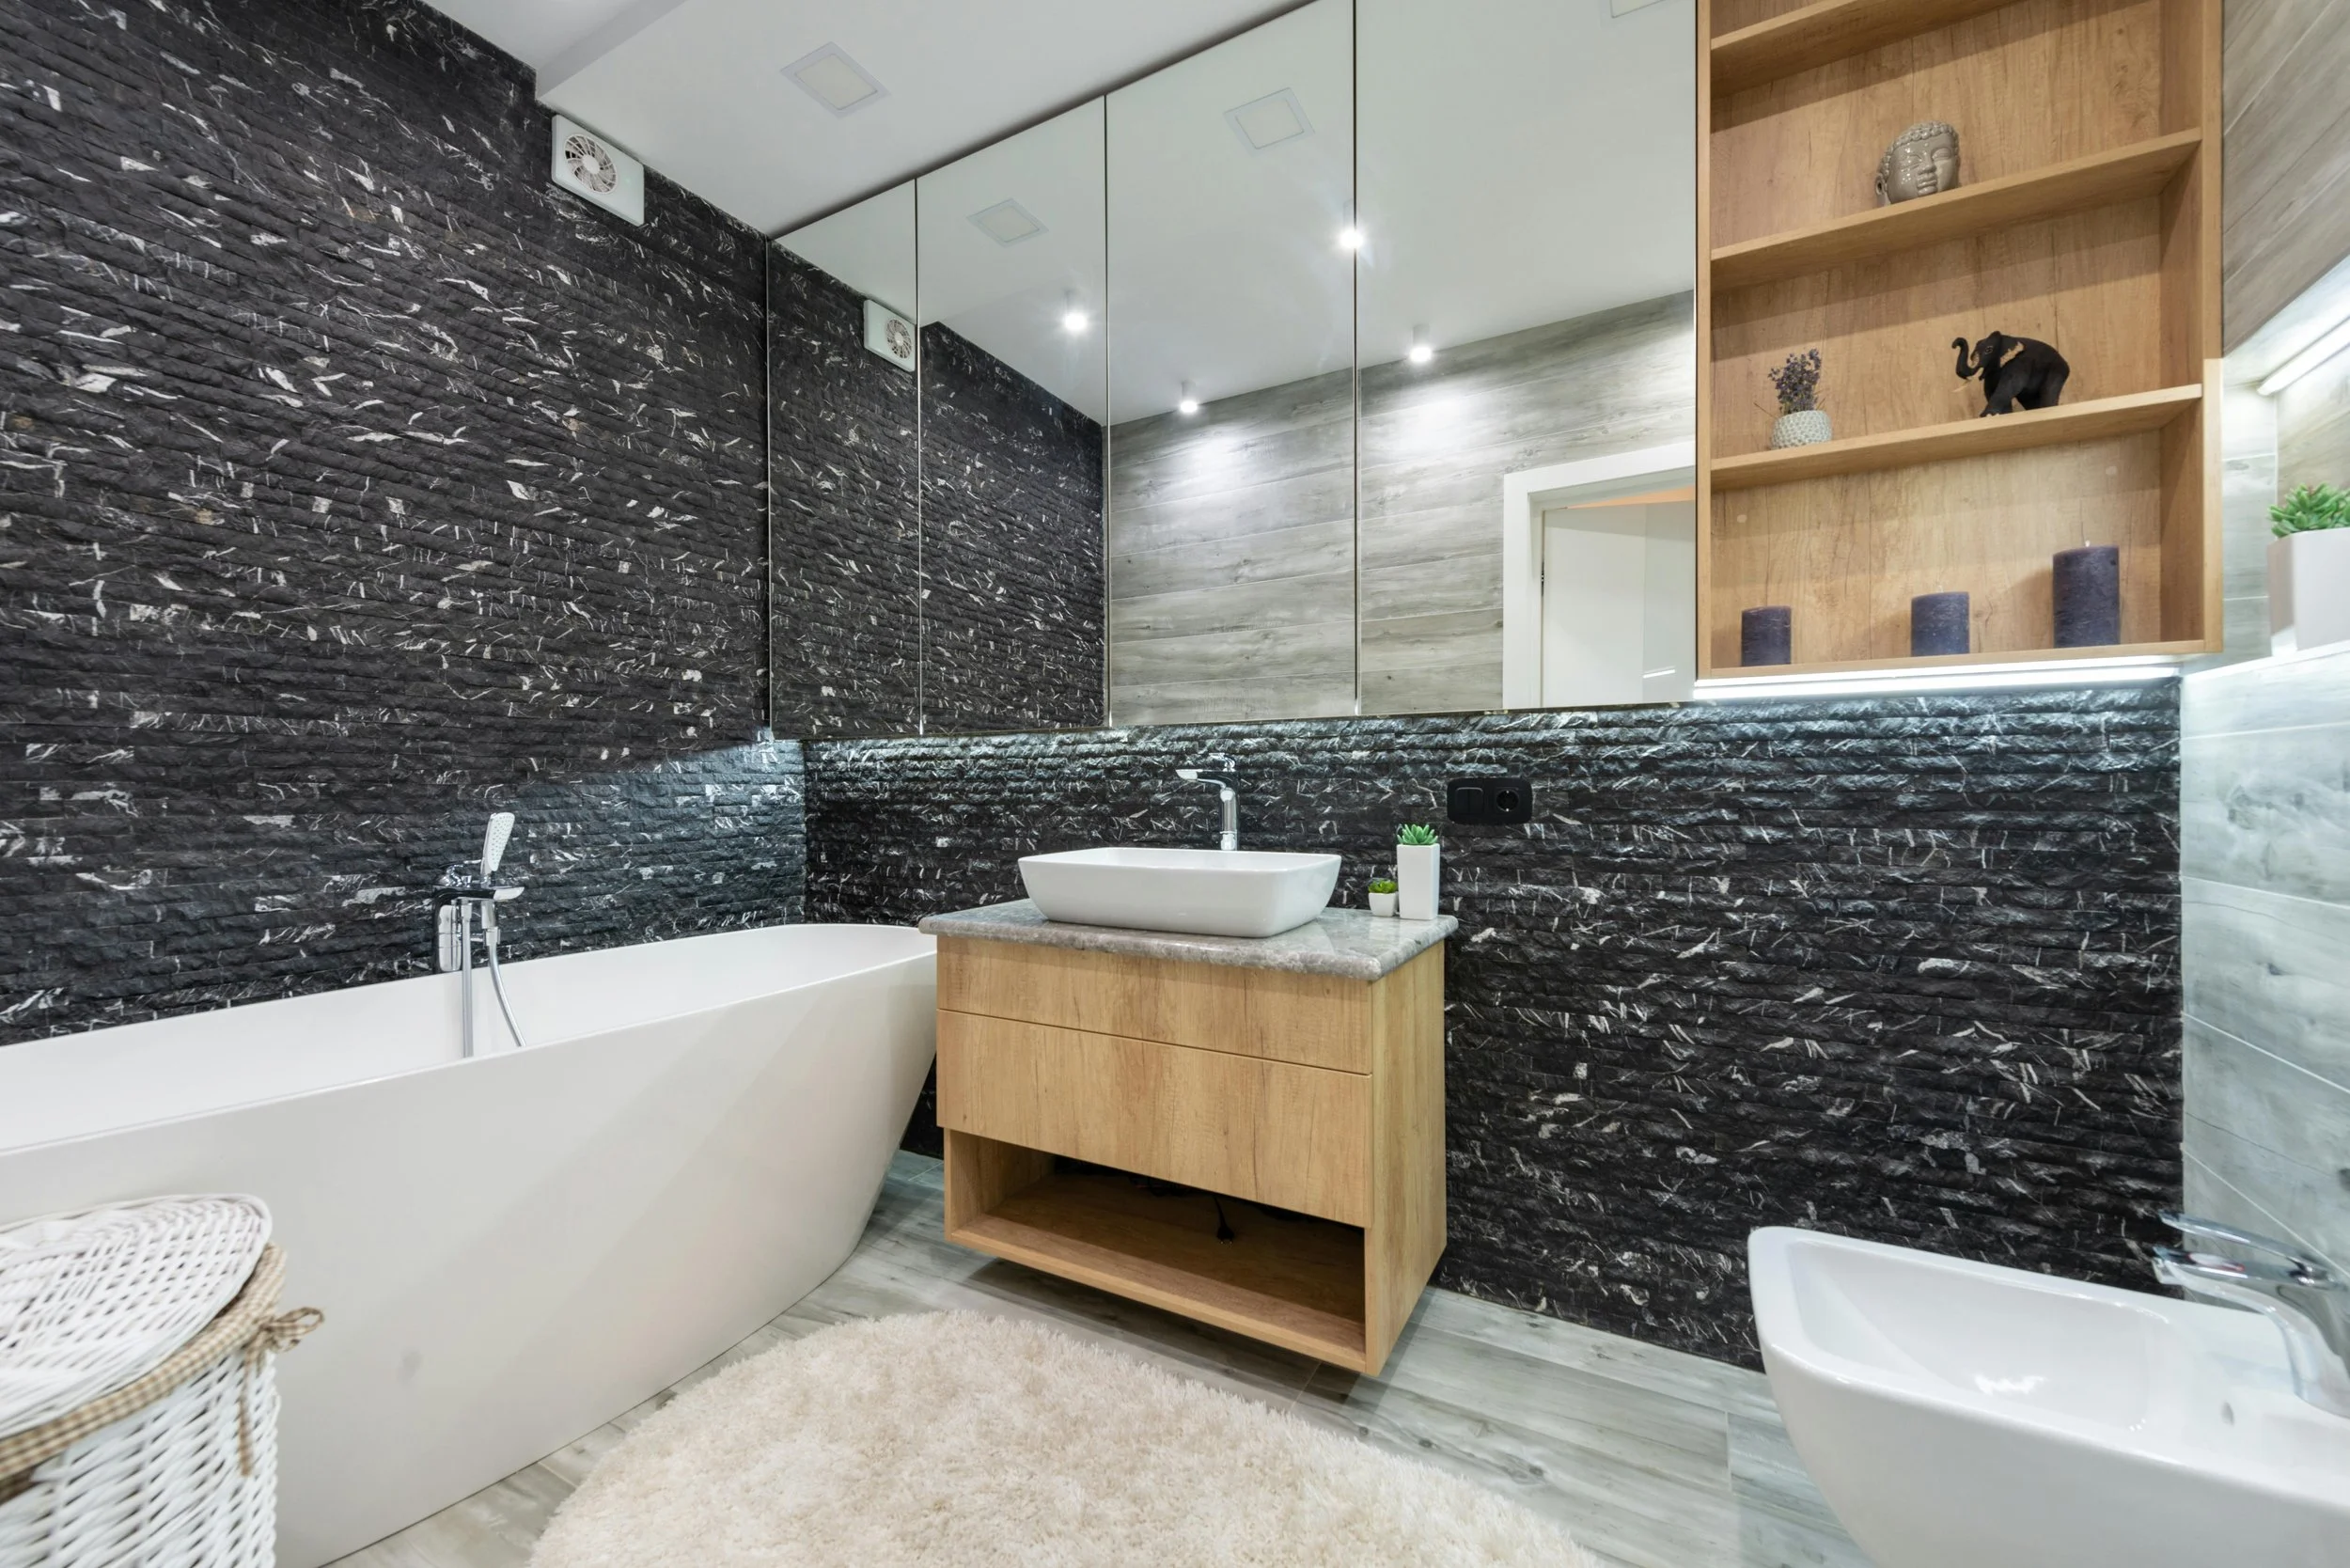
Bathrooms often present the highest risk for slips and falls because of wet surfaces and limited support points. Improving bathroom accessibility is one of the most important steps when modifying a home for better mobility. Non slip mats or textured flooring can provide additional grip and reduce the chance of slipping. Installing a walk in shower is another common solution because it removes the need to step over a bathtub edge.
Shower chairs can help individuals maintain balance while bathing, especially if standing for long periods is difficult. Handheld shower heads are also helpful because they allow greater flexibility during use.Raised toilet seats can make sitting and standing easier by reducing the amount of bending required. These simple adjustments allow individuals to use the bathroom with greater independence and safety.
Improving Kitchen Accessibility
The kitchen is a space where many daily activities take place, including cooking, cleaning, and preparing food. Small changes in kitchen design can make these tasks easier for individuals with limited mobility.
Placing commonly used items within easy reach helps reduce unnecessary bending and stretching. Frequently used cookware, dishes, and utensils should ideally be stored between waist and shoulder height. Pull out cabinet shelves are another helpful modification. Instead of reaching deep into cabinets, individuals can slide shelves outward to access items more comfortably.Lever style faucet handles are easier to operate than traditional round knobs. These handles require less grip strength and allow smoother movement when turning water on and off.
Reorganizing the kitchen with mobility in mind helps maintain independence and makes everyday tasks less physically demanding.
Choosing Flooring That Supports Stability
Floor surfaces can significantly affect how safely individuals move around their homes. Slippery or uneven flooring can create unnecessary risks, especially for people who already experience mobility challenges.
Smooth, even flooring materials such as vinyl, laminate, or hardwood often provide better stability than thick carpeting. Low pile carpets can also be suitable because they allow mobility aids to move more easily across the surface.
Designing Bedrooms for Comfortable Movement
Bedrooms should offer both comfort and easy accessibility. Since people spend many hours in this space, it is important that getting in and out of bed feels safe and manageable. One of the key factors is bed height. If a bed is too high or too low, sitting down or standing up can become difficult. Adjustable bed frames or bed risers can help create a height that makes these movements easier and more comfortable.
Lighting and organization also play an important role in supporting safe movement at night. Placing lamps or light switches within reach of the bed allows individuals to turn on the light before standing up..
Conclusion
Improving mobility at home does not always require major renovations or expensive remodeling. In many cases, small and practical changes can significantly improve safety, comfort, and independence.
Creating clear pathways, adding supportive fixtures, improving lighting, and choosing stable flooring are all effective ways to make homes easier to navigate. Bathrooms, kitchens, and bedrooms can also be adjusted with simple modifications that support everyday activities.

Pool Plastering vs Pool Resurfacing: What Homeowners Should Know
Pool plastering is one of the most important steps in keeping a swimming pool smooth, watertight, and visually appealing.
We partnered with a home improvement company for this post. The opinions in the post are honest. All reviews and opinions expressed in this post are based on our personal views. We are excited because we know you will love it.

Pool plastering is one of the most important steps in keeping a swimming pool smooth, watertight, and visually appealing.
Many homeowners only start thinking about their pool surface when something feels off under their feet.
I remember stepping into a neighbor’s pool during a backyard barbecue and immediately noticing the rough texture along the shallow end.
The water looked clear, but the surface felt gritty and uneven.
That moment showed how the condition of the interior finish affects the entire swimming experience.
Understanding the difference between pool plastering and resurfacing can help homeowners make smarter renovation decisions.
Choosing the right option can extend the life of the swimming pool while saving thousands of dollars in unnecessary renovations.You can learn more about the process by visiting pool plastering.
What Pool Plastering Actually Does
The plaster layer is the interior coating applied directly over the concrete shell of a swimming pool.
This finish creates the smooth surface swimmers feel when they move along the walls or steps.
It also acts as a protective barrier that seals the pool structure and prevents water from penetrating the concrete underneath.
Over time, chemical exposure, sunlight, and regular use slowly wear down that protective layer.
When that happens, the surface begins to lose its smooth texture and visual brightness.
A fresh plaster coat restores the interior finish while improving durability and appearance.
Most residential pools need a new plaster layer every 7 to 12 years, depending on water chemistry and maintenance habits.
A pool technician once told me that many homeowners mistake surface wear for simple staining.
They spend months trying to scrub discoloration away, only to realize the finish itself has deteriorated.
Applying a new plaster layer often makes the pool look brand new again.
Signs Your Pool Surface Needs Attention
Surface damage usually develops gradually, which makes it easy to overlook early warning signs.
One of the first clues is a rough or chalky texture underfoot.
Swimmers often notice this when they push off from the wall or walk along the shallow end.
Another sign is persistent staining that doesn't disappear even after chemical balancing and brushing.
Mineral deposits can settle into worn areas of the surface and create uneven colors.
Small cracks or tiny pits may also begin forming across the interior walls.
These tiny holes, sometimes called spalling, indicate the surface layer is breaking down.
A homeowner I spoke with once noticed white dust collecting in his pool filter every week.
That powder turned out to be deteriorating plaster slowly flaking away from the surface.
Addressing the issue early prevented much larger repairs later.
Pool Resurfacing: When Repairs Go Deeper
Resurfacing is a more extensive renovation process compared to standard plaster work.
Instead of simply applying a fresh coat, resurfacing involves removing the existing interior finish and installing a completely new surface system.
This step becomes necessary when the underlying material has deteriorated or when structural cracks appear in the pool shell.
Resurfacing also gives homeowners the opportunity to upgrade their pool finish to more durable materials.
Quartz finishes, pebble aggregates, and specialty coatings offer stronger protection than traditional plaster.
These finishes also change the visual appearance of the water by adding texture and depth.
I once saw a pool transformed with a pebble finish during a renovation project.
Before resurfacing, the water looked flat and dull.
After the new finish was installed, the pool reflected sunlight beautifully and looked like something you'd see at a luxury resort.
While resurfacing costs more upfront, it often provides longer-lasting durability.
The Cost Difference Homeowners Should Expect
Budget considerations play a major role when homeowners compare surface renovation options.
Applying a new plaster layer typically costs less because the underlying structure remains intact.
The process focuses on restoring the interior finish rather than rebuilding the entire surface system.
Resurfacing, however, requires additional labor to remove the existing material and install a new finish.
That extra construction work increases the overall project cost.
However, choosing the cheaper option when more serious structural damage exists can lead to repeated repairs later.
A homeowner in my neighborhood learned this lesson the hard way.
He replastered his pool twice within six years because the original structural damage had not been addressed.
Eventually, a full resurfacing project solved the underlying issue and prevented further deterioration.
This example shows why understanding the true condition of the pool is critical before making renovation decisions.
How Surface Materials Affect Pool Longevity
The material used for a pool’s interior finish plays a huge role in durability and maintenance.
Traditional plaster surfaces remain the most common option in residential pools.
They create a smooth, classic look and provide reliable performance when properly maintained.
Quartz finishes improve durability by mixing plaster with crushed quartz crystals.
This combination strengthens the surface and adds subtle shimmer under sunlight.
Pebble finishes go even further by embedding small natural stones into the surface layer.
These finishes are extremely durable and resist chemical wear much better than standard plaster.
A friend of mine recently upgraded to a pebble finish during a renovation project.
He immediately noticed that algae buildup became less frequent and that cleaning required far less effort.
Selecting the right finish can dramatically affect maintenance requirements and overall lifespan.
Maintenance Habits That Extend Surface Life
Even the best pool finish can deteriorate quickly without proper maintenance.
Water chemistry management is one of the most important factors.
When pH levels become unbalanced, acidic water can slowly dissolve interior surfaces.
Regular brushing also prevents mineral buildup and algae growth that damage finishes over time.
Routine inspections allow homeowners to catch small cracks or rough areas before they become major problems.
A pool professional once compared surface care to brushing your teeth.
Skipping routine maintenance might not cause immediate damage, but the problems slowly accumulate.
Consistent care helps extend the life of the interior finish and prevents expensive repairs later.
Homeowners who stay on top of maintenance often get several extra years out of their pool surface.
Making the Right Choice for Your Pool
Choosing between plaster repair and full resurfacing depends largely on the condition of the pool shell.
If the damage is limited to surface wear, applying a new plaster layer may be the most practical solution.
When deeper cracks, flaking surfaces, or structural deterioration appear, resurfacing is usually the better long-term investment.
Understanding what lies beneath the surface is key to making the right decision.
A professional inspection can reveal whether the issue is cosmetic or structural.
Once the right renovation method is chosen, the transformation can be dramatic.
A restored pool surface improves comfort, enhances appearance, and extends the life of the entire structure.
For many homeowners, it turns the pool back into the centerpiece of their backyard again.