

A resource for those seeking information on organizing and transforming spaces.

What to Do Immediately After a Pipe Bursts in Your Home
A burst pipe rarely announces itself politely. One moment the house is quiet, and the next, water is spreading across a floor faster than anyone expects. The first few minutes after that happen matter more than almost any other point in the recovery process, because what a homeowner does right away often determines whether the damage stays contained or spreads into something far more costly.

A burst pipe rarely announces itself politely. One moment the house is quiet, and the next, water is spreading across a floor faster than anyone expects. The first few minutes after that happen matter more than almost any other point in the recovery process, because what a homeowner does right away often determines whether the damage stays contained or spreads into something far more costly.
Stop the Water at the Source
The first move is always the same: find the water and stop it. Every home should have a main shutoff valve, typically located near the water meter or where the main line enters the house, and turning it off halts the flow immediately rather than waiting for a plumber to arrive. Anyone unsure where that valve sits should locate it now, long before an emergency forces a frantic search through the basement.
If the burst happens near a single fixture, such as under a sink or behind a washing machine, a local shutoff valve may stop the leak without cutting water to the entire house. Either way, speed matters far more than precision in that first moment. A flooded hallway only grows worse with every passing minute the valve stays open.
Cut Power to Affected Areas
Water and electricity make a dangerous combination, and a flooded room is not a safe place to leave outlets or appliances powered on. If water has reached an electrical panel, an outlet, or any plugged-in device, and it can be reached without stepping into standing water, shutting off power to that area or the whole house is a necessary next step. When the panel itself sits in or near the flooding, the safer choice is to leave it alone and call an electrician rather than risk a shock.
This step often gets overlooked in the panic of the moment, but it deserves the same urgency as shutting off the water. A submerged outlet or a soaked appliance left running is one of the more preventable hazards in a flooding situation, and a few extra seconds spent flipping a breaker can prevent an injury far more serious than the water damage itself.
Document the Damage Immediately
Once the immediate danger is under control, it helps to slow down just enough to record what happened. Photos and short videos of the flooding, the source of the leak, and any damaged belongings create a record that will matter later, whether for an insurance claim or simply for tracking what needs attention first. This does not need to be elaborate. A phone camera and a few extra minutes are enough.
Homeowners should also start moving valuables and easily damaged items, such as electronics, rugs, or furniture, away from standing water where it is safe to do so. Acting quickly here can preserve items that would otherwise be lost to prolonged water exposure, particularly anything made of wood or fabric that begins absorbing moisture within hours.
Call a Restoration Team Fast
Perhaps the most important decision in the entire process is how quickly a professional restoration team gets involved. Water that sits for even a day can seep into subflooring, drywall, and insulation, creating conditions for mold growth and structural weakening that are far more expensive to fix than the original leak. A company available around the clock, such as Midwest Restoration, can respond before that damage has a chance to set in, using extraction equipment and drying techniques that go well beyond what a homeowner can manage with towels and fans.
Calling early also tends to simplify the insurance process. A documented, fast response gives an adjuster a clearer picture of the original damage, rather than a murkier situation shaped by days of additional moisture. Homeowners who wait, hoping the damage looks manageable enough to handle alone, often find the opposite is true once walls and flooring have had time to absorb what first appeared to be a contained mess.
A burst pipe is stressful by nature, but it does not have to become a prolonged ordeal. Shutting off the water, securing the electricity, documenting what happened, and getting a trusted restoration team on site quickly gives a home its best chance at a full and reasonably swift recovery.
Garage Organization Tips That Help Keep Pests Away
A clean, organized garage can make a big difference in pest control. By reducing clutter, sealing entry points, and storing items properly, homeowners can make the garage less attractive to insects, rodents, and other unwanted pests.
We partnered with a home improvement company for this post. The opinions in the post are honest. All reviews and opinions expressed in this post are based on our personal views. We are excited because we know you will love it.
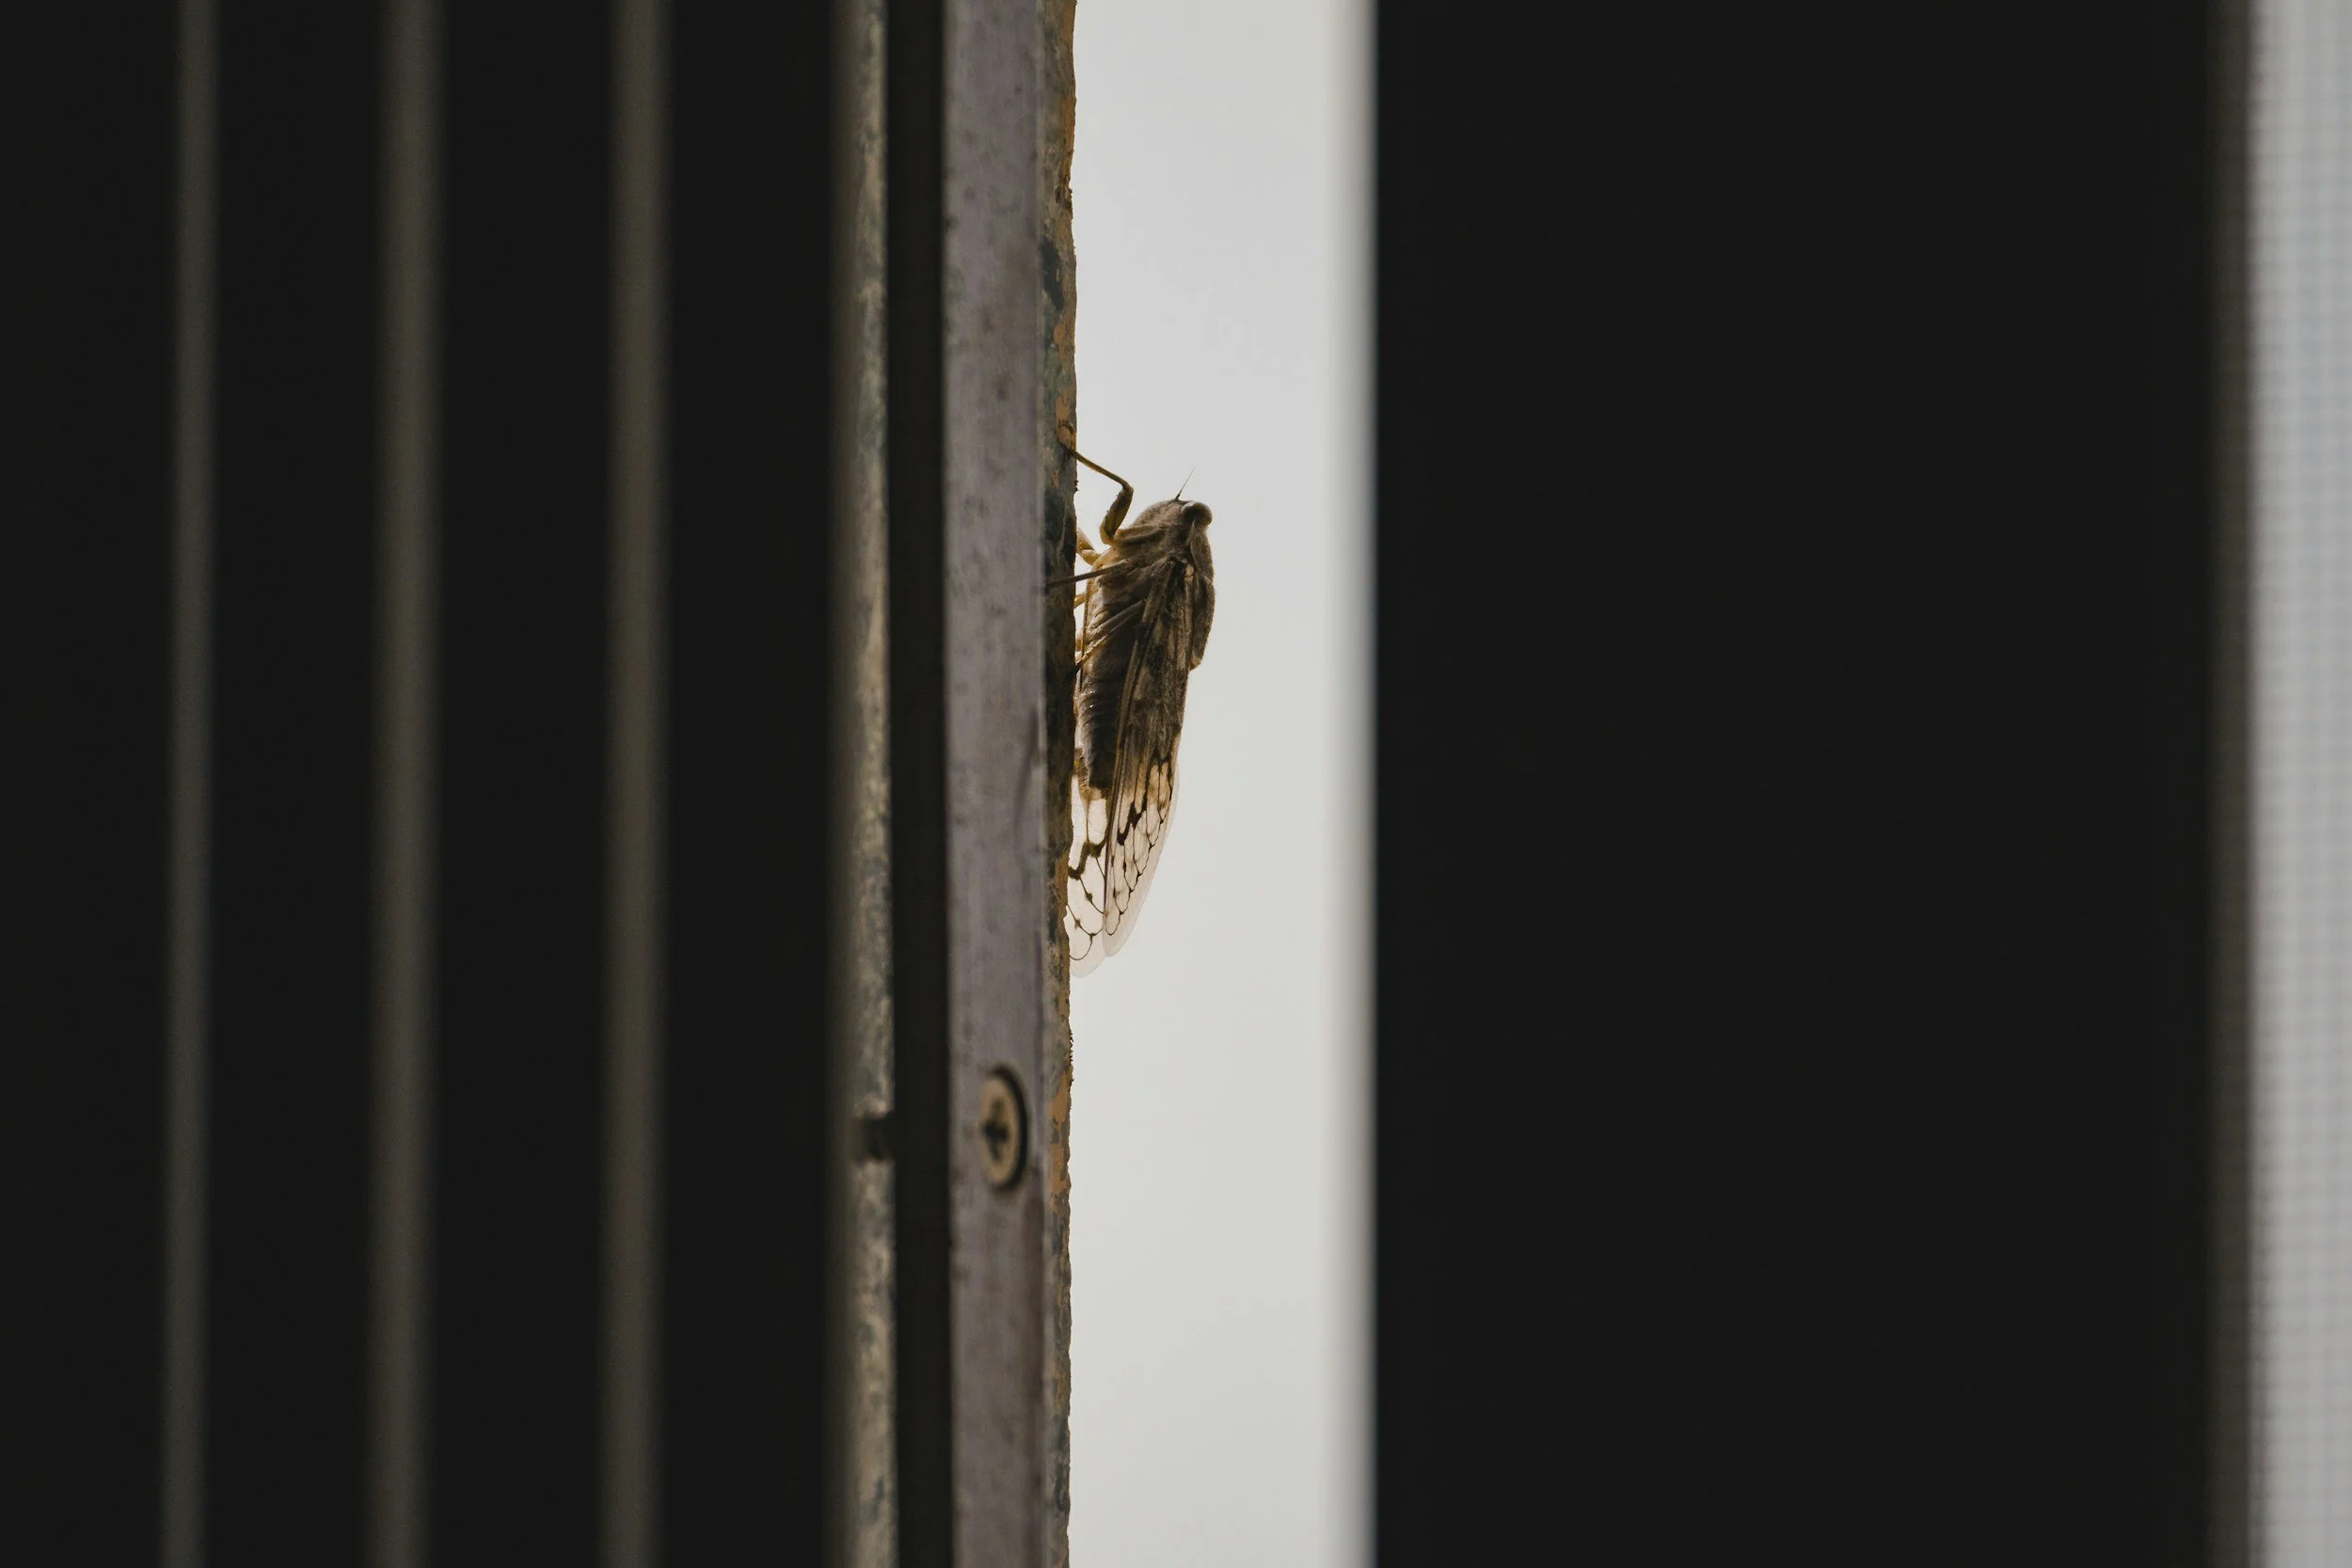
A clean, organized garage can make a big difference in pest control. By reducing clutter, sealing entry points, and storing items properly, homeowners can make the garage less attractive to insects, rodents, and other unwanted pests.
Why Pests Enter And How To Keep Pests Out Of Garage
Garages often attract pests because they offer the exact conditions many insects and rodents need: shelter, warmth, darkness, moisture, and easy access to food or nesting materials. They function as a transition zone between the outdoors and the home, are frequently opened to the outdoors, sealed less tightly than living spaces, and filled with items that create shade, warmth, scent, and shelter.
The biggest attractants are usually a combination of access and opportunity. A worn garage door pest seal, a small corner gap, an opening around a pipe, a crack near the foundation, or gaps around utility lines, vents, and wall penetrations can give pests a way inside. Once there, cardboard boxes, bags of seed, pet food, birdseed, grass seed, firewood, holiday decorations, old fabric, rarely moved storage bins, and cluttered corners can provide places to hide, feed, or nest.
Moisture also plays a major role. Damp concrete, condensation, wet mops, leaky water heaters, poor drainage near the garage, and damp bags of soil can make the space more appealing to ants, cockroaches, silverfish, spiders, crickets, rodents, and other pests. If cockroaches are already appearing in the garage or nearby rooms, storage changes and sealing may help reduce attractants, but the activity may also need to be inspected by a roach exterminator, especially if sightings continue after the garage is cleaned and dried. Once pests find a protected spot with limited disturbance, they may settle in quickly and spread to other parts of the home.
A pest-resistant garage is not only sealed; it is dry, organized, and easy to inspect. That is why homeowners who want to keep pests out of garage areas should treat storage, sealing, cleaning, and moisture control as part of the same prevention plan. When these steps work together, it becomes easier to keep pests out of garage spaces before they turn into a larger problem.
Garage Organization For Better Garage Pest-Proofing
Better organization helps remove the hiding places and food sources that make a garage attractive to pests. The best garage organization strategy for pest prevention is to make the space visible, accessible, and easy to disturb. Pests prefer areas that stay dark, crowded, and untouched.
Start by getting items off the floor and onto shelves, racks, hooks, ceiling racks, or wall-mounted storage systems. This makes it easier to see signs of pest activity and supports garage pest-proofing by reducing the dark, undisturbed spaces where insects and rodents like to nest. When everything is stacked tightly against walls or piled on the floor, homeowners lose the ability to spot droppings, chew marks, insect activity, webbing, nesting material, or small entry points.
Use clear, lidded plastic bins instead of cardboard boxes whenever possible. Label containers so they do not need to be opened repeatedly, and keep similar items grouped together. Seasonal items, tools, sports gear, gardening supplies, and automotive products should each have a defined storage area.
Leave a small inspection gap between stored items and the walls, especially along the floor-wall joint, so you can check along baseboards, corners, and foundation edges. Avoid stacking belongings directly against the garage door or around utility areas, water heater, electrical panel, vents, or the door leading into the home, since those are common pest entry points.
A well-organized garage does not have to look empty. It simply needs to be arranged so that corners, baseboards, door seals, and storage containers can be checked without moving dozens of items. That visibility makes it harder for pests to settle in unnoticed and improves long-term garage pest control.
What Not To Store For Better Garage Pest Control
Homeowners should avoid storing anything in the garage that can feed pests, absorb odors, provide nesting material, hold moisture, or become damaged by temperature and moisture changes. The riskiest garage storage items are not limited to obvious food products. This includes open food, pantry overflow, pet food in bags, birdseed, grass seed, cardboard boxes, paper files, old clothing, rugs, towels, upholstered furniture, patio cushions, moving blankets, fabric, and cushions.
Cardboard is especially pest-friendly because it holds odors, absorbs moisture, and can be chewed or shredded for nesting material. Fabric, cushions, clothing, and upholstered furniture can also create warm, hidden spaces for rodents, spiders, and insects. Used furniture, mattresses, rugs, and fabric items should be inspected carefully before being stored in the garage, especially if they came from a secondhand source or another home. If bed bugs are suspected, these items should not be moved into storage until they have been inspected, isolated, or handled through proper bed bug treatment. If these items must be stored in the garage, they should be cleaned, fully dried, and sealed in durable plastic containers.
Firewood should not be stored inside the garage for long periods because it can bring in ants, termites, beetles, spiders, and other pests. If firewood must be kept nearby, store it outside, elevated off the ground, and away from the home’s exterior walls.
Items with strong organic smells, such as potting soil, fertilizer, compost products, animal feed, bone meal, blood meal, and certain fertilizers, should also be handled carefully. Even when they are not "food" for every pest, their odors or organic ingredients can draw insects, rodents, wildlife, or other pests into the garage.
Safe Storage Tips: How To Keep Pests Out Of Garage
Any food-related or seed-based product stored in the garage should be sealed in a durable, pest-resistant container. Pet food, birdseed, livestock feed, grass seed, pantry overflow, and garden products should be stored as if they were pantry items. The original bag is usually designed for shipping and display, not long-term pest protection. Once opened, these products should be transferred to sealed, chew-resistant containers because rodents can chew through paper or plastic bags easily, and insects can get into tiny openings.
Use heavy-duty plastic, metal, or glass containers with tight-fitting lids. Metal containers are especially useful for birdseed and pet food because they are harder for rodents to chew through. Heavy-duty plastic bins can work well for lower-risk items if the lids close securely and the containers are checked regularly for cracks, chew marks, or loose seals.
Spills matter as much as storage. A few pieces of kibble, a scattering of birdseed, or a thin layer of grass seed under a shelf can keep pests interested in the garage. Keep containers off the floor when possible, wipe containers before putting them away, and sweep up spilled kibble, seed, grain, or residue immediately.
Garden products such as fertilizer, bone meal, blood meal, compost-based amendments, and certain soil amendments can attract pests because of their scent or organic content. Store these products in sealed bins or cabinets, away from pet food and household storage. Always keep labels intact so products are not mistaken for one another, and check containers regularly for chew marks, moisture, or insects. These habits help keep pests out of garage storage areas without requiring major changes to how the space is used.
Decluttering Tips For Garage Pest-Proofing
Clutter reduction is one of the most effective garage pest-proofing steps because pests rely on hidden, undisturbed areas. When a garage is crowded with boxes, bags, tools, loose items, or one untouched stack of belongings, pests can move, nest, and reproduce without being noticed.
Clearing clutter makes pest activity easier to spot. Droppings, gnaw marks, shredded nesting material, insect trails, dead insects, egg cases, cobweb buildup, seed fragments, and damaged packaging are much more visible in an organized space. It also makes cleaning more effective because dust, crumbs, spilled seed, and debris are not trapped beneath piles of belongings.
A practical approach is to remove anything that is broken, expired, damp, or no longer used, then divide the remaining garage items into keep, donate, discard, and relocate. Anything kept should be stored in sealed containers, on shelving, or on wall-mounted storage. Items that sit directly on the floor should be limited, because floor storage creates shadows, traps debris, and makes it harder to clean the places pests use most.
The goal is not an empty garage; it is a garage with fewer hiding places, fewer food sources, open floor space, clear wall edges, and clear access to corners, walls, and entry points. This lets homeowners catch pest problems early, before they spread into the home.
Using A Garage Door Pest Seal
A garage door pest seal or garage door pest guard helps protect one of the most common pest entry points in the garage: the gap beneath or around the garage door. Rodents, ants, cockroaches, spiders, mice, crickets, and other pests can use surprisingly small openings, especially at the bottom corners where the door, frame, and concrete meet.
The bottom seal helps create a tighter barrier where the garage door meets the floor. Side and top seals help close gaps around the frame. Pest guards can add extra protection at vulnerable corners, where rodents and insects often find small openings or where flexible seals wear down, pull away, or leave small openings. These products also help reduce drafts, dust, leaves, and moisture entering the garage.
For best results, the garage door pest seal should be flexible, intact, properly fitted, and regularly checked. A worn, cracked, loose, or flattened seal should be replaced. Homeowners should also check whether the garage floor is uneven, the door is misaligned, or the seal has flattened with age, because pests may still find a path in if the door does not sit flush. Homeowners should look for daylight under the door, cracked rubber, loose weatherstripping, chew marks, or triangular gaps at the corners.
Adding A Garage Door Pest Guard
During garage pest-proofing, homeowners should inspect the entire perimeter of the garage, starting with a simple light check. Stand inside the garage during daylight and look for places where light comes through. If light can enter under the garage door, around the corners, near a service door, or around a wall penetration, pests may be able to enter too.
The garage door deserves the closest attention. Check the bottom seal, side seals, top seal, corners, door tracks, and the point where the door meets the concrete floor. A garage door pest guard can be especially helpful at the lower corners, where small gaps often remain even when the main seal looks intact. If the corners continue to show light or small openings, a garage door pest guard may add another layer of protection. Look for daylight showing through, torn weatherstripping, chew marks, or gaps large enough for insects or rodents.
Other key areas include cracks in the foundation, the foundation edge, floor-wall joint, cracks in the slab, gaps along baseboards, spaces around utility lines, plumbing penetrations, electrical conduits, vents, windows, service doors, exterior doors, and the connection points between the garage and the main house. Pay close attention to corners, because they often separate slightly over time.
The door between the garage and the home should also be included in pest-proofing. A tight door sweep, intact weatherstripping, and a properly closing door can help keep pests from moving from the garage into living areas. Attached garages are especially important because even a small pest issue in the garage can become an indoor problem if that interior door is poorly sealed. Any opening that allows air, light, water, or debris through can also allow pests through.
Cleaning Tips For Long-Term Garage Pest Control
Regular cleaning and maintenance help keep the garage from becoming a long-term pest habitat. Sweeping and vacuuming remove seed fragments, crumbs, dead insects, spider webs, nesting material, dust, leaves, and debris that can hide early pest activity. Vacuuming corners, shelving, and storage areas also helps remove insect eggs and fine debris that pests use for shelter.
Homeowners should clean up spills immediately, especially pet food, birdseed, grass seed, fertilizer, and potting soil. Trash and recycling should be kept in closed containers and removed regularly, especially if food packaging is stored there. Moisture should also be addressed quickly, since damp areas can attract cockroaches, silverfish, ants, termites, and other pests. Homeowners should also remove standing water from buckets, bins, plant saucers, tarps, clogged gutters, or low spots near the garage, since these areas can contribute to mosquito activity. Keeping the garage and nearby exterior areas dry is an important part of long-term mosquito control.
Maintenance is just as important as cleaning. Homeowners should replace worn garage door seals, repair damaged weatherstripping, seal small cracks, fix moisture problems, remove unnecessary clutter, and remove items that have become damp or contaminated. These routine steps make garage pest control more effective over time and reduce the chance that pests will return.
A monthly garage inspection can prevent many pest problems from becoming serious. Check seals, corners, storage containers, wall edges, under shelves, behind bins, around the garage door, near utility areas, and the floor beneath shelves. Look for droppings, gnaw marks, torn packaging, web buildup, insect trails, unusual odors, moisture, or new gaps. The goal is to catch small changes before pests become established.
When To Call For Garage Pest Control
Homeowners should consider professional garage pest control when there is a pattern of activity rather than a one-time sighting. Repeated droppings, gnaw marks, scratching sounds, chewed packaging, nesting material, unusual odors, recurring ants, cockroach sightings, wasp activity, damaged storage, or pests appearing in rooms next to the garage are signs that DIY steps may not be enough.
Professional help is especially important for rodents, cockroaches, termites, carpenter ants, wasps, and recurring infestations. These pests can be difficult to control without identifying the species, locating the source, finding hidden entry points, and choosing the right treatment and exclusion plan.
DIY pest-proofing is useful for prevention, but an established pest problem often needs a more complete approach. A professional can inspect the garage, identify why pests are entering, find nesting or harborage areas, treat active activity, and recommend long-term changes to storage, sealing, sanitation, and moisture control. The best results usually come from combining professional treatment with better garage habits at home.
Tips for Maintaining the More Out‑of‑the‑Way Areas of Your Home
Every home has areas that rarely get attention, such as the spaces that sit behind your large appliances, that are above eye level, require you to climb into unconventional areas, or that are tucked into corners you only notice when something goes wrong. These out‑of‑the‑way places often collect dust, moisture, pests, and debris long before homeowners realize there’s an issue. While routine cleaning keeps visible surfaces looking good, deep cleaning and ongoing maintenance of hidden areas also play a major role in protecting your home.
Every home has areas that rarely get attention, such as the spaces that sit behind your large appliances, that are above eye level, require you to climb into unconventional areas, or that are tucked into corners you only notice when something goes wrong. These out‑of‑the‑way places often collect dust, moisture, pests, and debris long before homeowners realize there’s an issue. While routine cleaning keeps visible surfaces looking good, deep cleaning and ongoing maintenance of hidden areas also play a major role in protecting your home.
Water Heater and Mechanical Area Maintenance
Mechanical areas such as water heater closets, furnace rooms, and utility spaces are often overlooked because they’re not part of everyday living spaces. However, these areas accumulate dust, lint, and moisture quickly, especially in tight or poorly ventilated corners. Regular cleaning around mechanical equipment helps prevent corrosion, improves airflow, and reduces fire hazards.
Deep cleaning this area includes removing debris from the floor, wiping down accessible surfaces, and ensuring the space remains dry. Moisture around a water heater can indicate a slow leak or condensation issue, both of which can lead to mold or structural damage if ignored. Ongoing maintenance involves checking for rust, inspecting connections, and keeping the area free from stored items that restrict ventilation. A clean, well‑maintained mechanical area helps your equipment operate safely and efficiently.
Narrow Gaps, Tracks, and Channels
Some of the most stubborn buildup occurs in narrow spaces that are easy to forget but hard to clean. Window tracks and door rails collect dirt, pollen, and moisture that can affect smooth operation and contribute to mold growth. These areas often require a deep clean using narrow brushes, cotton swabs, or vacuum attachments designed for tight spaces.
Baseboards and trim edges also accumulate dust quickly, especially in corners or behind furniture. Regular dusting helps, but deep cleaning with a damp cloth or gentle cleaner removes the grime that settles over time. Cabinet gaps and between‑appliance spaces are notorious for trapping crumbs, pet hair, and debris. These areas benefit from periodic deep cleaning using crevice tools or flexible dusters. Maintaining these small but important features helps preserve the appearance and function of your home’s interior.
Crawl Space Cleaning and Moisture Control
The crawl space is one of the most out‑of‑the‑way areas in any home, and it often goes years without attention. Because it is dark, enclosed, and difficult to access, it becomes a collection point for debris, pests, and moisture. Deep cleaning involves removing old insulation, organic material, and contaminants that affect air quality and structural health.
Once cleaned, crawl space waterproofing becomes essential for long‑term maintenance. Vapor barriers, drainage systems, and sealing techniques help prevent moisture from entering the space. Moisture in the crawl space can lead to mold, wood rot, and humidity migration into the living areas above. Waterproofing, something that can be done with the help of professionals like Josh Lowe's Dr. Energy Saver, protects the home’s foundation, improves indoor air quality, and reduces energy loss.
Ongoing crawl space maintenance includes monitoring humidity levels, checking for leaks, and ensuring the waterproofing system remains intact. A well‑maintained crawl space supports a healthier, more efficient home.
Attics and Insulation Surfaces
Attics are another area that homeowners rarely see, but that requires periodic deep cleaning and maintenance. Dust, insulation fibers, general debris from what you store, the age of your attic, and pest debris accumulate in attic corners and along insulation surfaces. Over time, this buildup can affect indoor air quality and reduce insulation performance.
Deep cleaning includes removing debris, vacuuming accessible surfaces, and checking for signs of pests or moisture. Maintaining the attic involves inspecting insulation for settling or damage, ensuring ventilation pathways remain open, and monitoring for roof leaks or condensation. Proper care of attic corners and insulation surfaces helps protect the home’s energy efficiency and structural integrity. A clean, well‑maintained attic also reduces the risk of mold growth and improves the overall comfort of your home.
Dryer Vent Cleaning and Maintenance
Dryer vents are one of the most important yet overlooked areas that require a deep cleaning. Lint accumulates not only in the lint trap but also in the vent line. This buildup restricts airflow, reduces dryer efficiency, and significantly increases fire risk.
A thorough dryer vent cleaning involves clearing the entire vent pathway, including elbows, long runs, and the exterior exit point. Regular dryer vent maintenance ensures safe operation and prevents lint from accumulating again. Homeowners should watch for warning signs such as longer drying times, excessive heat, or a burning smell. In many cases, especially when the vent line is long or difficult to access, professional cleaning is necessary to ensure the system is fully cleared.
Deep cleaning and maintaining the out‑of‑the‑way areas of your home is essential for long‑term comfort, safety, and efficiency. These hidden spaces influence everything from air quality to energy use, yet they are often the first to be forgotten. By understanding the importance of deep cleaning hidden areas and committing to regular maintenance, homeowners can prevent costly repairs, extend the life of their home’s systems, and create a healthier living environment. Proactive care ensures that even the most overlooked corners of the home remain clean, functional, and protected.
What to Expect With a Professional Heating Installation
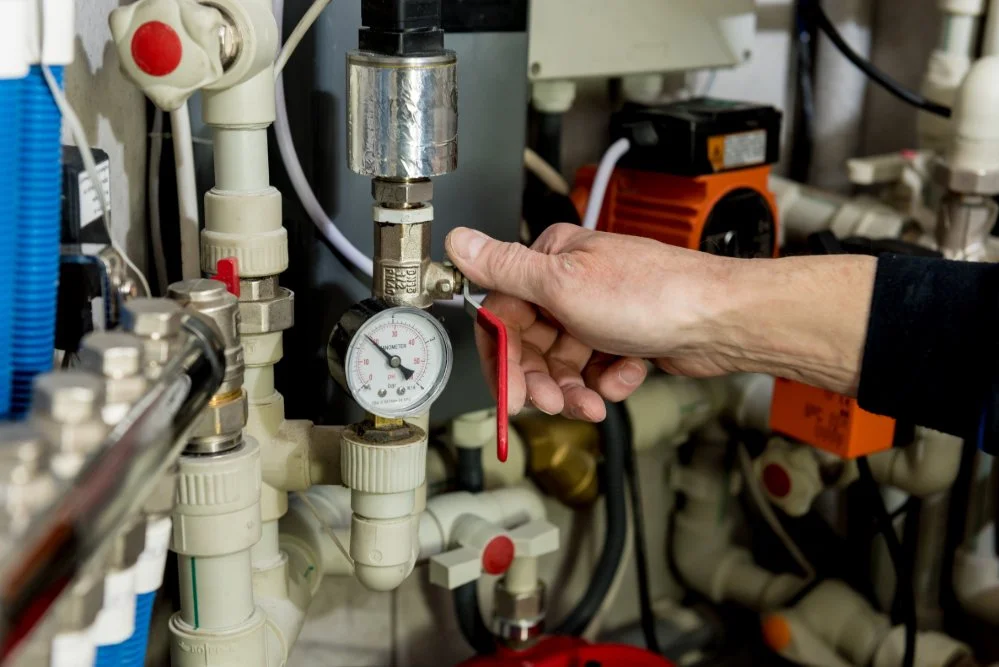
A professional heating installation goes a long way towards keeping your home warm and comfortable. When done correctly, it ensures reliable performance, lower utility costs, and a system that lasts for years. That’s why it’s important that homeowners have an idea of what they’re getting into when they start looking to have a heater or furnace either replaced or newly installed in their home. Below is a walkthrough of what to expect when getting a heating element installed from start to finish.
A professional heating installation goes a long way towards keeping your home warm and comfortable. When done correctly, it ensures reliable performance, lower utility costs, and a system that lasts for years. That’s why it’s important that homeowners have an idea of what they’re getting into when they start looking to have a heater or furnace either replaced or newly installed in their home. Below is a walkthrough of what to expect when getting a heating element installed from start to finish.
The Importance of Professional Installation
A good professional heating installation involves far more than placing a new furnace or heat pump in your home. Licensed HVAC technicians, such as those from BJ Heating & Cooling, follow strict safety standards and protocols to ensure your system operates correctly. Proper installation directly affects everything from system performance to energy efficiency, as well as your equipment’s lifespan. Homeowners who choose professional service benefit from more accurate sizing and safe connections, as well as the long‑term reliability that DIY or low‑cost shortcuts simply can’t match.
Initial Consultation and Home Assessment
The heating installation process begins with an in‑home consultation. During this visit, the technician performs a detailed evaluation to figure out your home’s heating needs. They assess things like square footage, insulation levels, window quality, ductwork condition, and the performance of any existing equipment. This information is essential for determining the correct system size.
A key part of this assessment is the load calculation. Using industry‑standard methods such as Manual J, the technician calculates the precise heating capacity your home requires. Oversized systems waste energy and cycle on and off too frequently, while undersized systems struggle to keep up on cold days. Accurate sizing ensures consistent comfort and efficient operation.
Based on the evaluation, the technician provides system recommendations tailored to your home and budget. They explain the differences between models, efficiency ratings, and features so you can make an informed decision. They can also provide transparent pricing, outlining what is included in the installation and avoiding vague or incomplete estimates.
Preparing the Home for Installation
Before the new system is installed, the team prepares the workspace to ensure safety and efficiency. If you have an older furnace or heat pump, the technicians handle the removal of the old system. They disconnect electrical wiring, gas lines, and ductwork, then remove the equipment safely and dispose of it according to environmental guidelines.
Next, the team inspects your ductwork. A ductwork inspection identifies any issues that could reduce the performance of your new system. Addressing these problems before installation ensures proper airflow and efficiency.
Professional installers also manage all code compliance requirements. They obtain necessary permits, schedule inspections, and ensure every part of the installation meets local building and safety standards.
The Installation Process
Once preparation is complete, the installation begins. The new equipment is positioned carefully to ensure proper clearance, ventilation, and accessibility for future maintenance. This equipment placement step is essential for safe operation and long‑term performance.
Technicians then complete the electrical and gas connections. These connections must be handled by licensed professionals to ensure safety and compliance with local codes. Proper wiring and gas line installation prevent hazards and ensure the system operates as designed.
Ventilation is another critical component. The team installs or adjusts the venting and flue system to ensure safe removal of combustion gases. Incorrect venting can lead to carbon monoxide risks, so this step is handled with precision.
If needed, the technicians make duct adjustments to improve airflow. This may include sealing leaks, resizing ducts, or modifying connections to support the new equipment.
The installation also includes thermostat setup. Whether you choose a standard programmable thermostat or a smart model, the technician ensures it is wired correctly and calibrated for accurate temperature control.
Before the installation is considered complete, the team performs a series of quality checks. These include verifying electrical connections, checking gas pressure, confirming proper airflow, and ensuring the system meets manufacturer specifications.
System Testing and Performance Verification
After installation, the technician conducts startup testing to ensure the system ignites safely and operates smoothly. They check fuel delivery, ignition timing, and temperature rise to confirm everything is functioning correctly.
Next, they perform airflow balancing. This involves adjusting registers and dampers to ensure even heating throughout the home. Proper balancing prevents hot and cold spots and improves overall comfort.
The technician also verifies the system’s efficiency. Through efficiency testing, they confirm the equipment is performing at its rated AFUE or heat pump efficiency level. Noise and vibration checks ensure the system runs quietly and without unnecessary strain.
Homeowner Walkthrough and Education
Once testing is complete, the technician provides a detailed system overview. They explain how the equipment works, what each component does, and how to operate it safely.
You also receive thermostat training. This includes programming schedules, adjusting settings, and using smart features to maximize comfort and efficiency.
The technician outlines maintenance expectations such as filter changes, annual tune‑ups, and signs that may indicate a problem. Proper maintenance protects your investment and ensures long‑term reliability.
Finally, they review warranty information and provide all necessary documentation, including manuals, inspection reports, and maintenance logs.
Safety, Compliance, and Long‑Term Reliability
Professional installation ensures full code adherence and reduces safety risks. Proper venting, sealed combustion, and correct gas connections protect your home from carbon monoxide and other hazards. These combustion safety measures are essential for any heating system.
Correct installation also improves system longevity. When equipment is installed according to the manufacturer specifications, it experiences less strain and fewer breakdowns. This leads to lower repair costs and a longer service life.
Energy efficiency is another major benefit. A properly installed system delivers optimal efficiency, reducing utility bills and improving comfort.
After‑Installation Support
Reputable HVAC companies provide ongoing support after installation. This may include follow‑up visits to verify performance or make adjustments. Many homeowners choose to enroll in maintenance plans to ensure regular tune‑ups and priority service. If issues arise, professional companies offer emergency support and responsive customer service to keep your home comfortable year‑round.
A professional heating installation provides long‑term comfort and efficiency for you and your family. With expert sizing, careful preparation, precise installation, and thorough testing, homeowners gain peace of mind knowing their system is built to perform. Choosing trained, certified technicians ensures your investment delivers reliable warmth and energy savings for years to come.

