

A resource for those seeking information on organizing and transforming spaces.
Warning Signs of an Overloaded Electrical Circuit
Learn the warning signs of an overloaded electrical circuit and protect your home from electrical hazards. Schedule a professional inspection today.
Electrical systems handle the demands of modern homes every day, but they have limits. Recognizing the warning signs of an overloaded electrical circuit helps prevent damage, reduces safety risks, and keeps your electrical system operating reliably.
Frequent Circuit Breaker Trips
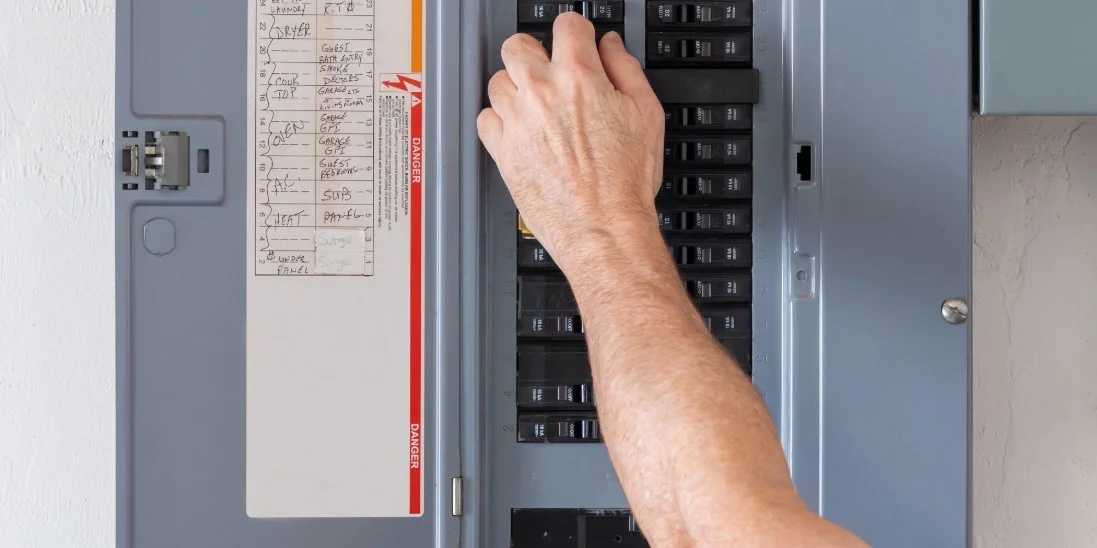
A circuit breaker protects your home by shutting off power when a circuit draws too much electricity. If the same breaker trips often, your electrical system may struggle to support the connected devices. Resetting the breaker without addressing the underlying issue only allows the problem to continue.
Flickering or Dimming Lights
Lights that flicker when large appliances start often indicate an overloaded circuit. This issue ranks among the common causes of household lighting problems because high electrical demand can reduce the power available to lighting fixtures. A licensed electrician can determine whether the circuit needs repair or an upgrade.
Warm Outlets and Burning Odors
Electrical outlets should remain cool during normal use. If an outlet feels warm or gives off a burning smell, disconnect any plugged-in devices immediately. Excess heat often signals excessive electrical demand or damaged wiring that requires professional attention before it becomes more serious.
Buzzing Sounds From Outlets or Switches
Electrical systems should operate quietly. Buzzing sounds coming from outlets, switches, or breaker panels may indicate loose wiring or excessive strain on the circuit. Ignoring these warning sounds increases the chance of electrical failure and creates unnecessary safety concerns.
Too Many Devices on One Circuit
Many older homes cannot support today's electrical demands. Plugging multiple high-powered appliances into one circuit places unnecessary stress on the wiring. Redistributing electrical loads or adding dedicated circuits helps reduce strain while improving overall system performance.
Protect Your Home With Prompt Electrical Service
Understanding the warning signs of an overloaded electrical circuit allows homeowners to address problems before they become costly or dangerous. If you notice repeated breaker trips, flickering lights, warm outlets, or unusual electrical behavior, contact a qualified electrician to inspect your system and recommend the appropriate solution. Prompt repairs help keep your home safe while ensuring your electrical system continues to perform efficiently.

The Essential Checklist for Large Landscaping Projects
Large‑scale landscaping projects require more than basic yard tools and weekend effort—they demand planning, organization, and the right equipment to handle acreage‑level challenges. Whether you’re clearing overgrown land, reshaping terrain, or preparing for new installations, having a structured checklist ensures your project runs smoothly from start to finish. This guide walks you through the essential steps to assess your property, gather the right tools, manage vegetation, and prepare for long‑term maintenance.
Large‑scale landscaping projects require more than basic yard tools and weekend effort—they demand planning, organization, and the right equipment to handle acreage‑level challenges. Whether you’re clearing overgrown land, reshaping terrain, or preparing for new installations, having a structured checklist ensures your project runs smoothly from start to finish. This guide walks you through the essential steps to assess your property, gather the right tools, manage vegetation, and prepare for long‑term maintenance.
Getting Started
Before any work begins, take time to assess your property thoroughly. Walk the entire area and note overgrowth, hazards, drainage issues, and terrain challenges. Mapping out priority zones, such as tree lines, fence lines, open fields, or neglected corners, helps you determine the scope of work and where to focus first.
Once you understand the land, break the project into clear phases. Most large landscaping jobs follow a sequence: clearing, cutting, hauling, grading, and finishing. Planning these phases ahead of time prevents wasted effort and keeps the project organized. Consider weather patterns, equipment availability, and seasonal vegetation growth when scheduling tasks. For example, brush removal is easier before summer heat thickens growth, while grading is best done when soil is dry enough to move efficiently.
Designate staging areas for brush piles, soil, mulch, rock, and reusable materials. This keeps your work zones clean and prevents bottlenecks as debris accumulates. Finally, create a realistic timeline that accounts for equipment maintenance, debris disposal, and unexpected delays. Large projects rarely go exactly as planned, but a structured workflow keeps you moving forward.
Gathering the Essentials
Large‑scale landscaping requires machinery built for heavy work. Start by identifying the core equipment you’ll need: mowers, skid steers, brush hogs, chainsaws, and debris‑removal tools. For many property owners, investing in a riding mower from a reputable retailer, such as someone like Lilly Kubota, provides long‑term value and reliability. A good mower becomes the backbone of your project, powering attachments and handling tasks that smaller machines simply can’t manage. If you’re unsure which model fits your acreage, exploring different options can help you match horsepower, size, and attachments to your project needs.
Attachments expand your capabilities even further. Grapples help move limbs and logs, box blades level soil, augers dig holes, and brush cutters tackle thick vegetation. Choosing attachments that match your workflow ensures you can transition smoothly between clearing, grading, and finishing tasks.
Hand tools also matter. Loppers, rakes, shovels, marking flags, and measuring tapes support detail work and layout tasks. Keep fuel, oil, spare blades, and basic maintenance supplies on hand so you can service equipment without interrupting your workflow.
Finally, safety gear is non‑negotiable. Large projects involve powerful machinery and unpredictable terrain. Helmets, gloves, chaps, eye protection, and steel‑toe boots protect you from common hazards. Review safe operating practices for each machine and clear work zones of pets, children, and bystanders before starting. Keep first‑aid supplies accessible and ensure communication devices are charged in case of emergencies.
Managing Vegetation, Trees, and Overgrowth
Vegetation management is often the most labor‑intensive part of large landscaping projects. Start by identifying what needs removal, trimming, or long‑term control. Overgrown brush, tall grass, and invasive plants can spread quickly if not addressed strategically.
Tree work requires special attention. Dead trees, broken limbs, and leaning trunks pose safety risks and should be removed early in the project. Chainsaws and pole saws help with cutting, while stump grinders eliminate leftover hazards. For dense understory or tangled brambles, forestry mulchers or heavy‑duty brush cutters may be necessary.
Decide how you’ll handle green waste. Mulching and composting allow you to repurpose debris on your property, while hauling services or dump trailers help manage large volumes of material. Planning disposal ahead of time prevents work zones from becoming overcrowded.
Handling Soil, Grading, and Drainage Needs
Large properties often have uneven terrain, erosion issues, or poor drainage that need correction before planting or construction. Evaluate low spots, washout areas, and natural drainage paths. Grading tools such as box blades, land planes, and skid steer graders help level or contour the land to improve water flow and create usable space.
If you plan to install garden beds, lawns, or hardscapes, add soil amendments or topsoil where needed. Healthy soil supports long‑term plant growth and reduces future maintenance. For drainage improvements, consider solutions like swales, berms, gravel paths, or French drains. Addressing these issues early prevents water damage and ensures your landscaping lasts.
Organizing Debris and Disposal
Large projects generate significant debris and require careful material organization. Set up designated areas for brush piles, logs, soil, rock, and reusable materials. Keeping materials sorted prevents confusion and speeds up workflow.
Choose debris‑management tools based on the volume of waste. Chippers and mulchers help reduce branches and brush into usable mulch. Dump trailers make hauling soil, rock, or debris more efficient. Track what can be repurposed—mulch, compost, firewood, or fill dirt—to reduce waste and lower project costs.
Plan disposal ahead of time. Whether you’re hauling debris to a landfill, renting a dumpster from services like Ware Disposal for large‑volume cleanup, burning brush where permitted, or hiring a removal service, having a strategy prevents delays and keeps your property safe and organized.
Preparing for Finishing Touches and Long‑Term Maintenance
Once the heavy work is complete, outline your finishing tasks. These may include planting, mulching, edging, installing pathways, or adding decorative features. Choose low‑maintenance plants or groundcover to reduce future labor, especially on large properties.
Create a seasonal maintenance schedule to keep your land manageable. Regular mowing, trimming, mulching, and debris removal prevent overgrowth from returning. Store equipment properly and document what worked well during the project to guide future improvements.
Large‑scale landscaping projects require planning, the right equipment, and a clear workflow. By assessing your property, organizing tools, managing vegetation, and preparing for long‑term maintenance, you set the foundation for a successful transformation. With structure and preparation, even the biggest landscaping challenges become manageable, and your property becomes a space you can enjoy for years to come.

How to Choose the Best Realtor for Your Home Search
A home purchase is one of the biggest financial decisions most people make, and the realtor guiding that journey plays a major role in shaping the outcome. The right professional helps you understand what to pay attention to while also hunting down the listings that best match what you’re looking for. When you choose your realtor well, the experience feels manageable and informed; when you choose poorly, it can quickly become stressful and uncertain.
A home purchase is one of the biggest financial decisions most people make, and the realtor guiding that journey plays a major role in shaping the outcome. The right professional helps you understand what to pay attention to while also hunting down the listings that best match what you’re looking for. When you choose your realtor well, the experience feels manageable and informed; when you choose poorly, it can quickly become stressful and uncertain.
Define What You Need as a Buyer
Clarify Your Buying Goals
Your budget, preferred neighborhoods, home style, and timeline determine the type of agent who will serve you best. If you’re targeting competitive suburban markets, you need someone who moves quickly and understands bidding trends. If you’re exploring historic districts, you benefit from an agent familiar with older homes and their unique considerations. Aligning your goals with the right professional ensures your search stays focused and efficient.
Identify Your Expectations and Comfort Level
Understanding the support you need is essential when choosing a realtor, such as someone like McGraw Realtors. Some buyers want hands‑on guidance with curated listings and detailed explanations, while others prefer a more independent, streamlined approach. Your past experience also matters, as first‑time buyers often need more reassurance, experienced buyers may prioritize efficiency, and relocating buyers rely heavily on neighborhood insight. Keeping these expectations in mind can help you choose a realtor whose communication style and approach align with how you prefer to navigate the home‑buying process.
Find Someone Who Knows the Area
Neighborhood Expertise
A realtor’s familiarity with local schools, amenities, commute routes, zoning changes, and long‑term growth trends helps you make smarter decisions. Local insight prevents surprises and ensures you understand the full context of each home you consider.
Pricing Insight and Competitive Strategy
A skilled realtor, like someone from Jones Realty SoCal, combines pricing expertise with a clear understanding of competitive market conditions. They interpret market data, comparable sales, and inventory trends to help you determine whether a home is fairly priced, likely to attract multiple offers, or positioned as a potential value opportunity. At the same time, they analyze bidding patterns, seller behavior, seasonal shifts, and timing advantages to shape a strategic approach. This blend of valuation knowledge and market awareness allows you to craft stronger offers, avoid unnecessary risks, and move confidently through fast‑changing conditions.
Check Their Experience and Background
Evaluating a realtor’s professional background gives you a clearer picture of their capabilities and the level of support you can expect. You can start by taking a look at their license and any additional certifications they have, such as a CRS, ABR, or SRES. It’s also helpful to review their transaction history, since an agent who regularly works in your preferred neighborhoods or price range will better understand local trends and buyer expectations. Finally, consider the strength of their brokerage. A well‑resourced brokerage can provide legal guidance, marketing tools, and negotiation support that directly enhance your buying experience, making the entire process more efficient and informed.
Watch How They Communicate
Clear, timely communication is essential in fast‑moving markets, and an agent’s responsiveness can make the difference between securing a home and missing an opportunity. If they take too long to reply or frequently leave you waiting for updates, the process becomes stressful and uncertain. It’s also important to consider how they prefer to communicate; some rely on text, while others lean on phone calls, email, or in‑person conversations. Choosing someone whose style aligns with your own helps ensure updates feel natural and consistent. Availability is another key factor; you need an agent who can accommodate showings, contract discussions, and last‑minute opportunities, especially when homes move quickly.
Look at the Network They Bring
A realtor’s network can shape the quality and efficiency of your home‑buying experience. Strong connections with lenders, inspectors, contractors, and title companies help streamline each step of the transaction and reduce delays. Some agents also maintain relationships that provide early access to off‑market homes, giving you an advantage in competitive neighborhoods. Beyond personal connections, the tools they use, from digital search platforms and automated alerts to virtual tours and organized communication systems, can make your search more efficient and keep you consistently informed.
Understand Their Negotiation Style
A realtor’s negotiation style directly affects your results. Some agents take a direct, assertive approach aimed at securing concessions and stronger terms, while others rely on diplomacy and relationship‑building to create cooperative negotiations. Their ability to manage contingencies, including inspection, financing, and appraisal protections, plays a major role in safeguarding your interests. Ultimately, their advocacy style, whether bold or measured, determines how effectively they represent you when it matters most.
Check What Others Say About Them
Feedback from past clients offers valuable insight into how an agent performs in real‑world situations. Online reviews often reveal patterns in communication, reliability, and professionalism, while testimonials provide firsthand stories about responsiveness, negotiation outcomes, and overall satisfaction. Industry reputation also matters; agents respected by their peers tend to collaborate more effectively, which can positively influence negotiations and access to opportunities.
Decide Whether They’re the Right Fit
Choosing the right realtor ultimately comes down to comfort, trust, and alignment. You should feel confident asking questions, expressing concerns, and relying on their guidance throughout the process. Personality fit plays a meaningful role; if you prefer direct, concise communication, look for an agent who mirrors that style; if you value patience and reassurance, seek someone with a calm, supportive approach. Shared expectations around communication frequency, search strategy, and decision‑making help create a smoother partnership and ensure the entire experience feels organized and collaborative.
The best realtor isn’t just the most experienced or highest‑rated; they’re the one who aligns with your goals, communication style, and comfort level. By evaluating expertise, responsiveness, negotiation style, and overall fit, you can choose a professional who supports you throughout your home search with confidence and clarity. Use this structured approach to find a realtor who feels like a true partner in your buying journey.

Planning Exterior Home Upgrades That Improve Everyday Living
Your home’s exterior is more than a facade; it shapes how you arrive, how you host guests, and how you use outdoor living spaces. Strategic exterior home upgrades boost safety, curb appeal, and everyday comfort. They also enhance energy efficiency and add lasting value through thoughtful home remodeling.
Your home’s exterior is more than a facade; it shapes how you arrive, how you host guests, and how you use outdoor living spaces. Strategic exterior home upgrades boost safety, curb appeal, and everyday comfort. They also enhance energy efficiency and add lasting value through thoughtful home remodeling.
In this guide, you’ll learn how to:
• Assess your current exterior and set clear aesthetic and functional goals
• Plan budgets, timelines, and phased work for smooth progress
• Refresh curb appeal with paint, doors, and landscaping
• Improve energy efficiency with windows, roofing, and smart plantings
• Create functional outdoor living spaces for cooking, dining, and relaxing
• Add smart and sustainable features for long-term savings
• Decide which DIY exterior upgrades you can tackle and when to hire pros
Ready to transform your outdoor space? Let’s begin by evaluating your home’s current condition and defining your upgrade goals.
1. Assess Your Current Exterior and Set Goals
Begin with a detailed walkthrough of your property. Carry a notebook and take photos of every exterior surface, including siding, trim, roof, and walkways. Note problem areas such as peeling paint, loose shingles, or uneven paths. Identify issues that pose safety risks, like trip hazards or rotted framing, versus those that are purely cosmetic.
Prioritize enhancements that boost safety and prevent damage, then rank remaining upgrades by visual impact and long-term value. Clear goals help guide decisions and keep your exterior home remodeling project on track.
Exterior condition checklist
• Siding and paint for rot or fading
• Roof shingles, gutters, and downspouts
• Driveway, paths, and patio surfaces
• Trim, fascia, soffits, and eaves
• Exterior lights, hardware, and outlets
Defining aesthetic vs. functional goals
Aesthetic goals focus on color schemes, materials, and curb appeal. Functional goals address water drainage, insulation, shade, and security. By separating these objectives, you create a balanced plan. For example, choose a trim color that complements siding while adding a gutter extension to channel runoff effectively.
Aligning upgrades with lifestyle needs
Consider how your family uses outdoor living spaces. If you host gatherings often, plan seating zones and cooking areas. Gardeners should allocate space for raised beds or planters. Think about storage for tools, bicycles, or sports equipment. Upgrades that match your daily routine ensure your exterior remains both attractive and practical.
2. Budgeting, Timeline, and Phasing
Create a realistic budget and timeline before starting any exterior home upgrades. Set milestones to monitor progress and decide which projects to tackle now versus later. Define key milestones such as permit approvals, material deliveries, and inspection dates to stay organized and avoid delays.
Cost Breakdown by Project Type
• Painting: $2,250–12,000
• Garage door replacement: $850–5,500
• Premium materials uplift: +15%–30%
• Labor: typically 40%–60% of total
Phased vs One-Time Renovation
A phased approach tackles safety and structural repairs first, spreads expenses across stages, and delivers visible progress at each milestone. A one-time renovation saves repeat mobilization costs and compresses the schedule but demands a larger upfront investment.
Contingency Planning
Allocate a 10%–20% buffer for permit fees, waste removal, and hidden issues like framing repairs. Update your timeline when unexpected repairs arise to keep the project on track.
3. Enhancing Curb Appeal and Aesthetics
Refresh your home’s exterior with targeted updates that deliver big visual returns without overspending. From a fresh coat of paint to new hardware accents, these cost-effective curb appeal upgrades boost value and enjoyment.
Fresh Paint and Trim Accents
Repainting is one of the most effective ways to revitalize your facade. Homeowners spend a median of $2,000 on exterior paint, making it the top outdoor project choice. Choose a cohesive palette by lightening a base hue for trim and eaves, or go bold with contrasting accents. For a classic look, opt for a monochromatic scheme like softened olive siding with crisp white trim. For drama, pair deep blue siding with a bright red door and muted green accents.
Upgrading the Front Door and Garage Door
Doors are focal points that welcome guests and define style. Nearly one in five homeowners replaces doors during curb appeal projects. Select materials: fiberglass for durability or solid wood for warmth. Add decorative hardware such as rustic strap hinges or sleek matte-black handles. Consider window inserts, frosted for privacy or clear for an open feel. Panel configurations, raised or recessed, further tailor your door to traditional or modern architecture. Finish with integrated lighting like LED strips or wall sconces to highlight textures and improve evening visibility.
Landscaping and Hardscaping Highlights
Frame your upgrades with thoughtful landscaping. Define walkways using pavers or gravel, edged by low-maintenance shrubs. Install simple retaining walls to add depth and prevent erosion. Accent beds with seasonal blooms and mulch for color contrast. Finally, incorporate solar pathway lights or lantern-style sconces to guide visitors and showcase garden features after dusk.
4. Boosting Energy Efficiency
Upgrade exterior elements to lower utility bills and stabilize indoor temperatures year-round. Focus on sealing, insulation, and strategic landscaping to tighten the building envelope. Investments in energy efficiency often pay for themselves within 5–10 years while improving home value.
Installing Energy-Efficient Windows and Doors
Replace single-pane units with multi-pane windows featuring low-emissivity coatings. Low-e glass cuts energy loss by 30%–50%, and NFRC labels help compare U-factor and SHGC values. Finish with weatherstripping and caulking around frames to reduce drafts. New exterior doors often include advanced sealing systems and adjustable thresholds to minimize air infiltration.
Roofing, Insulation, and Siding Options
A well-sealed roof and insulated siding boost R-value and prevent air leakage. Air sealing and added insulation lower heating and cooling use by around 10%. Consider cool-roof materials that reflect sunlight or insulated vinyl siding for extra thermal gains. Tackling these upgrades together optimizes overall performance.
Strategic Shade and Windbreak Landscaping
Position deciduous trees to shade south and west walls in summer and allow sun in winter. Evergreen hedges or shrubs placed upwind act as windbreaks, reducing heat loss on colder days. This living barrier cuts heating costs and enhances comfort with minimal maintenance.
5. Creating Functional Outdoor Living Spaces
Well-planned outdoor living spaces depend on clear layouts and durable materials. Divide the project into zones for cooking, dining, and relaxing. Ensure safe circulation with proper grading and drainage to avoid puddles or ice in colder months.
Decks, Patios, and Screened Porches
Orientation and Drainage
Position structures to capitalize on winter sun and summer shade. Slope finished surfaces away from the house at 1/4 inch per foot to prevent water pooling. Screened porches offer insect protection without full enclosure.
Patios offer a versatile flat space ideal for dining and lounging. Well-designed patios complement decks and porches, creating a cohesive outdoor area.
Use climate-adaptive materials like stone, concrete pavers, or porcelain tile that resist freeze-thaw cycles and handle moisture without cracking.
Built-In Seating and Outdoor Kitchens
Create built-in benches with concrete block systems, integrated storage, and standard counter heights. Plan an outdoor kitchen layout that separates hot and cold zones, place grilling appliances away from refrigeration to improve efficiency. Add a fire pit or outdoor fireplace to extend comfort into cooler seasons.
Lighting and Weatherproofing
Layer lighting with ambient fixtures under pergolas, task lights above prep areas, and accent uplighting around seating. Select damp-rated LED lights and glow-in-the-dark pathway pavers for minimal wiring. Protect installations with retractable awnings or wind screens, and apply water-repellent sealers to wood components. Plan maintenance for leaf drop and snow removal to preserve performance.
6. Incorporating Smart and Sustainable Features
Enhance your exterior with technology and eco-friendly materials to boost efficiency and resilience. These sustainable features help future-proof your home against rising energy costs and extreme weather, while adding curb appeal and property value.
Solar and LED Exterior Lighting
Harness solar panels paired with integrated LED fixtures to cut electricity use. Look for models with motion sensors and dusk-to-dawn photosensors. Many systems sync with smart home hubs, allowing voice commands and scheduling from a smartphone. Advanced panels use MPPT controllers for maximum energy harvest.
App-Controlled Irrigation Systems
Install IoT-enabled valves and soil-moisture sensors to create hydrozones. Use a mobile app to set watering schedules based on weather forecasts. Real-time analytics track water consumption and prevent overwatering. Pair with drought-tolerant plants for best results.
Recycled Composite Decking and Green Roofing
Choose composite decking made from recycled plastics and wood fibers for low-maintenance durability. Composite boards resist moisture, mold, and UV damage, and often come with long warranties. For green roofs, select lightweight modular trays with native sedums or grasses. Living roofs improve insulation, absorb stormwater, and extend membrane life.
7. Hiring Pros vs. DIY Considerations
Skill Assessment and Safety Concerns
Assess your skill level and risk before starting DIY exterior upgrades. Simple tasks, like painting a one-story home, removing light fixtures, or demolishing a small deck, are manageable for most homeowners. Industry data shows a full pro project averages $8,454 versus $979 for DIY, while a hybrid plan runs around $5,774. Leave structural changes, plumbing, gas, or electrical work to licensed professionals to avoid safety hazards and code violations.
Permits, Codes, and Inspections
Research local building codes early. Many exterior upgrades, roofing, rewiring, or major structural work require permits and inspections. Professionals typically manage filings and schedule inspections. If you DIY, confirm permit requirements, submission deadlines, and inspection timelines to maintain compliance.
Selecting Qualified Contractors
Hire licensed, insured, and bonded contractors. Obtain three written estimates and verify references. Consider BIY (Buy It Yourself) to source fixtures at discount prices, then schedule pros for installation. Ensure contracts specify scope, timeline, payment schedule, and warranty details.
Conclusion
Upgrading your home’s exterior is more than a facelift. It boosts safety, comfort, efficiency, and curb appeal while adding lasting value. Use this guide to plan each step and stay on track.
Key takeaways:
• Assess current conditions and set clear aesthetic and functional goals
• Build a realistic budget and phased timeline with a contingency buffer
• Refresh paint, doors, and landscaping for maximum curb appeal
• Improve energy efficiency with high-performance windows, roofing, and smart plantings
• Create dedicated zones for cooking, dining, and relaxing using durable materials
• Incorporate smart and sustainable features to cut costs and environmental impact
• Balance DIY exterior upgrades with professional help to meet safety codes and quality standards
With a structured plan and informed choices, you can transform your outdoor space into a welcoming, efficient, and stylish extension of your home. Your dream exterior is within reach. Start today and enjoy the rewards of well-planned home remodeling.
Sara Young
Sarah Young holds a Bachelors in Marketing Communications from California Lutheran University. She enjoys running her website glitternglue.com where she can share her own and others thoughts on lifestyle tips! During her spare time, she enjoys going to the beach with her dog or painting nature murals.