

A resource for those seeking information on organizing and transforming spaces.

Declutter Your Mind for a Relaxing Trip
A relaxing trip starts well before you close the front door. Unfinished tasks, scattered booking details and an overstuffed suitcase can occupy your thoughts long after your vacation has begun. Clearing those sources of stress gives you more attention for the place and people in front of you.
We partnered with a home improvement company for this post. The opinions in the post are honest. All reviews and opinions expressed in this post are based on our personal views. We are excited because we know you will love it.
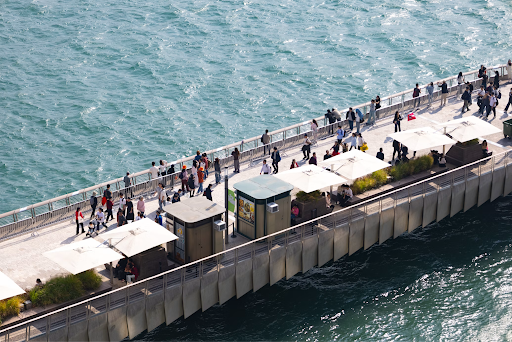
A relaxing trip starts well before you close the front door. Unfinished tasks, scattered booking details and an overstuffed suitcase can occupy your thoughts long after your vacation has begun. Clearing those sources of stress gives you more attention for the place and people in front of you.
A simple travel organization system can reduce last-minute decisions and help you recover when plans change. The aim is to give every task, document and item a clear place, so your mind doesn’t have to keep track of everything at once.
Why Pre-Trip Stress Happens
Travel adds dozens of small decisions to an already busy schedule. You may need to confirm reservations, finish work, arrange pet care and decide what to pack within the same few days. Your brain treats every unfinished decision as something it must continue monitoring, which can make it hard to relax.
Uncertainty adds another layer. Delayed transportation, unfamiliar streets and tight connection times can feel more threatening when you’re tired or rushed. These pre-travel anxiety tips explain why identifying specific worries is more useful than treating the entire trip as one large source of concern.
Write down everything competing for your attention, then separate the list into three categories:
Tasks that must happen before departure
Tasks someone else can handle
Tasks that can wait until you return

Give each essential task a date. For example, download tickets three days before leaving, pack medications two days before and take out the trash on departure morning. Assigning a time to each item closes the mental loop.
Leave some open space in the final 24 hours. Packing every hour with errands creates a fragile schedule where one late appointment affects the rest of your day. A two-hour buffer gives you room to solve an unexpected problem without beginning the trip in a rush.
Organize Your Travel Documents
Keep every important travel detail in one physical or digital location. Searching through email at a busy terminal or hotel desk wastes time and raises stress, especially when your phone battery is low.
Create a folder for transportation confirmations, accommodations, identification copies, event tickets and travel coverage details. Rename digital files with clear labels such as “Hotel Confirmation” or “Tuesday Train Ticket”; useful organized travel tips also recommend keeping your itinerary and confirmation numbers easy to reach instead of buried among unrelated messages.
Save key documents for offline access. Screenshots work well for boarding passes, booking addresses and QR codes, but check that each image is readable before departure. Carry paper copies of critical details if you’ll be traveling somewhere with unreliable mobile service.
Your folder should include:
Transportation times and confirmation numbers
Accommodation addresses and check-in instructions
Emergency contacts
Copies of identification
Reservation details for timed activities
Contact information for service providers
Share the basic itinerary with a trusted person at home. They don’t need every restaurant plan, but they should know where you’re staying and how to contact you.
Review the folder 48 hours before departure. That gives you enough time to notice a missing confirmation or an incorrect date while the issue can still be fixed calmly.
Lighten Your Load, Literally
Heavy bags create physical work and limit what you can do between checkout and departure. Start with a packing list based on your actual itinerary. Three days of sightseeing and one dinner reservation require a different wardrobe from a week of mixed activities.
Choose clothing that works in several combinations and check whether your accommodation provides toiletries, towels or laundry facilities. Travel organization ideas can help you group small items so chargers, personal care products and documents stay easy to find.
Temporary storage is useful when arrival and departure times don’t align with accommodation access. For example, a traveler researching where can I leave my bags in Melbourne can book a verified local storage location and explore the central business district without carrying luggage after checkout.
Before leaving a bag anywhere, remove identification, medication, payment cards and other essentials you’ll need during the day. Keep those items in a compact personal bag.
Use this final packing test: carry your packed luggage around your home for five minutes. Lift it onto a chair and walk up a flight of stairs if that matches your trip. If it already feels uncomfortable, remove duplicate clothing, full-size containers and “just in case” items that are readily available at your destination.
Enjoying the Journey
A detailed itinerary can be helpful, but filling every hour creates pressure to stay on schedule. Choose one or two priorities for each day and leave room for meals, rest and unplanned discoveries. Walking across an unfamiliar neighborhood often takes longer than a map estimate, especially when you stop for photos or need to find an entrance.
Build transition time into travel days. Arrive earlier than the minimum recommendation and avoid scheduling a prepaid activity immediately after a flight or long train ride. A delay then becomes an inconvenience instead of a chain reaction that affects several reservations.
Small routines can settle your attention during the trip. Drink water, eat at regular intervals and take a few slow breaths before checking directions or responding to a change. These stress-free travel tips include breathing and meditation practices that may help when your thoughts start racing.
Limit how often you check work messages. If you must stay available, choose a defined 15-minute period each morning or evening. Turn off nonessential notifications outside that window.
When something changes, focus on the next practical action. Find the service desk, contact the accommodation or identify the next available route. Solving one immediate problem takes less mental energy than imagining every possible effect of the disruption.
Stress-Free
A calm return deserves as much attention as a calm departure. Before leaving home, clear food that may spoil, empty the trash and put fresh sheets on the bed. Set aside an easy meal in the freezer or plan a simple grocery order for your return day.
Avoid scheduling demanding commitments for the first few hours after you get back. Unpacking, showering and eating can take longer than expected after a tiring travel day. If possible, give yourself one night to settle before returning to a full schedule.
Create a short landing routine:
Put identification and payment cards back in their usual places
Start one load of essential laundry
Plug in devices and travel chargers
Check for damaged or missing belongings
Store receipts needed for reimbursement
Restock toiletries before putting luggage away
Unpack within 24 hours so the trip doesn’t remain in the form of an open suitcase for the next week. Keep a small note inside the bag listing anything you wished you had packed and anything you never used. That record will make the next packing session faster and more accurate.
The most useful travel plan is one your mind can release. Once each detail has a place and each necessary task has a time, you can close the list, pick up your bag and give the trip your full attention.

Your Roadmap to a More Secure, Comfortable, and Well-Planned Future
Planning your financial future involves more than saving money. You need to picture your ideal daily life and set steps to reach it. Without a clear path, you risk running short on funds or missing experiences that matter most.

Planning your financial future involves more than saving money. You need to picture your ideal daily life and set steps to reach it. Without a clear path, you risk running short on funds or missing experiences that matter most.
In this guide, you will learn how to:
• Picture your dream lifestyle and set clear priorities
• Assess your net worth along with income and expenses
• Establish SMART goals for short-, mid-, and long-term plans
• Create a savings and investment strategy that balances growth and safety
• Protect your assets with insurance, wills, and trusts
• Keep yourself healthy and engaged through fitness and community
• Budget for travel, hobbies, and special projects
• Leverage apps and online tools for real-time planning
Whether you are just starting your career or preparing for the next phase of life, this roadmap provides a step-by-step plan for planning your financial future with confidence and peace of mind.
Let us begin by envisioning where you want to live and how you want to spend your days in retirement.
Setting Your Retirement Destination
Planning retirement starts with picturing life after work. Envision where you live, how you spend your days, and which aspirations drive your joy. Use tools like vision boards or lifestyle mapping to capture ideas and keep goals in focus.
Envisioning your ideal lifestyle
Consider travel aspirations, hobbies, and time with loved ones. Ask yourself:
• Which destinations or bucket-list trips matter most?
• Do you see yourself downsizing or moving to a retirement community?
• How much family time and personal projects do you want each week?
Visualizing daily routines and special milestones creates a clear picture of your future.
Identifying priorities and values
Next, rank what matters most, such as health, adventure, or legacy. Factor in your timeframe for retiring in 10, 20, or 30 years to shape savings targets. Evaluate cost of living, local amenities, and proximity to family.
Aligning your core values with concrete goals ensures your roadmap reflects the lifestyle you desire. Also, consider local infrastructure such as reliable HVAC services, property maintenance, and utility costs when picking a home that supports your comfort.
Assessing Your Financial Starting Point
Before planning your financial future, establish a clear view of your current finances. This section shows how to measure net worth and track income and expenses. Knowing where you stand helps you plan with confidence. It also guides your next steps in saving and investing.
Net Worth Calculation
Listing Your Assets
• Cash and checking or savings balances
• Investments such as stocks and bonds
• Real estate or property values
• Vehicles and other valuable items
Listing Your Liabilities
• Mortgage balances
• Auto and student loans
• Credit card debt
• Other personal loans
Computing Your Net Worth
Subtract total liabilities from total assets. A positive net worth means assets exceed debts. A negative net worth highlights areas for improvement. Review these figures at least once a year to spot major shifts in your financial health.
Income and Expense Tracking
Start by identifying all income streams, such as salaries, rental income, or freelance work. Review bank and credit card records to capture every payment.
Categorizing Expenses
• Fixed costs (rent, utilities)
• Variable costs (groceries, entertainment)
• Recurring fees (subscriptions)
• Non-monthly expenses (insurance premiums)
Calculating Net Cash Flow
Subtract total monthly expenses from total monthly income. A surplus shows spare funds for saving or investing. A shortfall signals a need to adjust spending. Regularly update these numbers to keep your plan on track.
Next, use this baseline to set measurable goals and track growth.
Goal Setting: Short-, Mid-, & Long-Term Milestones
As part of planning your financial future, set clear milestones to track progress across different horizons. By applying SMART criteria, you ensure each goal stays focused and achievable.
SMART Financial Goals
Define goals that are Specific, Measurable, Achievable, Relevant, and Time-bound.
• Specific: e.g., save $5,000 for an emergency fund
• Measurable: track monthly contributions
• Achievable: align with income and expenses
• Relevant: focus on priorities like debt reduction
• Time-bound: set a deadline, such as 12 months
This framework applies to short-, mid-, and long-term objectives.
Timeline Planning
Use a visual timeline to assign each milestone a clear date. Break your objectives by horizon:
1. Short-term (0–12 months): build an emergency buffer, pay off high-interest debt
2. Mid-term (1–5 years): save for a home down payment, invest in retirement accounts
3. Long-term (5+ years): plan for college funds, secure retirement income
Map these milestones on a calendar. Review progress quarterly and adjust targets as needed. Celebrating small wins keeps motivation high and ensures your roadmap stays on course.
Building Your Financial Roadmap
In planning your financial future, laying out a clear path helps you save, invest, and leverage retirement accounts for long-term security. Focus on building habits that balance liquidity, growth, and tax efficiency.
Savings Strategies
Start by tracking income and expenses to ensure you spend less than you earn. Key steps:
• Automate deposits into a high-yield savings or money market account
• Build an emergency fund equal to 3–6 months of living expenses
• Implement a debt reduction plan targeting high-interest loans first
Investment Options
Align your portfolio with your risk tolerance and timeline. Consider:
• A mix of stocks, bonds, and real estate for balanced growth
• Dollar-cost averaging into low-cost index funds or ETFs
• Regular rebalancing to maintain diversification across asset classes
Retirement Account Optimization
Maximize Employer Match
Contribute at least enough to your 401(k) to capture any employer match.
Choose the Right Account
• Compare Roth vs Traditional IRAs based on current and future tax brackets
• Use catch-up contributions if you are 50 or older to boost savings
Tax Planning Strategies
Use deductions, credits, and account selection to minimize tax liability and enhance long-term growth.
Health & Wellness Roadmap

Maintaining health supports long-term vitality. Combine fitness routines, balanced nutrition, and community engagement for sustained well-being.
Physical Fitness and Nutrition
Aim for at least 150 minutes of moderate aerobic activity or 75 minutes of vigorous exercise each week. Complement cardio with strength training two days weekly to preserve muscle mass and bone density.
Follow a balanced eating plan rich in vegetables, fruits, whole grains, lean proteins, and healthy fats. Consider a Mediterranean-style diet to support metabolic health and reduce inflammation. Use meal planning or macro tracking to maintain consistent energy levels.
Mental Health and Social Connections
Integrate daily mindfulness practices such as guided breathing or brief meditation to build stress resilience. Prioritize sleep by setting a consistent bedtime routine.
Engage with community through clubs, volunteering, or group classes to foster social bonds. Cultivate close relationships by scheduling regular catch-ups with friends and family. Pursue lifelong learning and purposeful hobbies to boost mood and cognitive function.
Estate Planning & Insurance Essentials
Effective estate planning protects assets and ensures your legacy follows your wishes. It combines legal tools and insurance to safeguard your family’s future.
Wills and trusts
A will provides clear instructions for distributing property and naming guardians for minor children. Trusts can avoid probate court, streamline asset transfer, and allow conditions like age-based distributions.
A revocable living trust offers flexibility and privacy during your lifetime. An irrevocable trust may shield assets from creditors and reduce estate taxes.
Powers of attorney
Designate a durable power of attorney to manage finances if you become incapacitated. A health care power of attorney or living will spells out medical preferences and appoints someone to make treatment decisions.
Life and health insurance planning
Life insurance policies pay benefits directly to named beneficiaries. Regularly review coverage amounts and designations after major events.
Long-term care insurance can protect savings by covering costs of assisted living or nursing care. These strategies work together to preserve estate value and support family needs.
Budgeting for Experiences and Lifestyle
Allocating funds for new pursuits needs a clear plan. Budget for travel, hobbies, and dining with simple frameworks.
Travel and Hobbies Budgeting
Divide your discretionary fun money into core categories:
• Travel: annualize your monthly allotment (example: $300 × 12 = $3,600 per year)
• Hobbies: estimate cost per hour and equipment depreciation
• Dining and entertainment
Adjust overall allocation based on your financial phase:
• 25% of after-tax income if you have a fully funded emergency fund
• 20% if you are building that safety net
• 10% if you are prioritizing debt payoff
Employ rollover budgets to carry unused funds into future months.
Hidden Costs and Contingency Funds
Create a miscellaneous buffer for variable fees, incidental travel charges, and hobby supplies. Add a 5–10% contingency on top of core budgets to cover exchange-rate fluctuations or unexpected expenses. Keep these reserves separate to avoid derailing your planned experiences.
Leveraging Digital Tools and Innovative Resources
Online calculators and robo-advisors simplify planning with real-time projections and automated portfolios. Integrating these tools can cut manual work and keep your goals on track.
Retirement planning calculators
• Vanguard’s calculator offers quick, no-login retirement estimates
• Fidelity’s Planning & Guidance Center generates readiness scores and printable reports
• PopaDex tracks net worth across currencies and projects FIRE timelines
Robo-advisors and apps
• Wealthfront: diversified portfolios and tax-loss harvesting (0.25% fee, $500 min)
• Fidelity Go: no fees under $25,000 and advisor support
• Schwab Intelligent Portfolios: no management fee and $5,000 min
Conclusion
Building a secure, comfortable, and well-planned future is within reach when you follow a clear roadmap. By envisioning your ideal lifestyle, assessing your finances, and setting SMART goals, you lay the foundation for lasting confidence.
You have the tools to save, invest, protect your assets, and enjoy life to the fullest.
Key takeaways:
• Clarify your vision and align goals with your values
• Calculate net worth and track income versus expenses
• Set specific, measurable, achievable, relevant, and time-bound milestones
• Balance savings, investments, tax planning, and insurance
• Maintain physical fitness, mental wellness, and social connections
• Establish wills, trusts, and powers of attorney to protect your estate
• Budget for travel, hobbies, and unexpected costs with contingency funds
• Use calculators, robo-advisors, and apps to monitor progress in real time
This guide provides a step-by-step plan and the resources you need. Now it is time to take action. Choose one milestone, schedule a planning session, or download a budgeting app today. Consistent steps lead to lasting results.
Your roadmap is set. Move forward with confidence and build the future you imagine.
Sara Young

Sarah Young holds a Bachelor's in Marketing Communications from California Lutheran University. She enjoys running her website glitternglue.com, where she can share her own and others' thoughts on lifestyle tips! During her spare time, she enjoys going to the beach with her dog or painting nature murals.

The Hidden Weight Of Renovation Waste
A home renovation often begins with decisions about what will be added: new flooring, cabinets, countertops, fixtures, or finishes. Less attention goes to everything that must come out first. Even a modest remodeling project can generate piles of drywall, lumber, tile, packaging, old fixtures, and other debris. Planning for those materials before demolition starts can make a project cleaner and reduce unnecessary disposal.

A home renovation often begins with decisions about what will be added: new flooring, cabinets, countertops, fixtures, or finishes. Less attention goes to everything that must come out first. Even a modest remodeling project can generate piles of drywall, lumber, tile, packaging, old fixtures, and other debris. Planning for those materials before demolition starts can make a project cleaner and reduce unnecessary disposal.
Renovation Debris Adds Up Fast
Construction and demolition materials are a major waste stream in the United States. The Environmental Protection Agency estimated that 600 million tons of this debris were generated in 2018, although that figure includes construction, renovation, and demolition across buildings, roads, and bridges.
Inside a home, weight can accumulate surprisingly quickly. Removing a tile floor produces tile, mortar, and possibly underlayment. Taking down a wall can generate drywall, framing materials, insulation, fasteners, and trim. Kitchen renovations may add countertops, cabinets, sinks, appliances, and flooring to the pile.
Decide What Can Stay Out of the Trash
Demolition does not automatically make every removed material garbage. Doors, cabinets, plumbing fixtures, hardware, windows, and other components may be suitable for reuse if they remain in good condition. Wood, concrete, asphalt, and metals are among the materials that may have recycling options, depending on local facilities.
Planning for reuse before demolition is important. A cabinet carefully unscrewed from a wall has a better chance of being donated or reused than one broken apart with a pry bar.
Plan Disposal Before Work Begins
Homeowners should estimate the types and approximate quantities of debris the project will create. Contractors can explain how they handle waste, while local authorities or recycling facilities can clarify disposal requirements.
For larger projects, dumpster rental servicesmay provide a centralized location for approved debris. However, homeowners should confirm which materials are accepted. Certain waste may require separate handling, and rules can vary by location. It also helps to separate recyclable or reusable materials as work progresses rather than sorting through one mixed pile afterward.
Renovation waste is easy to overlook because attention naturally falls on the finished room. Yet every material removed has to go somewhere. Planning demolition carefully and arranging disposal in advance can reduce clutter and keep waste from becoming an unexpected problem halfway through the project. Check out the infographic below for more information.


Turn Your Patio Into a Place You Actually Use After Dark
Most backyards have a season. Somewhere around the first cool evening, the outdoor furniture stops getting used, and it stays that way until spring.

Most backyards have a season. Somewhere around the first cool evening, the outdoor furniture stops getting used, and it stays that way until spring.
That is a lot of space sitting idle for a lot of the year. The frustrating part is that the temperature keeping everyone inside is often only a few degrees away from pleasant, which is a much smaller problem than it feels like from the kitchen window.
Getting More Evenings Out of the Year
Outdoor heating is really about the shoulder seasons.
Spring arrives with beautiful afternoons and evenings that turn sharp the moment the sun drops. Autumn does the same thing in reverse. Those months contain a great many evenings that would be perfect outside with a modest amount of warmth in the right place.
A well-placed heater turns those evenings into usable ones. People stay after dinner instead of drifting inside, and a patio stops being a summer feature and becomes part of the house.
Choosing Radiant Heat Over Blown Air
The reason outdoor heating works at all comes down to how it delivers warmth.
Heating outdoor air is futile, because the air simply moves away. Radiant heaters do something different. They warm people and surfaces directly, the same way sunlight feels warm on your face even on a cold day.
That distinction matters practically. Radiant warmth reaches you immediately rather than waiting for a space to come up to temperature, and it holds up in a breeze that would carry heated air away entirely.
It also explains why placement matters so much. Radiant heat travels in a direction, so a unit aimed at where people actually sit does far more than a more powerful one pointed at empty pavement.
Deciding Between Electric and Gas
Both work well, and the right answer depends on the space.
Electric units are compact, quiet, and produce no emissions, which makes them suitable for covered porches and enclosed spaces where combustion would be a problem. They mount close to a ceiling and disappear visually.
Gas delivers higher output, which is the better choice for open areas and for colder climates where the heater has more work to do. Wind resistance tends to be stronger as well.
Dealers such as PHD Outdoor Comfort, an authorized Bromic dealer specializing in permanent outdoor heating for residential and hospitality spaces, size systems to the actual patio rather than selling a unit and hoping it covers the area. Coverage is easy to underestimate, and an undersized installation is a disappointment that shows up on the first genuinely cold night.
Mounting configuration matters too. Ceiling, wall, and pendant options each suit different structures, and a pergola presents different constraints than a covered porch does.
Mounting Heaters Where They Disappear
The visual argument is the one most people underestimate.
Freestanding propane heaters are effective and they look like equipment. They occupy floor space, need refilling, and never quite belong in a designed outdoor room.
Permanently mounted units read as part of the architecture instead. Slim profiles, ceramic glass fronts, and stainless finishes sit quietly overhead, and once installed, most people stop noticing them entirely until the moment they are switched on.
Layering Warmth With Light
This is where heating becomes ambiance rather than utility.
Radiant elements produce a soft glow of their own, and that low warm light does something to a patio after dark that overhead fixtures never manage. Some pendant units combine heat with dimmable lighting in a single fixture, which handles both jobs from one clean mounting point.
Dimming is worth specifying. Being able to bring both heat and light down as the evening goes on is the difference between a functional patio and one people want to linger on.
Planning the Installation Properly
Permanent heating is an electrical or gas project, not a purchase.
Electric units frequently require dedicated circuits, and gas installations need a properly sized supply line. Both need clearances from combustible surfaces observed carefully, which is the sort of detail that gets overlooked and matters enormously.
Building this into a renovation while walls and ceilings are open is far simpler than retrofitting afterward. If a patio project is already being planned, that is the moment to have the conversation rather than a season later.